What conditional colors do Back to top
Conditional colors let you paint Jira issues on your calendar based on their field values — assignee, status, priority, due date, fix versions, or any custom field. Each rule has a color and a condition tree (AND / OR groups). Issues that match the rule are drawn in that color instead of the calendar's default.
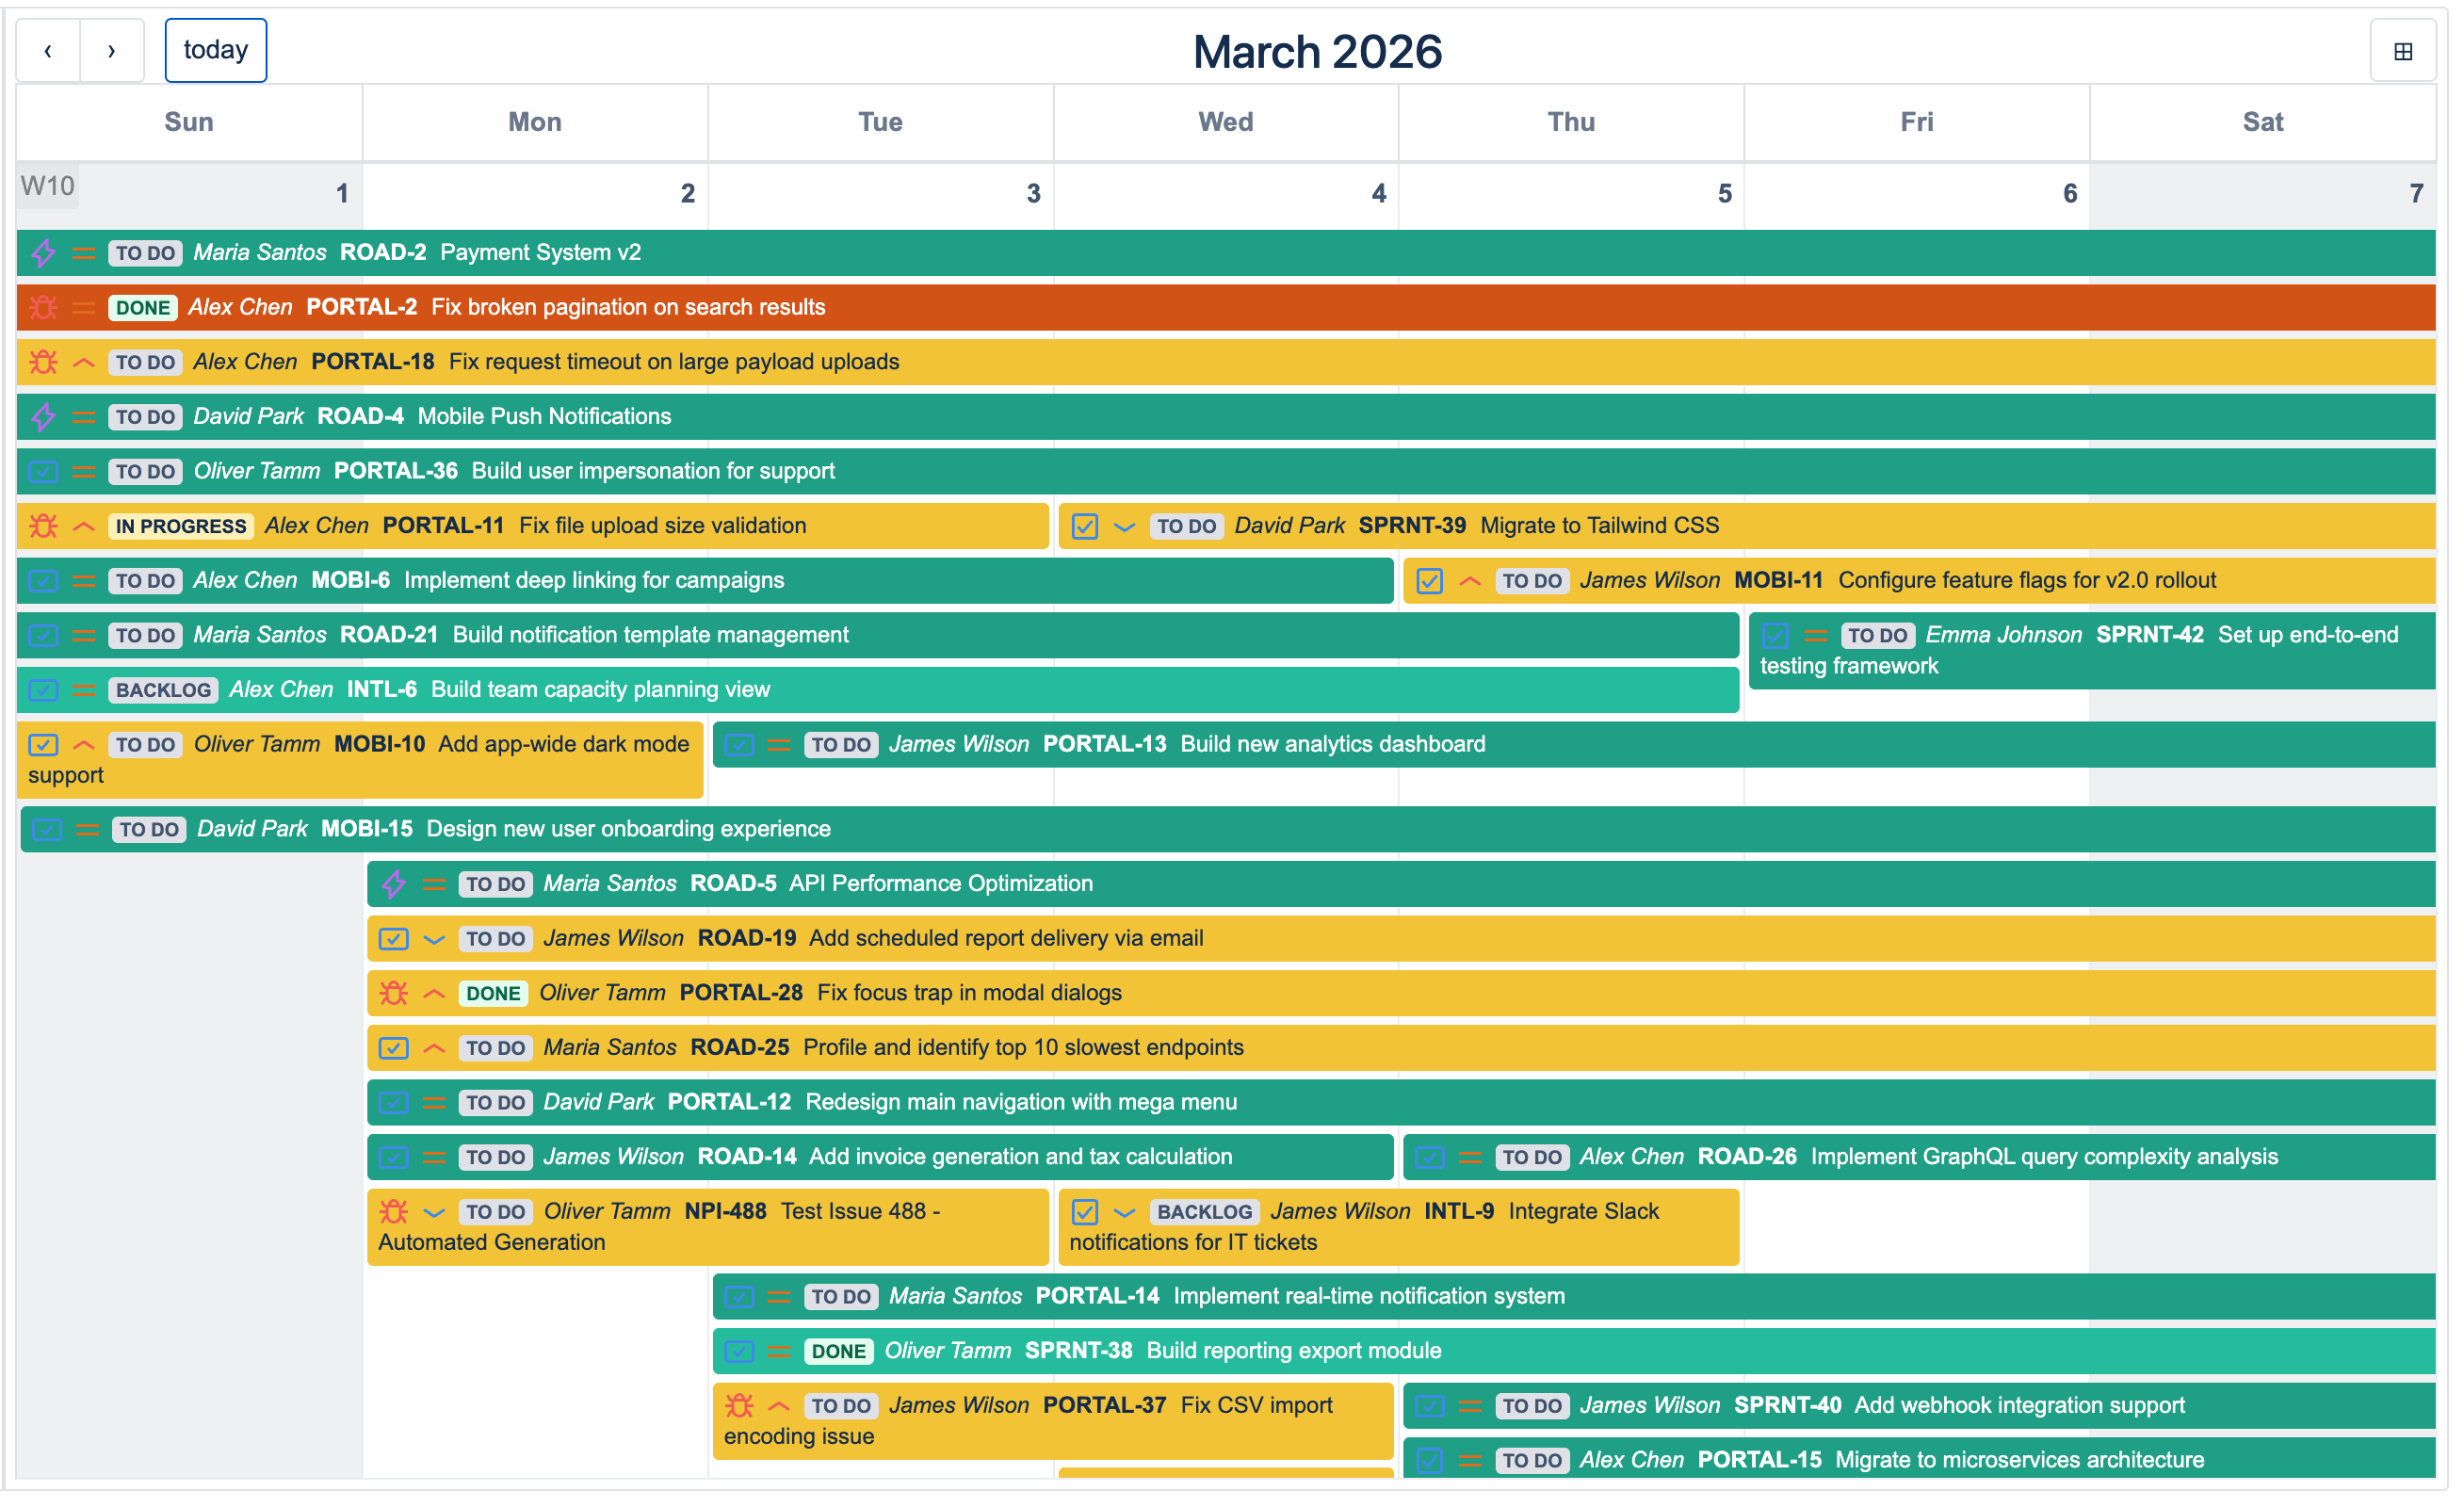
How matching works
Rules are evaluated top to bottom — the first rule that matches an issue wins. You can reorder your own rules to control precedence. Issues that match no rule keep the calendar's default color.
Creating a rule Back to top
Open the conditional-colors dropdown in the calendar header and choose Manage conditional colors. The management dialog lets you create, edit, and reorder rules.
- Pick a color using the swatch.
- Name the rule — this appears in the header dropdown and in the rule list.
-
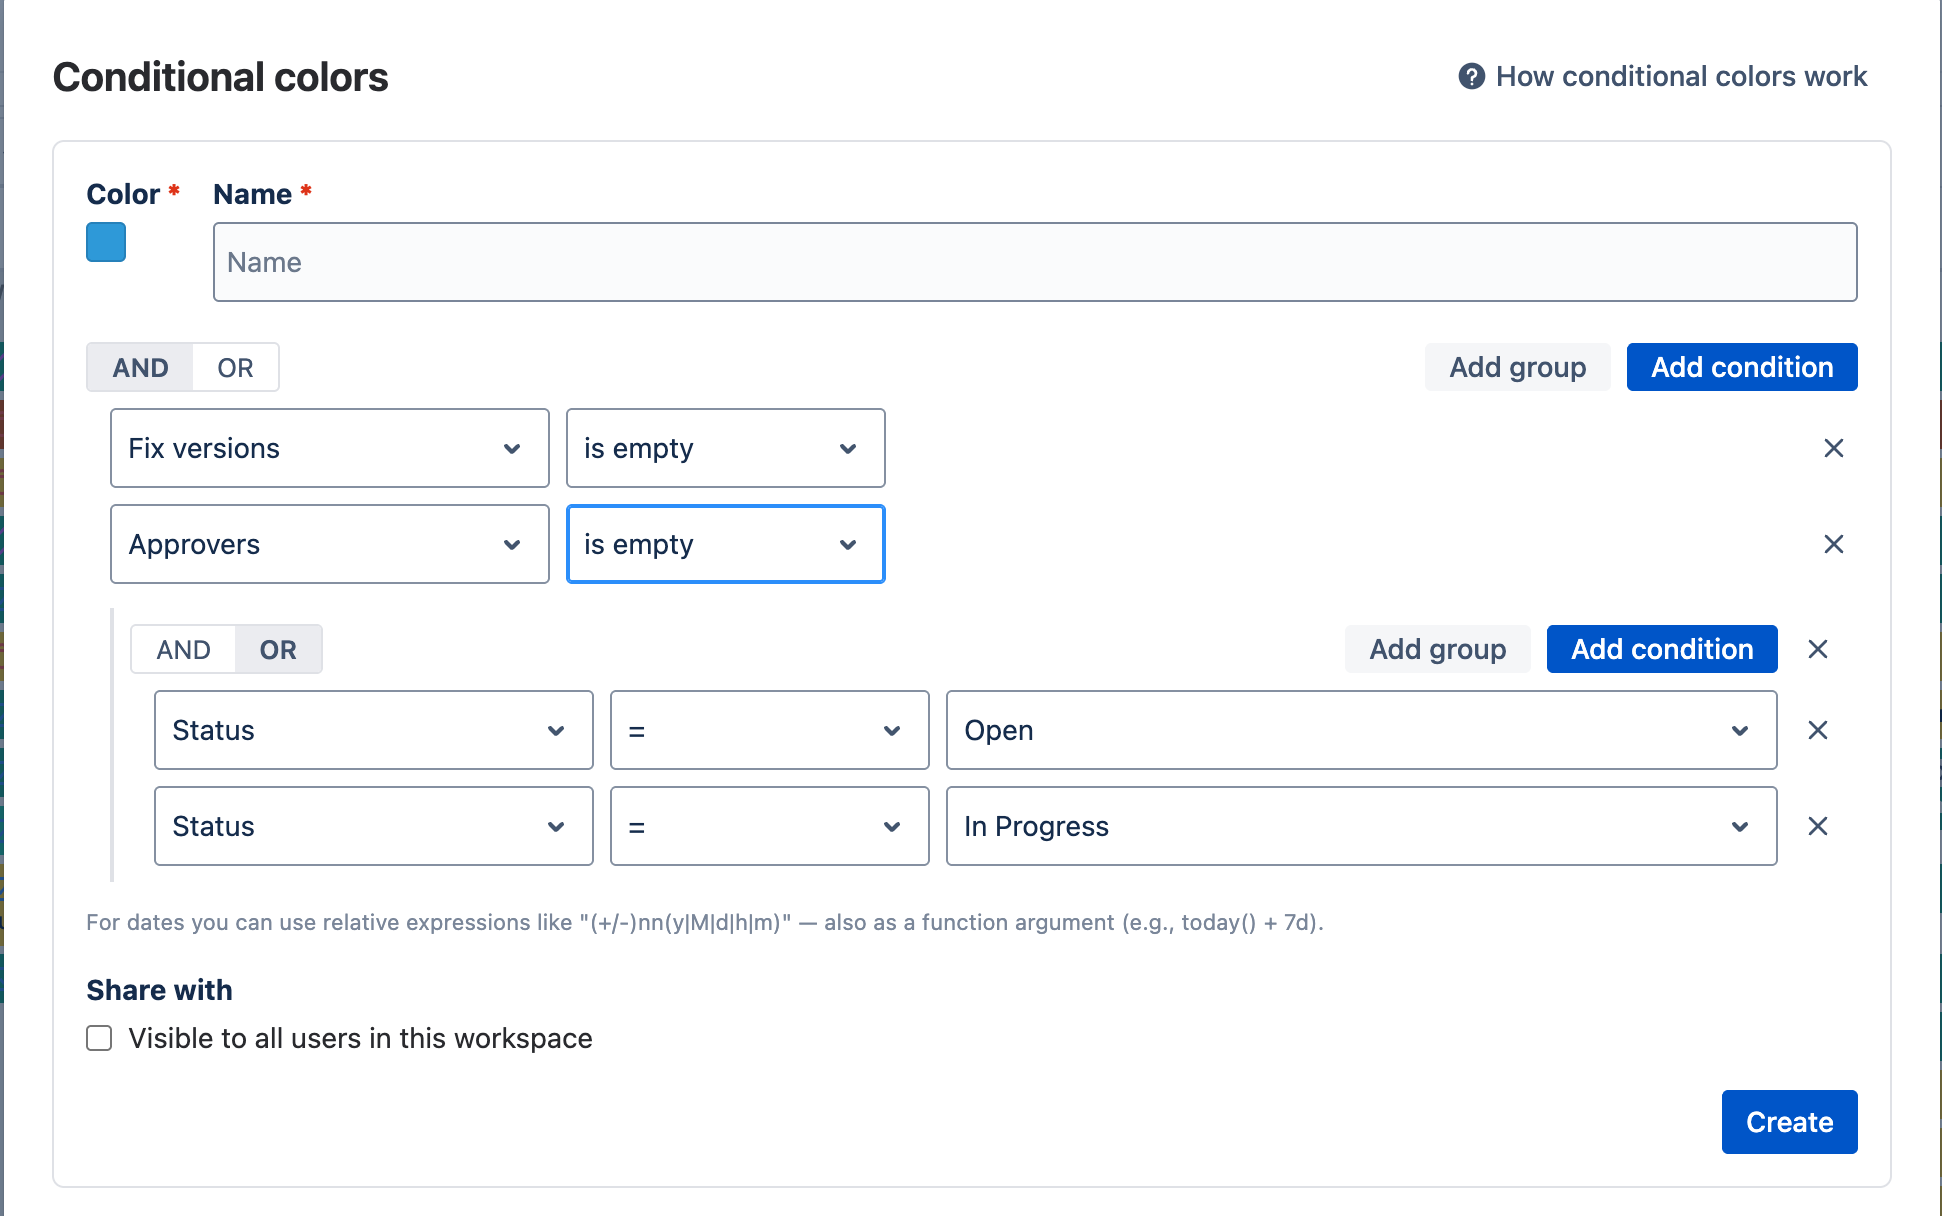
Build the condition tree:
- Add condition — pick a field, an operator (=, in, contains, is empty, …), and a value.
- Add group — nest an AND or OR sub-group. Combine groups for more complex logic.
- AND — every condition in the group must match.
- OR — any one condition is enough.
-
Date conditions support functions like
today(),now(),startOfMonth(),endOfMonth(),startOfYear(),endOfYear(), and relative expressions like+7d,-1M,+2h. -
User fields support the
currentUser()function — match issues assigned to the viewer. - Tick "Visible to all users" to share the rule with the workspace, or leave it unchecked for a private personal rule.
- Click Create to save. The rule is auto-favourited and turned on for you.
Common rule examples
- My work —
Assignee = currentUser() - Overdue —
Due date < today() - Blocked —
Status = Blocked - Critical bug —
Priority = Highest AND Issue type = Bug - End-of-month crunch —
Due date >= today() AND Due date <= endOfMonth()
Managing rules Back to top
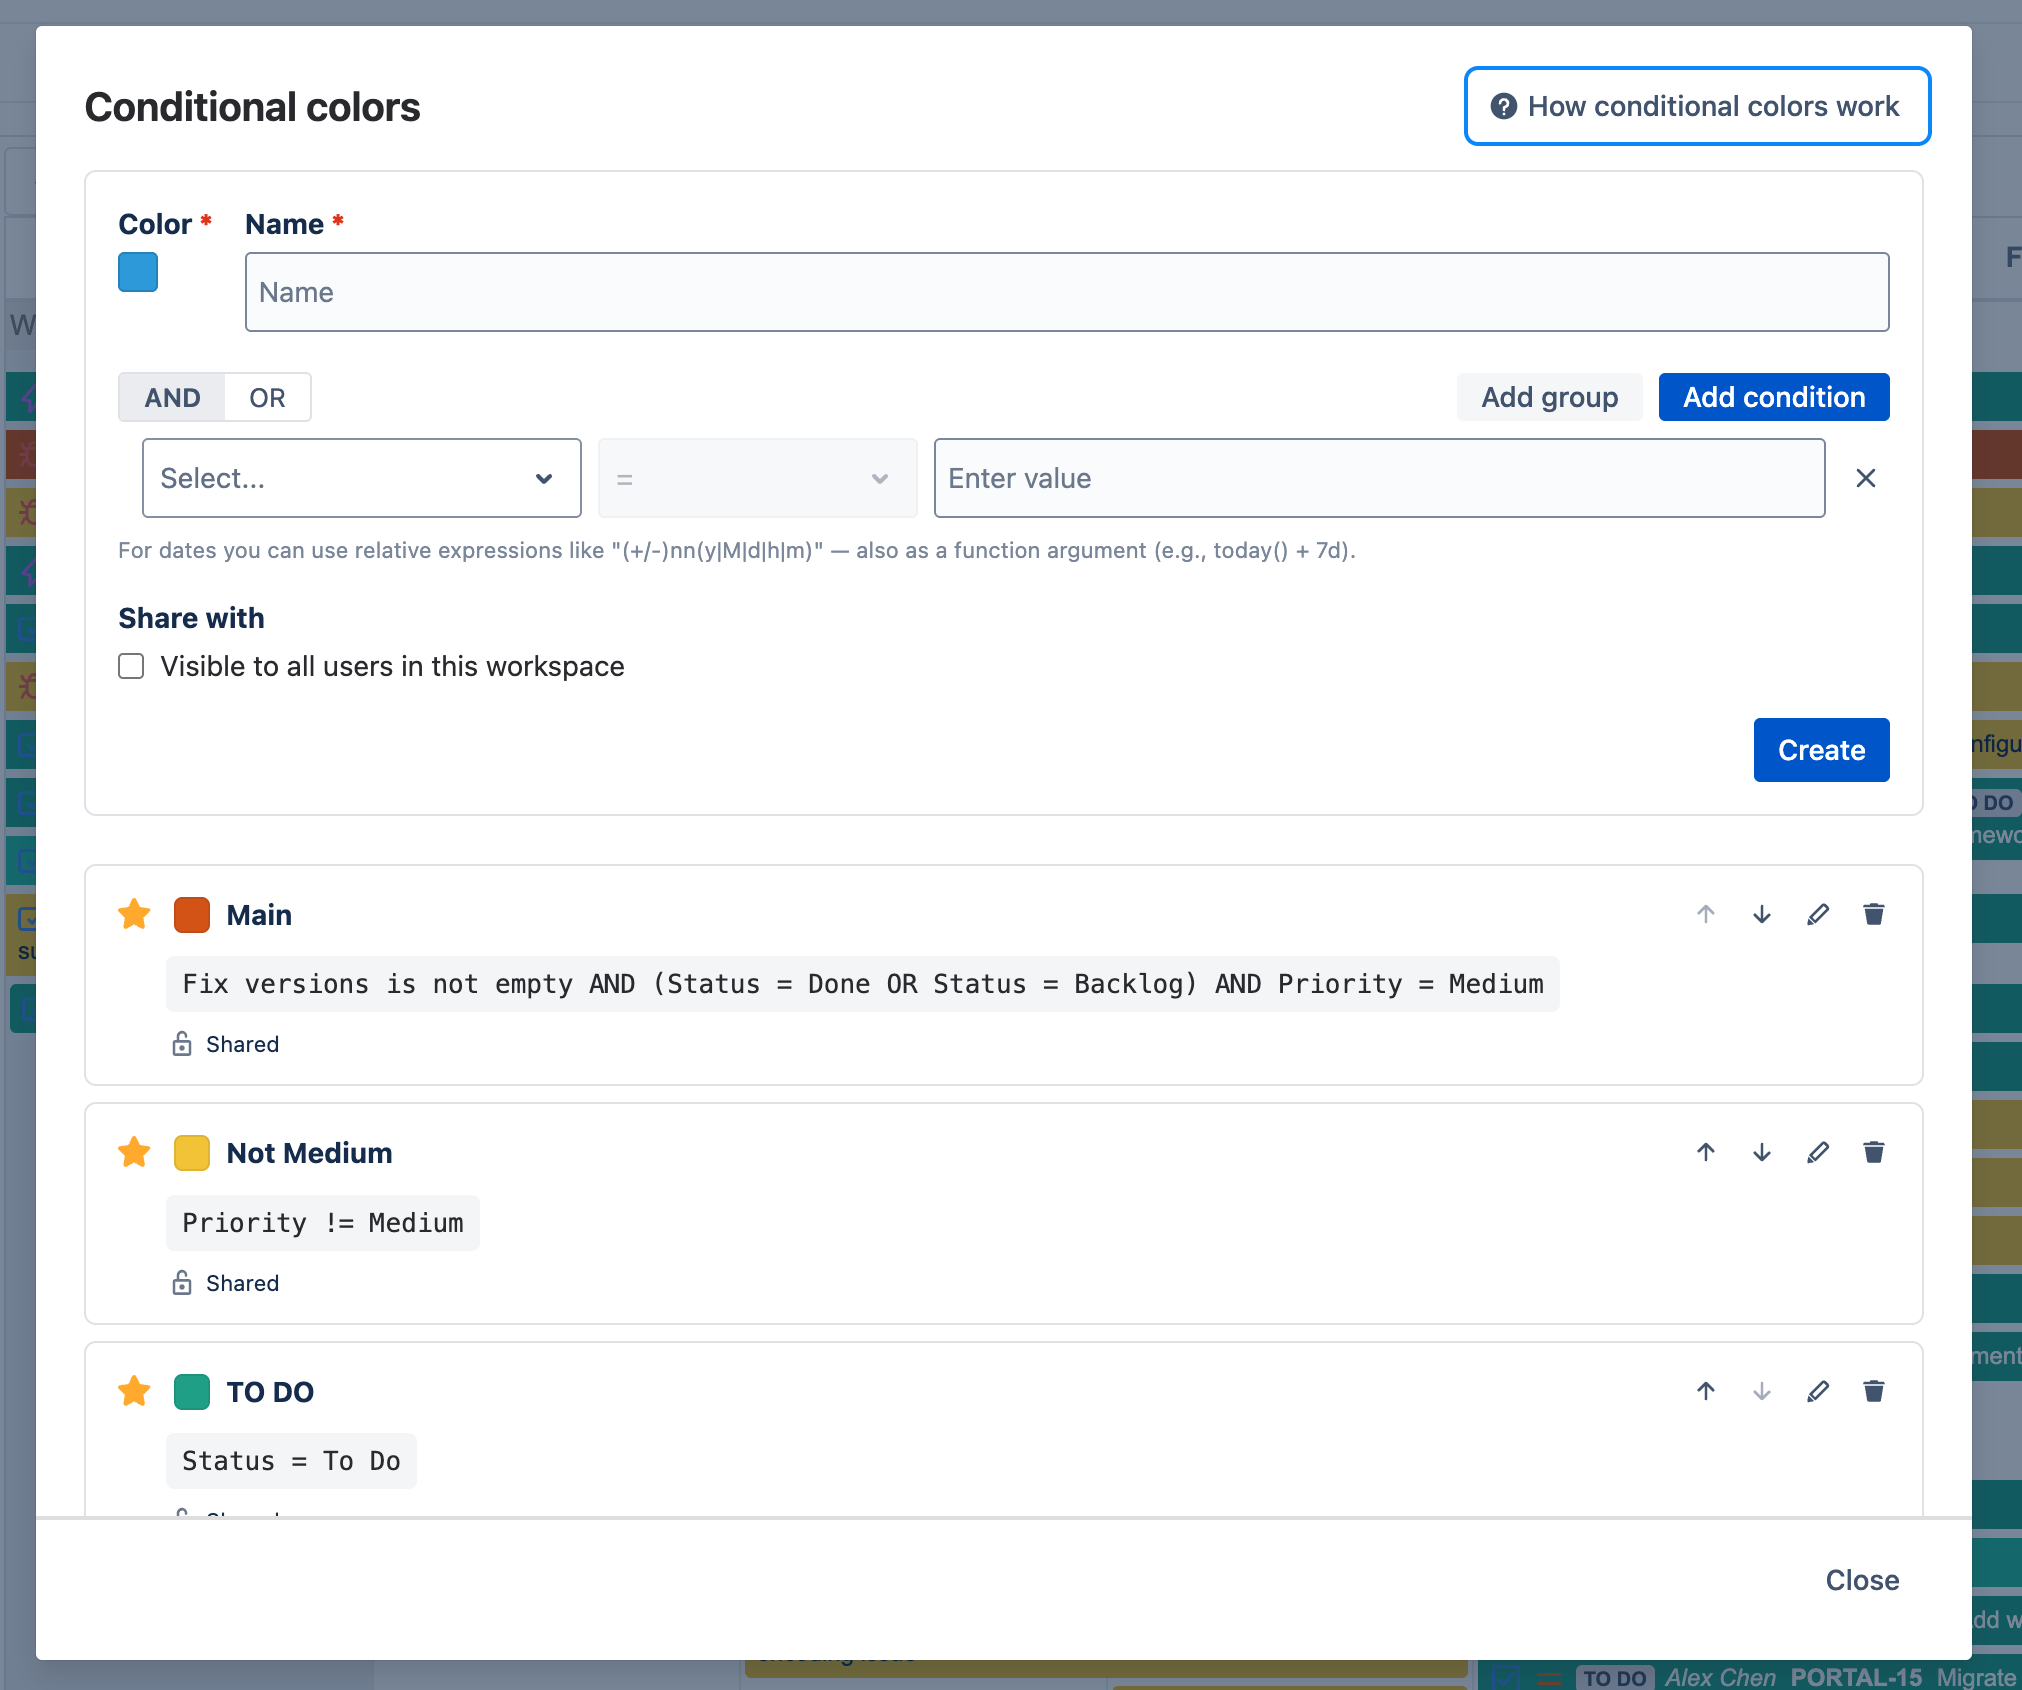
The management dialog shows every rule visible to you — your own rules plus any rules others have shared with you. Each card has a star, a color swatch, the rule name, the condition summary, and a lock/unlock icon indicating private vs. shared.
What each control does
- Star — favourite — pin the rule to your header dropdown so you can toggle it on or off without opening this dialog. Unstarring just removes it from your dropdown; the rule itself stays. Favouriting is per-user — your picks don't affect anyone else.
- Up / Down — reorder among your own rules. Rules higher in the list win the first match, so move "Overdue" above "My work" if you want overdue assigned-to-you issues to show red, not green. Arrows are hidden on rules others created.
- Edit — change the rule's color, name, condition tree, or sharing. Only the creator sees this button.
- Delete — remove the rule for everyone, including users who favourited it. Only the creator sees this button.
- Lock / unlock indicator — shows whether the rule is private (only you see it) or shared with the workspace.
Sharing & reordering limits
- Only the creator can edit, delete, or reorder a rule — even after it's shared.
- Other users can favourite a shared rule and toggle it on or off — that choice is per-user.
- Reordering is global: the order you set is what everyone sees. Shared rules from other users stay in the position their creator set.
- Unshared rules are private — only the creator sees them. Useful for personal color preferences like "My work".
Day-to-day: the header dropdown Back to top
The Conditional colors button in the calendar header opens a dropdown of every rule you've favourited (using the star in the management dialog). This is where you turn rules on and off as you work, without re-opening the management dialog.
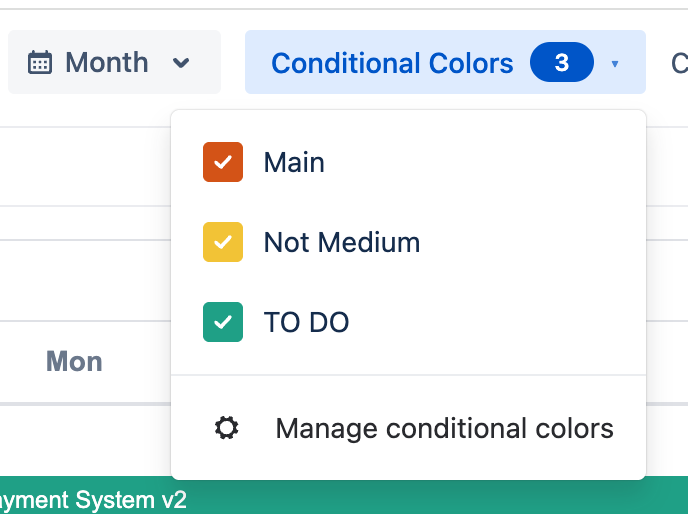
- Click a row — toggles the rule on or off. The colored checkbox fills in when the rule is on.
- Number badge on the button — counts how many rules are currently on.
- Clear all — appears next to the button when at least one rule is on; turns them all off in one click.
- Manage conditional colors — the gear item at the bottom opens the management dialog if you want to create, edit, or reorder rules.
Using conditional colors in a dashboard gadget Back to top
Dashboard gadgets get their own conditional-colors picker in the configuration form. Each gadget instance can use a different set of rules — useful when you have several dashboards focused on different concerns (one highlighting blockers, another highlighting overdue work).

- Edit the dashboard gadget to open its configuration panel.
- Pick calendars, view, and weekend settings as usual.
- In the "Conditional colors" picker, choose the rules to apply in this gadget instance. The picker lists every rule visible to you (yours plus rules shared with you) — including rules you haven't favourited in the main calendar.
- Save. The gadget paints matching issues with your picked rule colors; non-matching issues keep the calendar's color.
See Dashboard Gadgets for the full gadget configuration walkthrough.
Need Help?
If you have questions or need assistance, our support team is here to help.
Contact Support