Available Views Back to top
Calendar for Jira offers 8 view layouts so you can visualize your schedule at any level of detail. Switch between views using the Views dropdown in the calendar toolbar.
- Month — a full month grid showing all events. Best for high-level planning and spotting busy periods.
- Week — a 5-day work week with hourly time grid. Great for day-to-day scheduling.
- All Week — a full 7-day week (including weekends) in the same layout as Month but scoped to a single week.
- Day — a single day with hourly time grid for detailed scheduling.
- Basic Day — a single day in the same layout as Month but showing just one day.
- Agenda — a flat chronological list of upcoming events. Easy to scan and print.
- Quarter — a three-month overview, same layout as Month but showing three months at once.
- Timeline — switches to the Resource Timeline view with Gantt-style scheduling.
All views support drag and drop to reschedule issues and custom events. The underlying Jira date field updates automatically when you move an event.
Color-code issues with conditional rules
Paint matching issues a different color based on assignee, status, priority, due date, or any custom field. Rules support AND / OR groups and date functions like today() and endOfMonth(). See Conditional Colors for the full guide.
Month View Back to top
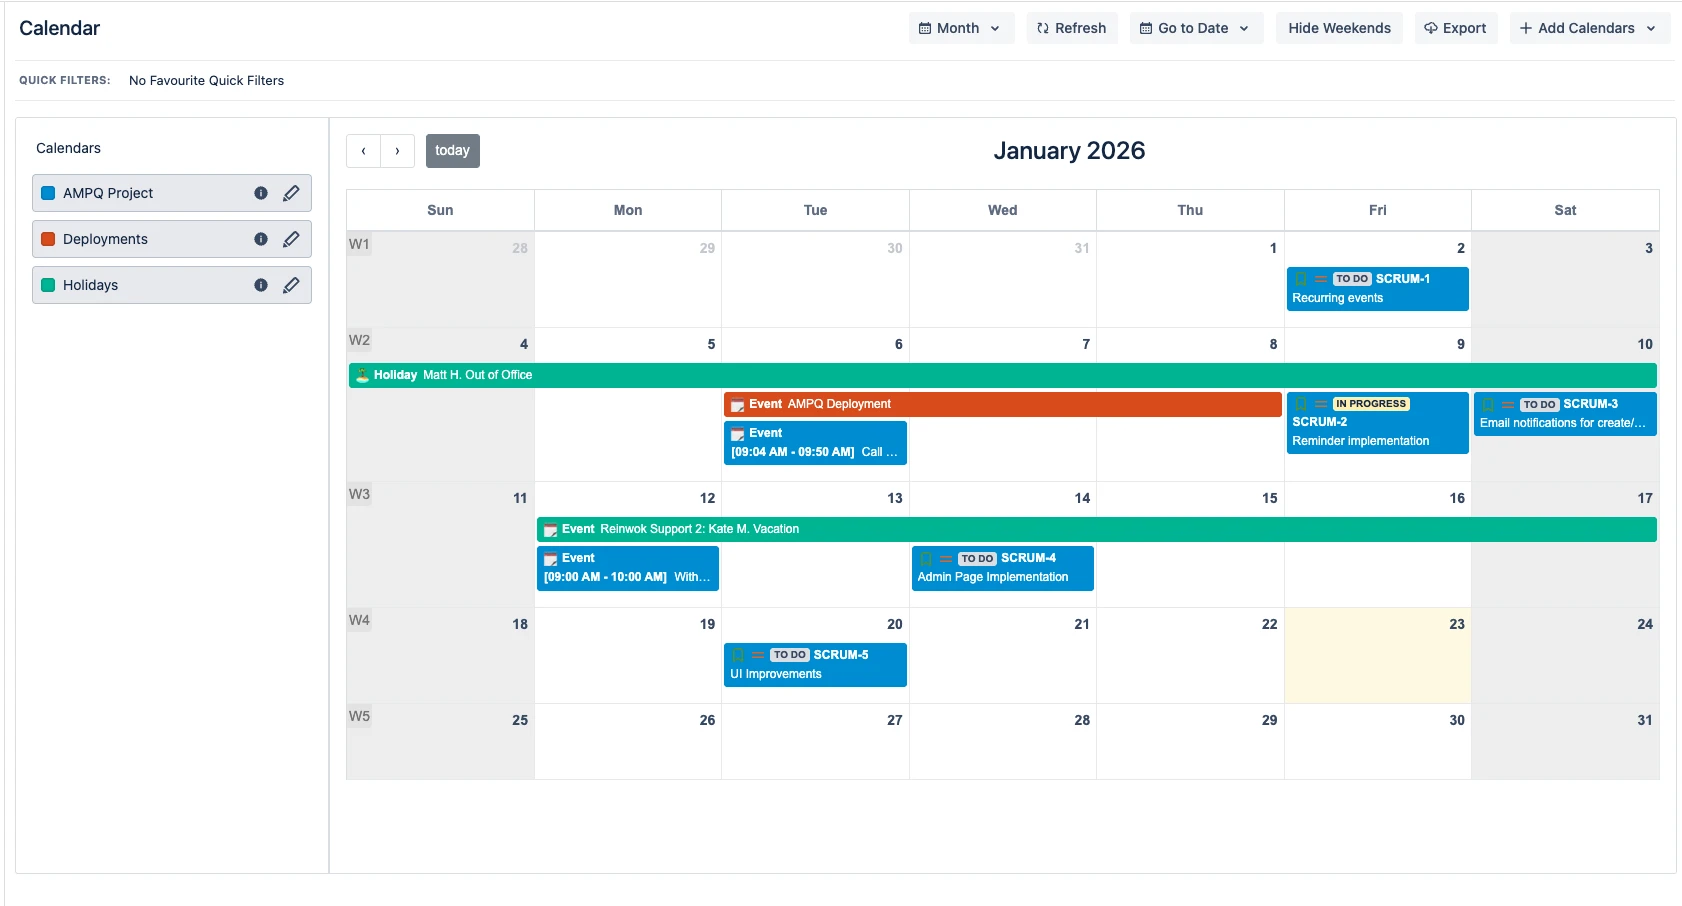
The default view. Events appear as colored bars spanning their date range. Each event shows the issue type icon, status lozenge, assignee avatar, and priority icon.
The left sidebar lists all your calendars with color-coded checkboxes to toggle visibility. The toolbar provides: View selector, Refresh, Go to Date, Hide Weekends, Export, and Add Calendars.
Timeline View Back to top
Timeline view displays tasks in a horizontal Gantt-style layout with powerful grouping options.
Group Issues by Project

Group Issues by Issue Type
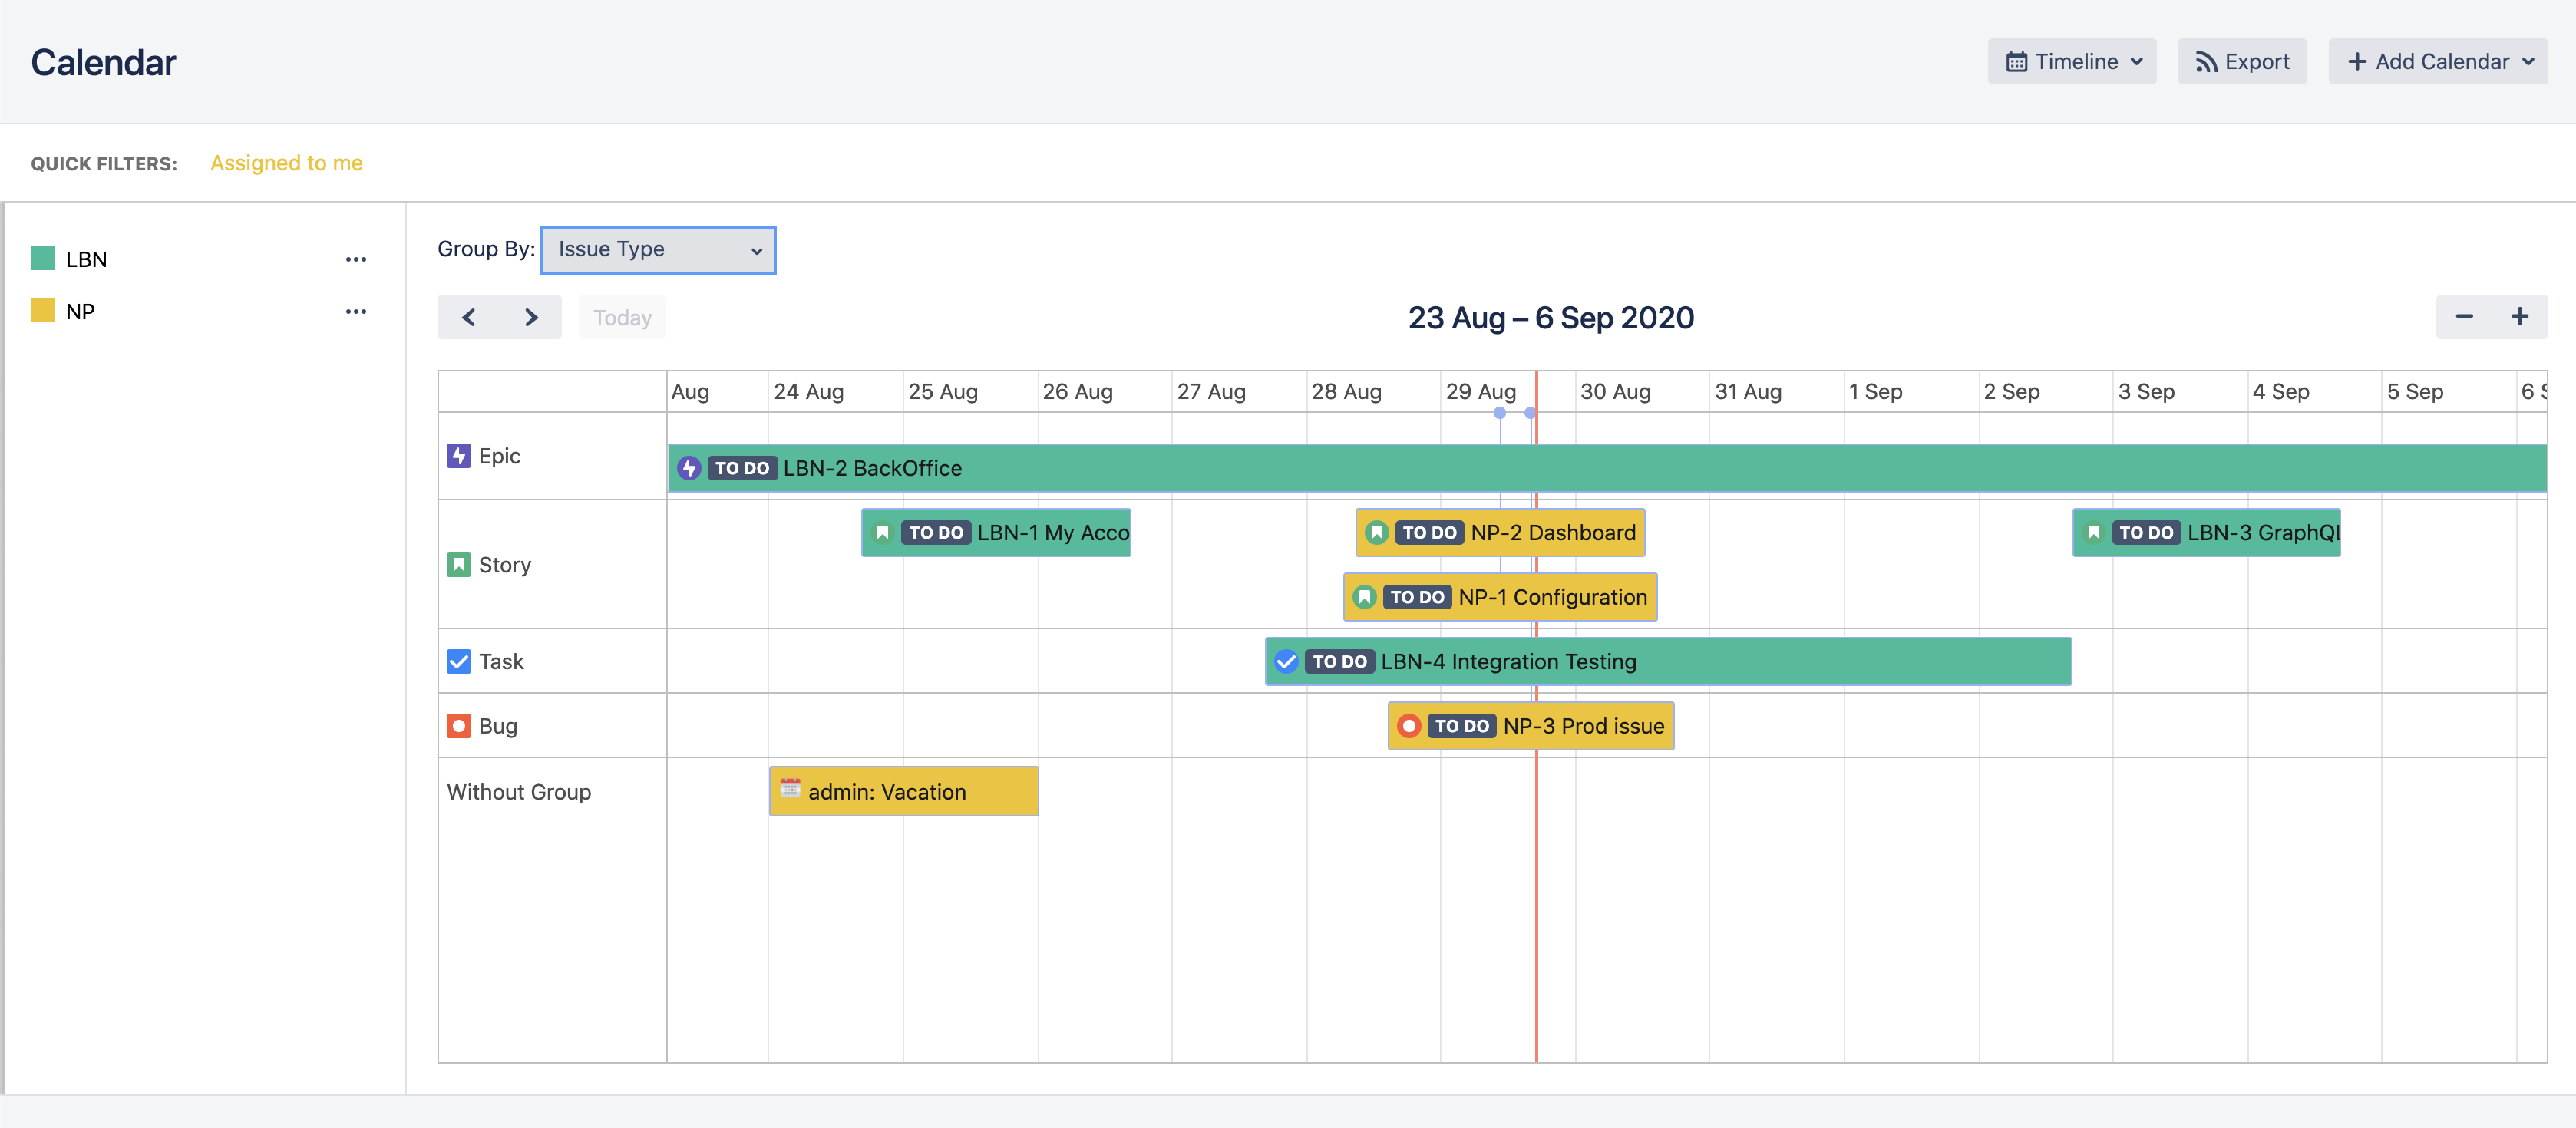
Group Issues by Assignee

- Click Views dropdown in the calendar toolbar.
- Select Timeline from the list of available views.
- Select "Group By" field to organize issues by Project, Issue Type, Assignee, or other available fields.
Agenda View Back to top
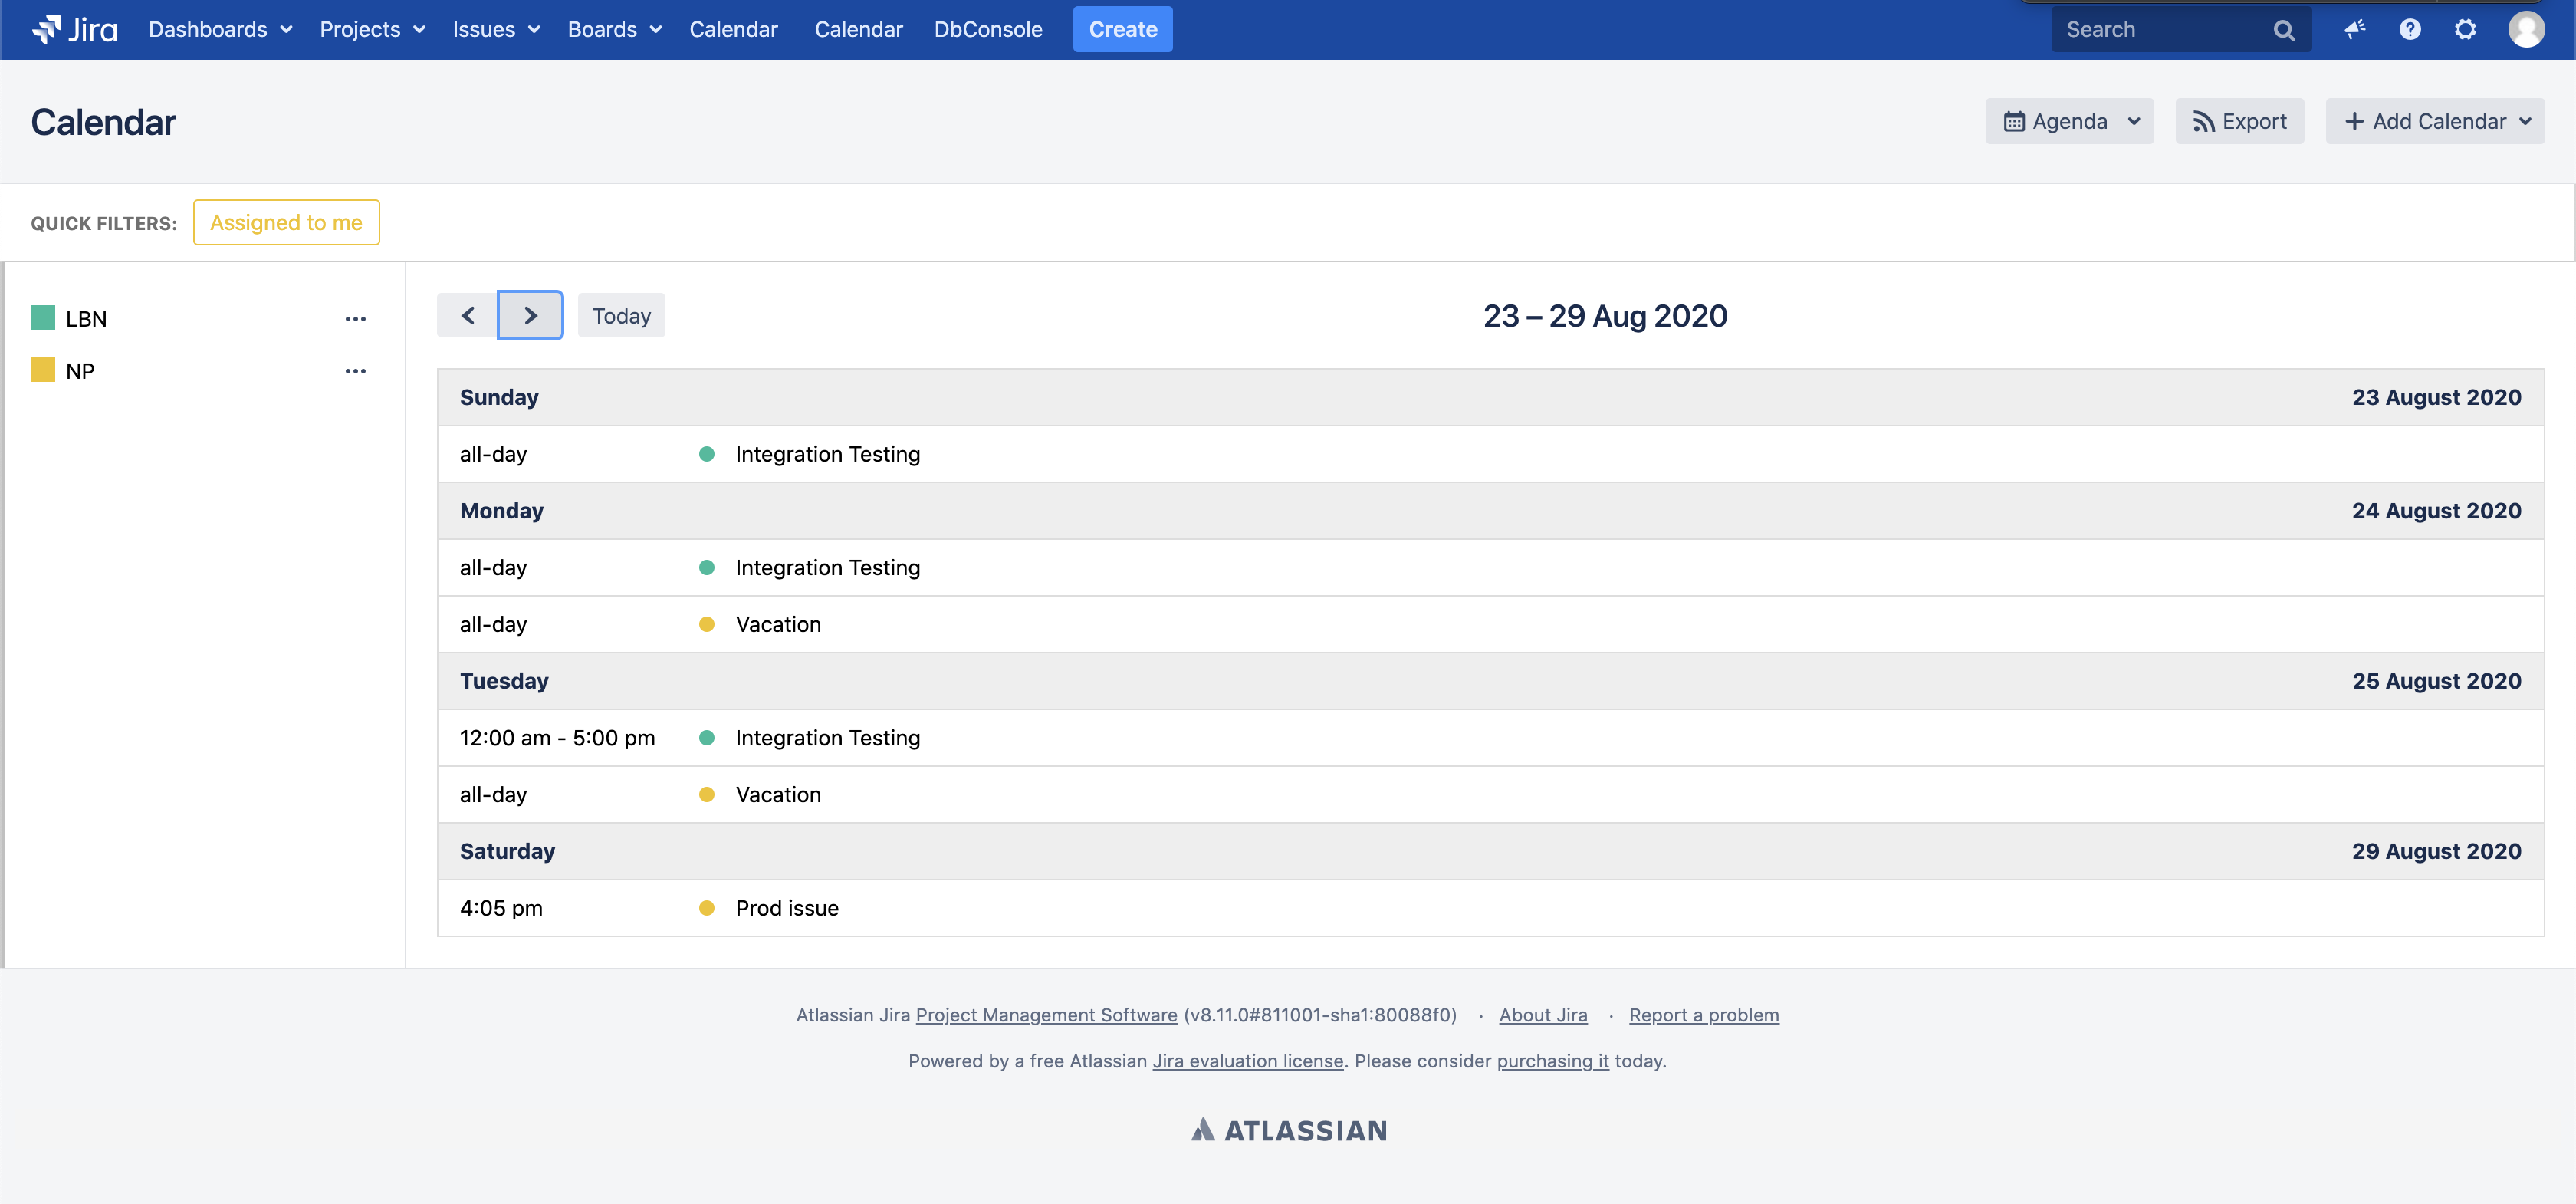
Agenda view shows a flat chronological list of all events sorted by date. Ideal for printing or sharing a list of upcoming deadlines.
- Click Views dropdown in the calendar toolbar.
- Select Agenda from the list of available views.
Week & Day Views Back to top
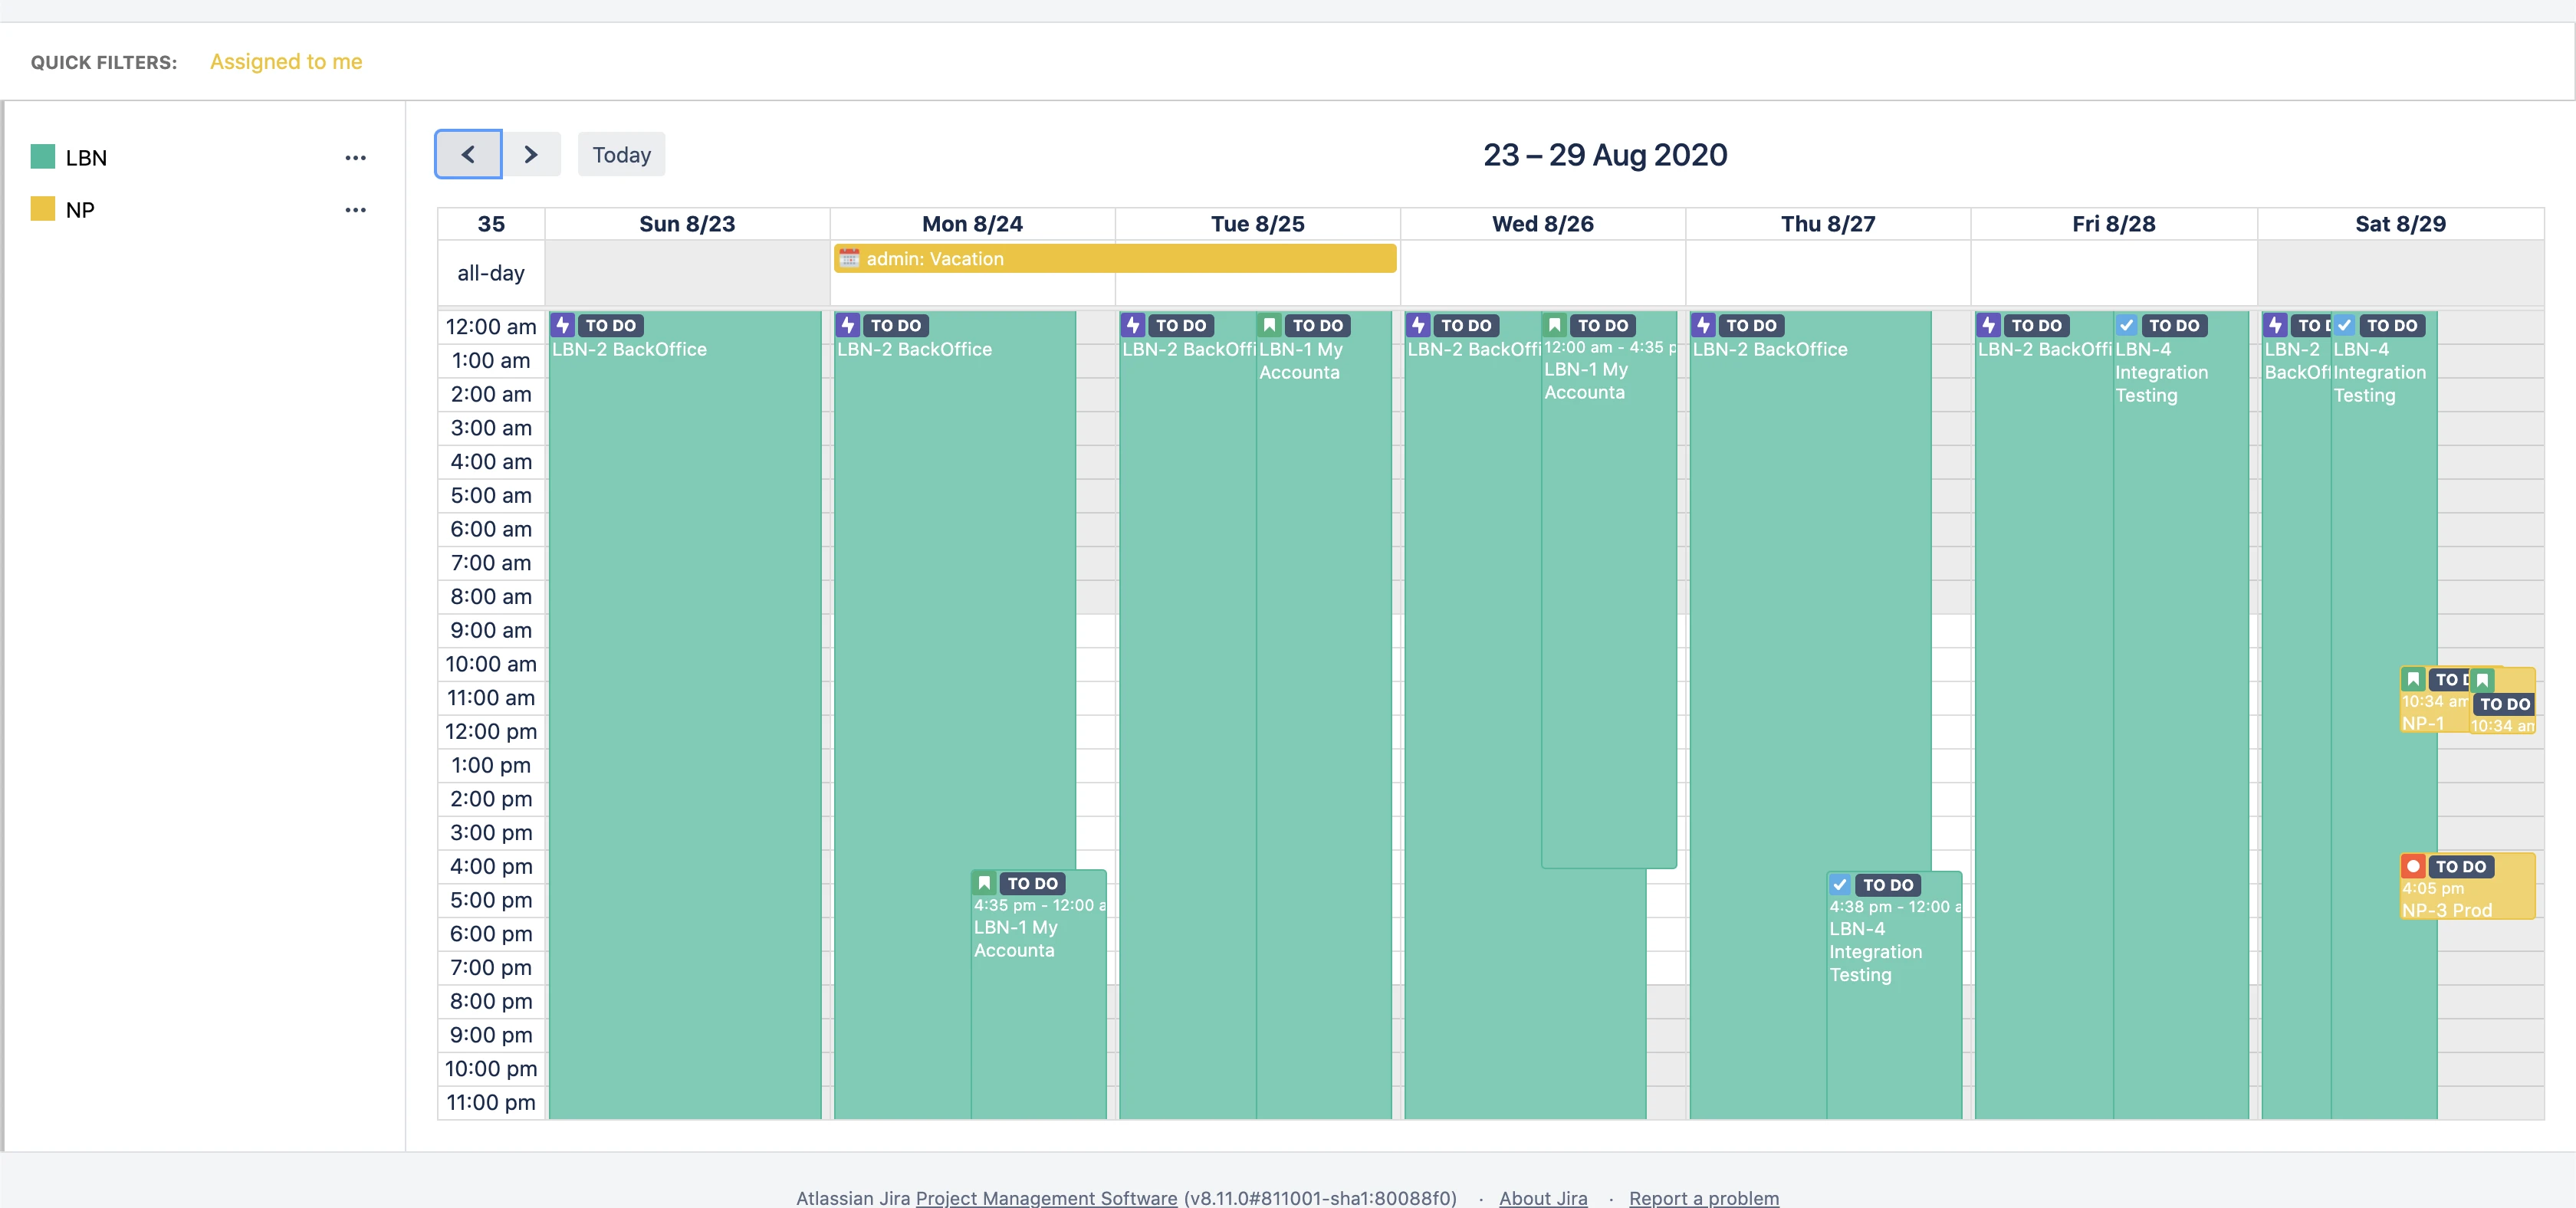
The Week and Day views display an hourly time grid, letting you see exactly when events start and end throughout the day. All-day events appear in a separate row at the top.
The All Week and Basic Day views use the same layout as Month view but scoped to a single week or single day — no time grid, just event bars on day cells.
Need Help?
If you have questions or need assistance, our support team is here to help.
Contact Support