Create a Booking Back to top

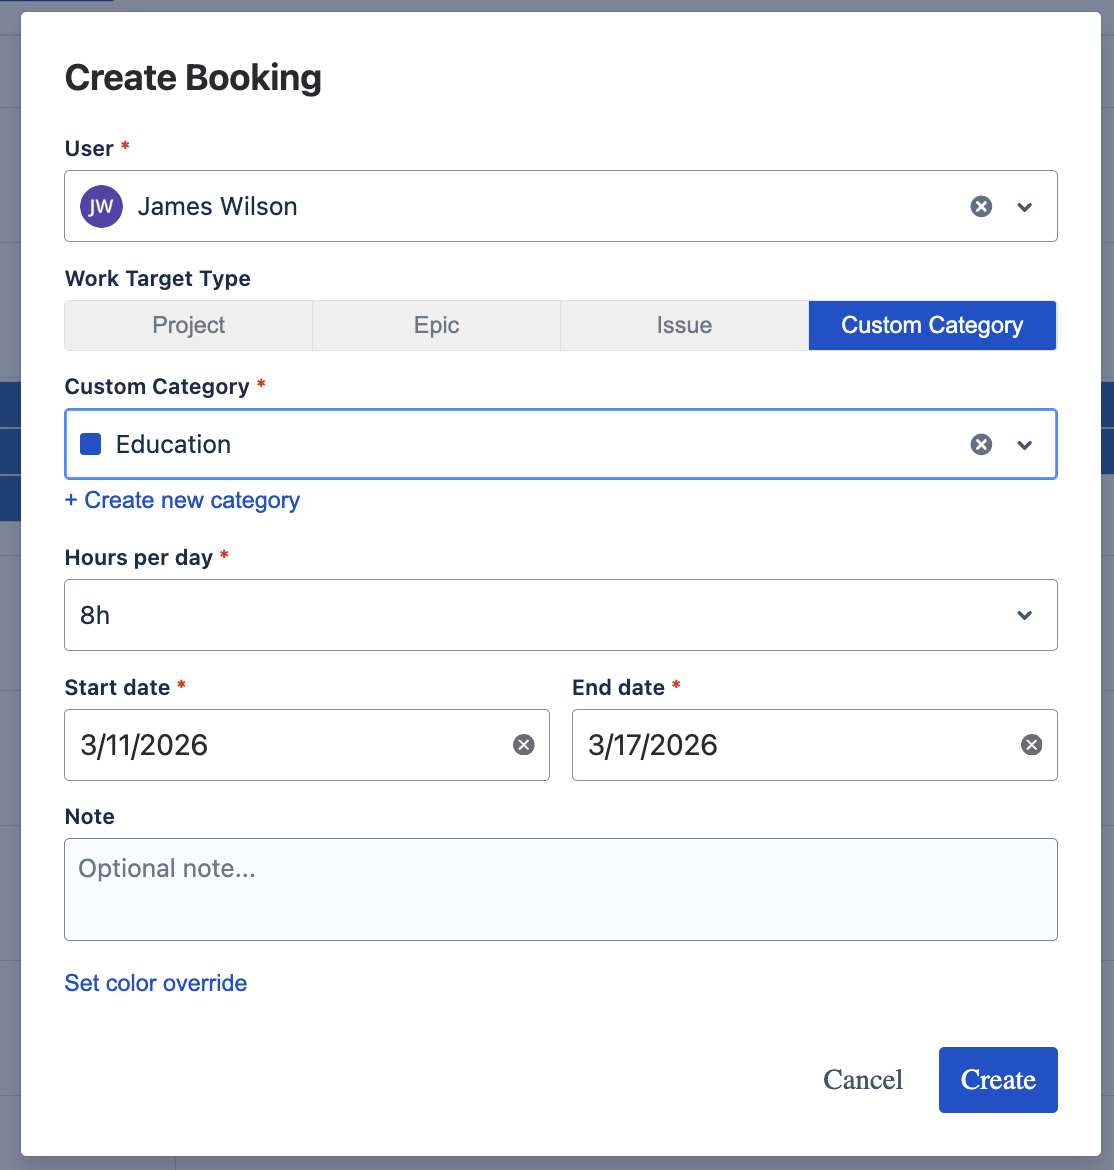
- Click "+ Create Booking" in the toolbar, or click on an empty cell in the timeline grid.
- Select a User — use the searchable dropdown to pick the team member. If you clicked on a cell, the user is pre-populated.
- Choose a Work Target Type — select one of the four tabs: Project, Epic, Issue, or Custom Category.
-
Select the Work Target — the picker changes based on the selected type:
- Project: search and select a Jira project
- Epic: first select a project, then pick an epic within it
- Issue: search by issue key or summary
- Custom Category: pick from existing categories or create a new one
- Set Hours per day — choose from 0.5h to 24h in 0.5h increments. Defaults to the value configured in Capacity Settings.
- Set Start and End dates — define the booking period. If you clicked on a cell, dates are pre-populated from the visible range.
- Add a Note (optional) — free-text note for additional context.
- Click "Create" to save the booking. It will immediately appear on the timeline.
Work Target Types Back to top
The booking dialog uses a tabbed interface to switch between the four work target types. Each tab adjusts the picker fields accordingly.
Project
Allocate a user's time to an entire Jira project. Search by project name or key.
Epic
Allocate time to a specific epic. First select the project, then choose an epic within that project.

Issue
Allocate time to a specific Jira issue. Search by issue key (e.g., PROJ-123) or summary text.

Custom Category
Allocate time to a user-defined category such as "Education", "Internal Meetings", or "Training". Categories are created and managed in the settings. You can also create a new category directly from the booking dialog via the "+ Create new category" link.
Color Override Back to top
By default, each booking inherits its color from the work target. You can override this color for individual bookings.
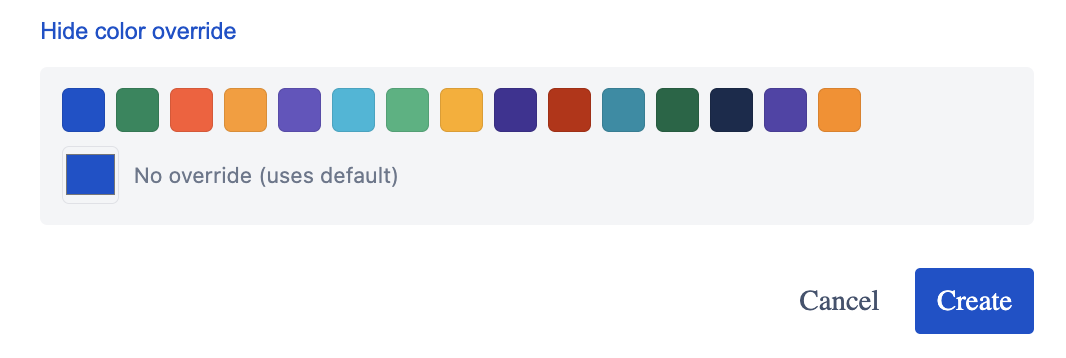
- Click "Set color override" at the bottom of the booking dialog.
- Select a color from the palette. Choose "No override (uses default)" to revert to the work target's default color.
Edit & Delete Back to top
Click on any booking bar in the timeline to view its details. From the detail popup you can:
- Edit — modify the user, work target, hours per day, dates, note, or color override
- Delete — permanently remove the booking (with confirmation dialog)
Drag-and-Drop Back to top
Bookings can be rescheduled and reassigned directly on the timeline using drag-and-drop:
- Horizontal drag: Move a booking bar left or right to shift its date range while keeping the same duration
- Vertical drag: Move a booking bar to a different user row to reassign the booking
- Edge resize: Drag the left or right edge of a booking bar to change its start or end date
Changes are saved immediately after the drop. A visual preview (ghost) is shown during the drag operation.
Undo Support
After a drag-and-drop operation, you can undo the change using Ctrl+Z (Windows) or Cmd+Z (Mac). A toast notification confirms each action.
Need Help?
If you have questions or need assistance, our support team is here to help.
Contact Support