If you have not installed WorkHub yet, grab it from the monday.com Marketplace. Once installed, the app is available as both a Board View and a Workspace View across your account.
Workspace View vs Board View
WorkHub offers two ways to access its features, each suited to a different workflow.
Workspace View
Workspace View is a full-screen application accessible from the monday.com left sidebar. It contains seven modules:
- Scheduler — resource planning across multiple boards at once
- Time Tracking — log worklogs against any board item
- Timesheets — submit and approve weekly timesheets
- Leave — request and approve time off
- Reports — utilization, worklog, leave, and planned-vs-actual reports
- Settings — boards, capacity schemes, holidays, permissions (admin only)
- My Account — personal preferences and assigned schemes
Workspace View is the main way to use WorkHub. Use it for everything that isn't scoped to a single board: timesheets, leave management, reports, settings (boards, capacity schemes, holidays, permissions), cross-board resource planning in the Scheduler, and the My Account personal view. Board View is a lightweight companion for planning and logging time on a single board without leaving it — but timesheet submission, leave requests beyond the scheduler cell menu, all reports, and all admin settings live only in Workspace View.
Opening Workspace View
- In the monday.com left sidebar, open the Workspaces panel.
- Select the workspace you want to work in (for example, Main workspace).
- Expand Workspace apps.
- Click the WorkHub: Plan, Track & Report entry to open Workspace View.
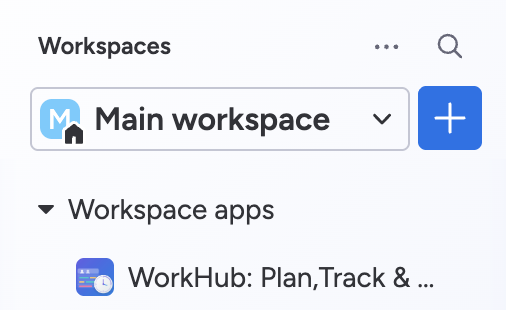
The WorkHub app hasn't been added to this workspace yet. Install it once from the monday.com Marketplace — after that, it appears under Workspace apps in every workspace on the account.
Board View
Board View is added as a view tab on a single monday.com board. It provides two tabs:
- Resource Planning — a Gantt-like scheduler showing tasks from that board, organized by assignee and timeline.
- Worklog — a time tracking interface for logging hours against items on that board.
Use Board View when you want a focused scheduler for one project board without leaving the board context.
Both tabs support the same cell quick actions as Workspace View — click an empty cell on any row to create an item, log time, or request leave without leaving the scheduler.
Adding Board View to a board
- Open the monday.com board you want to schedule from.
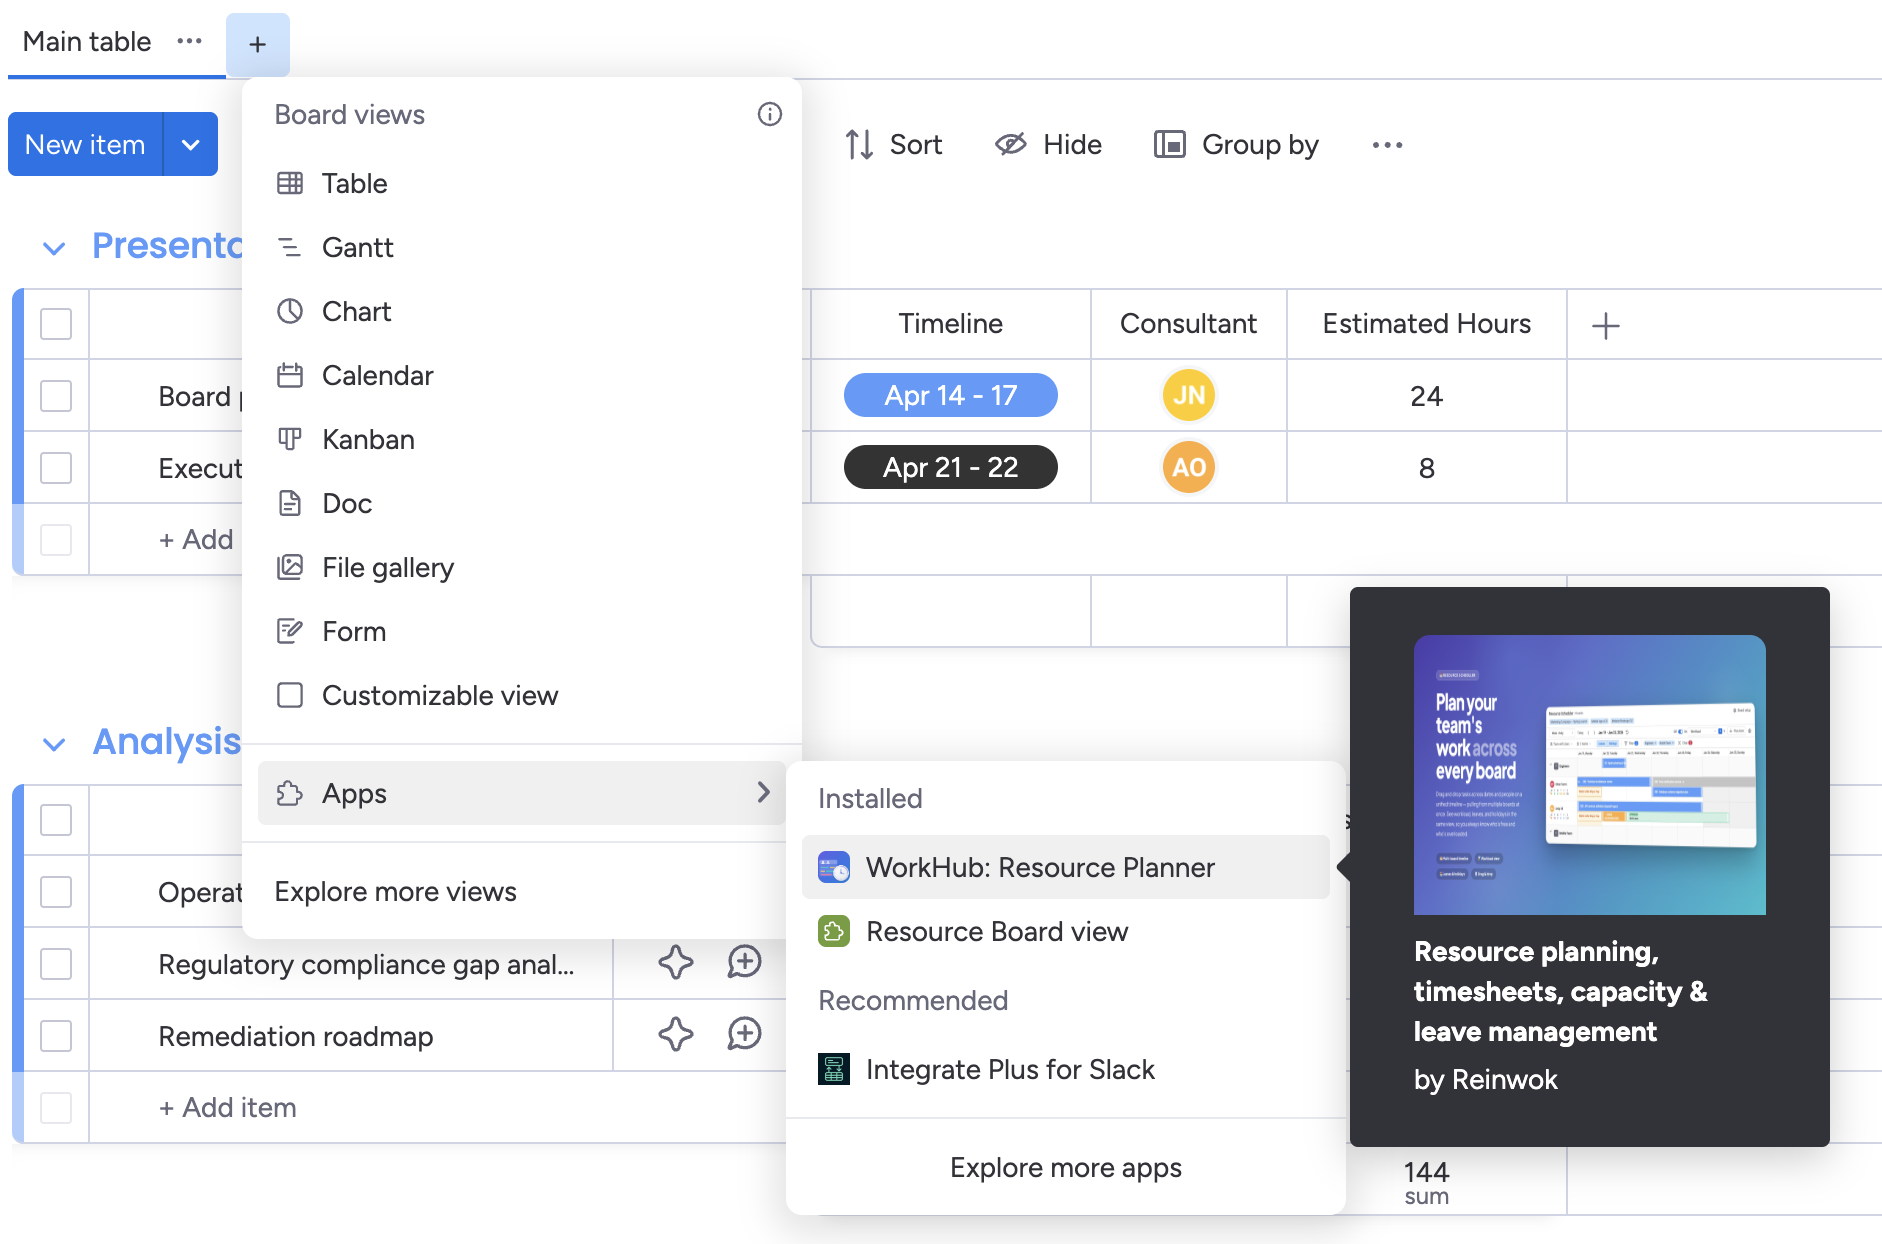
- Click the + button in the row of view tabs next to Main table (or whichever views your board already has).
- In the Board views menu that opens, hover over Apps.
- Under Installed, pick the WorkHub entry published by Reinwok — the hover preview confirms "Resource planning, timesheets, capacity & leave management by Reinwok".
- The new view opens as a tab on your board with the Resource Planning and Worklog tabs, scoped to this board's items.
The first time you add Board View to a board, the field-mapping wizard launches automatically to pick the Item Level and map your Timeline and Assignees columns. The mapping is saved per board and shared across all users who add the view to that board.
If you don't see the WorkHub app under Apps → Installed, it hasn't been installed on your account yet. Install it once from the monday.com Marketplace; after that, every board on the account can add the Board View from the + menu.
Items and Subitems
Monday.com boards have two levels of items that WorkHub can work with:
- Main items — the top-level rows on your board. These are the primary tasks or work items.
- Subitems — nested items attached to a main item. In monday.com, subitems live on a separate subitems board with their own columns.
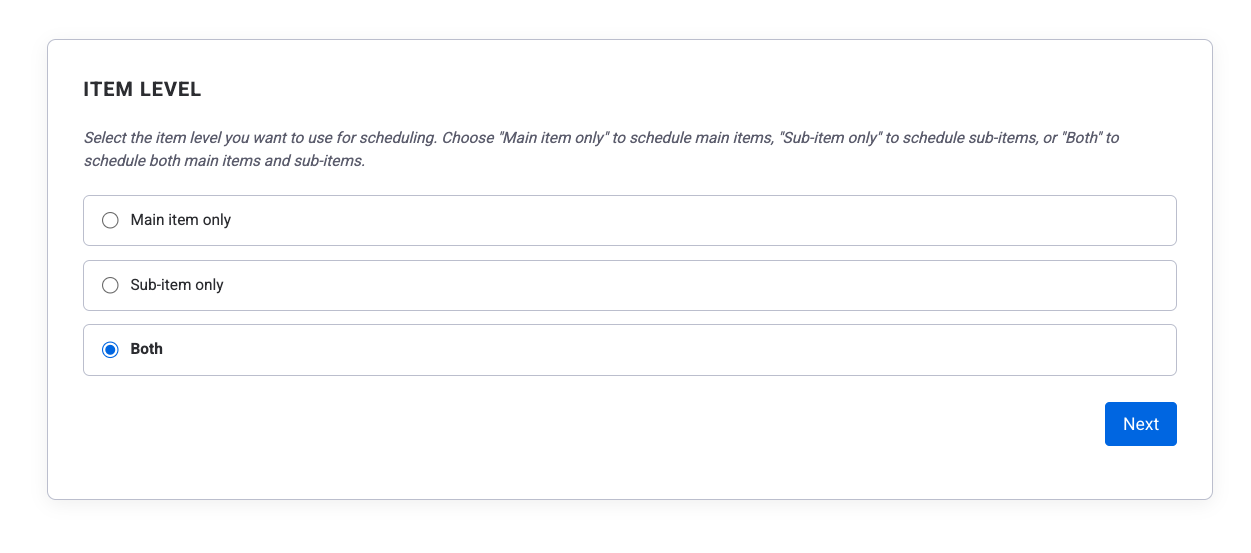
During board setup (or in the settings sidebar), you choose the Item Level setting:
- Main items — the scheduler shows only top-level board rows.
- Sub-items — the scheduler shows only subitems.
- Both — the scheduler shows main items and subitems together.
When subitems are enabled, field mapping is configured separately for the subitems board since it has its own column structure — see Field Mapping below.
You can create new items (main or subitem, depending on the board's Item Level) without leaving the scheduler — click an empty cell on someone's row to open the quick actions menu. The same menu also lets you log time and request leave for the selected date range.
Field Mapping
Before the scheduler can display your board data, it needs to know which monday.com columns correspond to which concepts. This is called field mapping. Each board has its own mapping configuration.
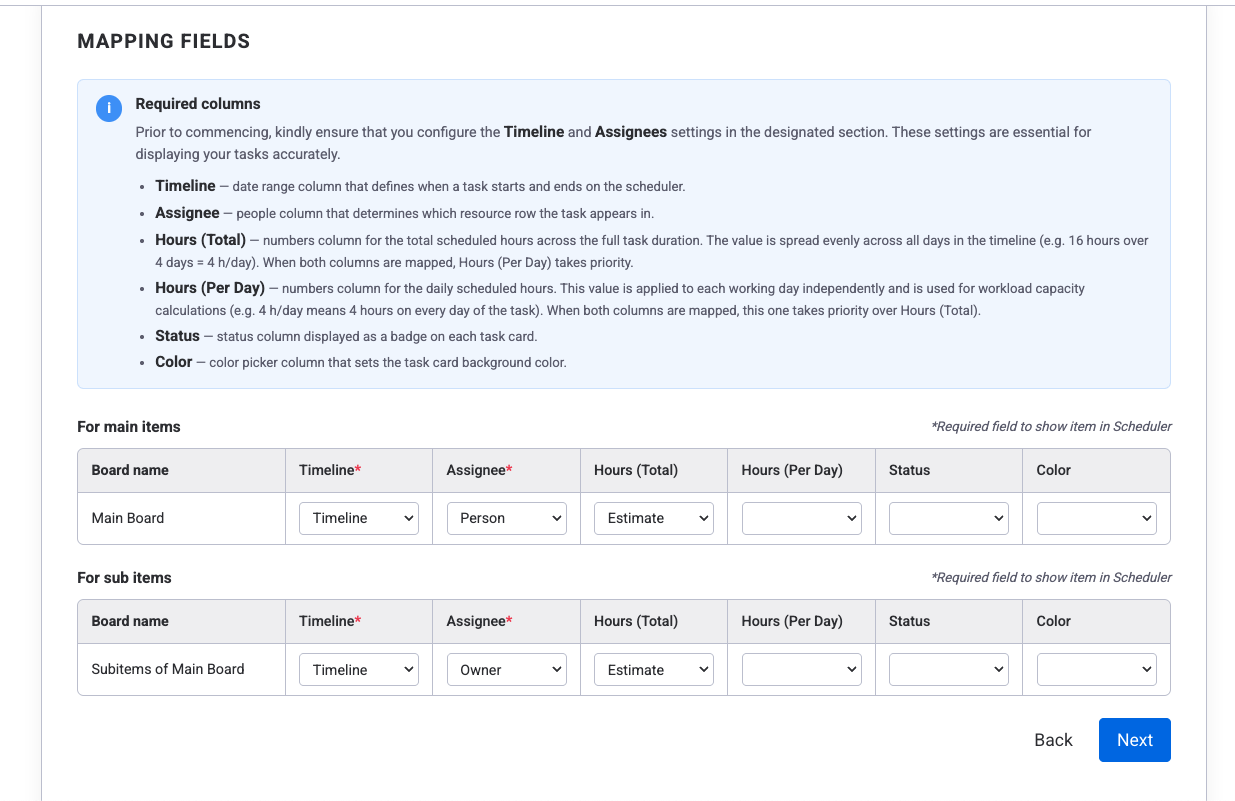
The six available field mappings are:
| Field | Column Type | Required? | Purpose |
|---|---|---|---|
| Assignee | People | Yes | Determines who is assigned to each item. The scheduler organizes tasks by person, so this field is essential. |
| Timeline | Timeline | Yes | Provides start and end dates. The scheduler positions items horizontally by date range. |
| Original Estimate | Numbers | No | Total estimated hours for the entire task duration. The scheduler divides this across working days in the timeline range for workload calculation. |
| Hours Per Day | Numbers | No | Estimated hours per working day. An alternative to Original Estimate for teams that estimate in daily effort rather than totals. |
| Status | Status | No | Enables status-based card coloring and lets you filter completed items from the scheduler view. |
| Color | Color Picker | No | Provides custom card coloring when the color schema is set to "picker" mode. |
Required fields explained
Assignee and Timeline are the only required fields because they answer the two fundamental scheduling questions: who is doing the work and when. Without an Assignee column mapped, the scheduler cannot create rows for team members. Without a Timeline column, items have no date range and cannot be placed on the calendar.
Original Estimate vs Hours Per Day
These two fields control how workload is calculated. You can map one, the other, or both — but the scheduler needs at least one for workload indicators to reflect real planned effort. If neither is mapped, items still appear on the scheduler (Assignee and Timeline are the only requirements), but each item contributes 0 hours to the workload indicator.
Both formulas use the assignee's working days, not raw calendar days. A day counts as working only when all three of these are true:
- The day is a working day in the assignee's work capacity scheme (so a Friday-off scheme excludes Fridays).
- The day is not a holiday in the assignee's holiday scheme.
- The assignee does not have full-day approved leave on that day. Half-day leave counts as 0.5 of a working day.
Original Estimate
Use this when your team estimates total effort per task. The plugin divides the total by the number of working days in the item's timeline range and distributes the result evenly.
A task has 16 hours in the Original Estimate column and a timeline of Monday to Thursday (4 working days, no holidays or leave). The plugin calculates 4 hours per day (16 ÷ 4) for workload purposes.
Same task, but the assignee is on approved leave on Wednesday. Wednesday is excluded from the working-day count, so the 16 hours are spread over the remaining 3 working days — about 5.33 hours per day on Mon, Tue, and Thu.
Hours Per Day
Use this when your team estimates daily effort instead of totals. The plugin uses the per-day value directly for each working day in the timeline — no division is needed. On non-working days (non-working days in the capacity scheme, holidays, or approved leave) the per-day value is skipped entirely, not added.
A task has 3 hours/day in the Hours Per Day column and a timeline of Monday to Friday. With a standard Mon–Fri capacity scheme and no holidays, the plugin counts 3 hours each day, totaling 15 hours across the week.
Same task on an assignee with a 4-day week (Friday off): the plugin counts 3 hours on Mon–Thu and 0 on Friday, totaling 12 hours for the week.
When both are mapped
If both columns are mapped on the same board, Hours Per Day takes precedence per item. The Original Estimate column is used as a fallback only when the per-day value is missing, empty, zero, or negative for that specific item. This lets you mix the two approaches on the same board — leave Hours Per Day blank on items where you only know the total, and fill it in on items where you know the daily rhythm.
Most teams use Original Estimate because it aligns with how estimates are typically given ("this task will take 20 hours"). Use Hours Per Day if your team plans in daily time blocks ("I'll spend 2 hours per day on this"). If you're unsure, map only Original Estimate — you can always add Hours Per Day later.
Other optional fields
Status enables two features: coloring task cards by their status label (e.g., "Working on it" = orange, "Done" = green) when using the Status color schema, and filtering completed items out of the scheduler view.
Color (Color Picker) is only needed if you want to assign custom colors to individual items. Most teams use the Status or Group color schema instead.
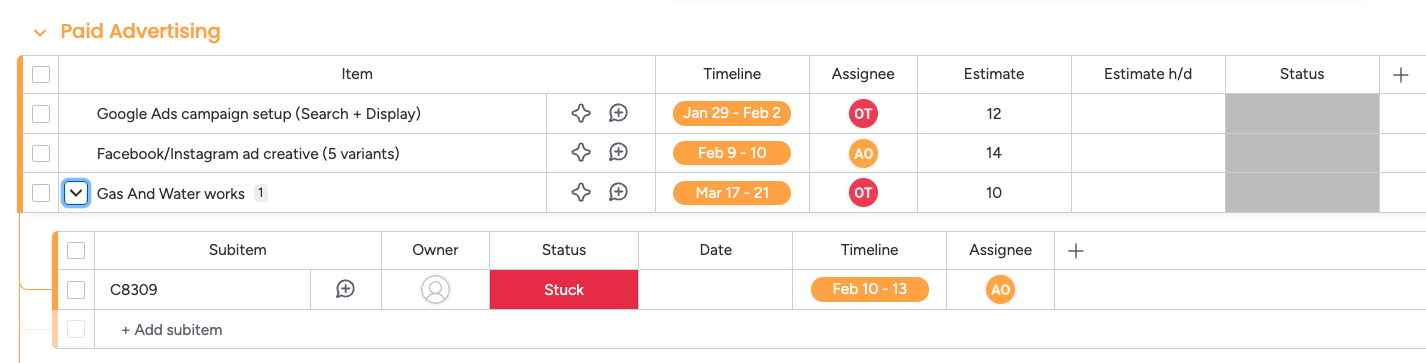
Subitems live on their own subitems board in monday.com. When you enable subitems, WorkHub shows a second mapping table for the subitems board, allowing you to map columns independently from the parent board. The example screenshot above shows the parent board with Assignee, Timeline, Estimated, and Estimated H/D mapped, while the subitems board has just Timeline and Assignee.
Board Setup & Configuration
Before the scheduler can show anything, WorkHub needs to know which boards to load and how each board's columns map to the scheduler's concepts. Two separate screens handle this:
- A board-selection screen (Workspace View only) that controls which boards feed into the unified scheduler.
- A field-mapping wizard (both views) that configures Item Level and column mapping for one board at a time. In Board View, this wizard opens directly the first time you add the scheduler to a board — there's no multi-board selection step.
If you haven't mapped any boards yet, Workspace View still opens — the scheduler shows your team with holidays and existing leaves. You can request leave and log time in this state (Log time's item picker queries monday.com directly, so it doesn't need a configured board). To start planning or creating items and to use workload indicators, add a board via the board-selection screen below.
Selecting boards for the Workspace View scheduler
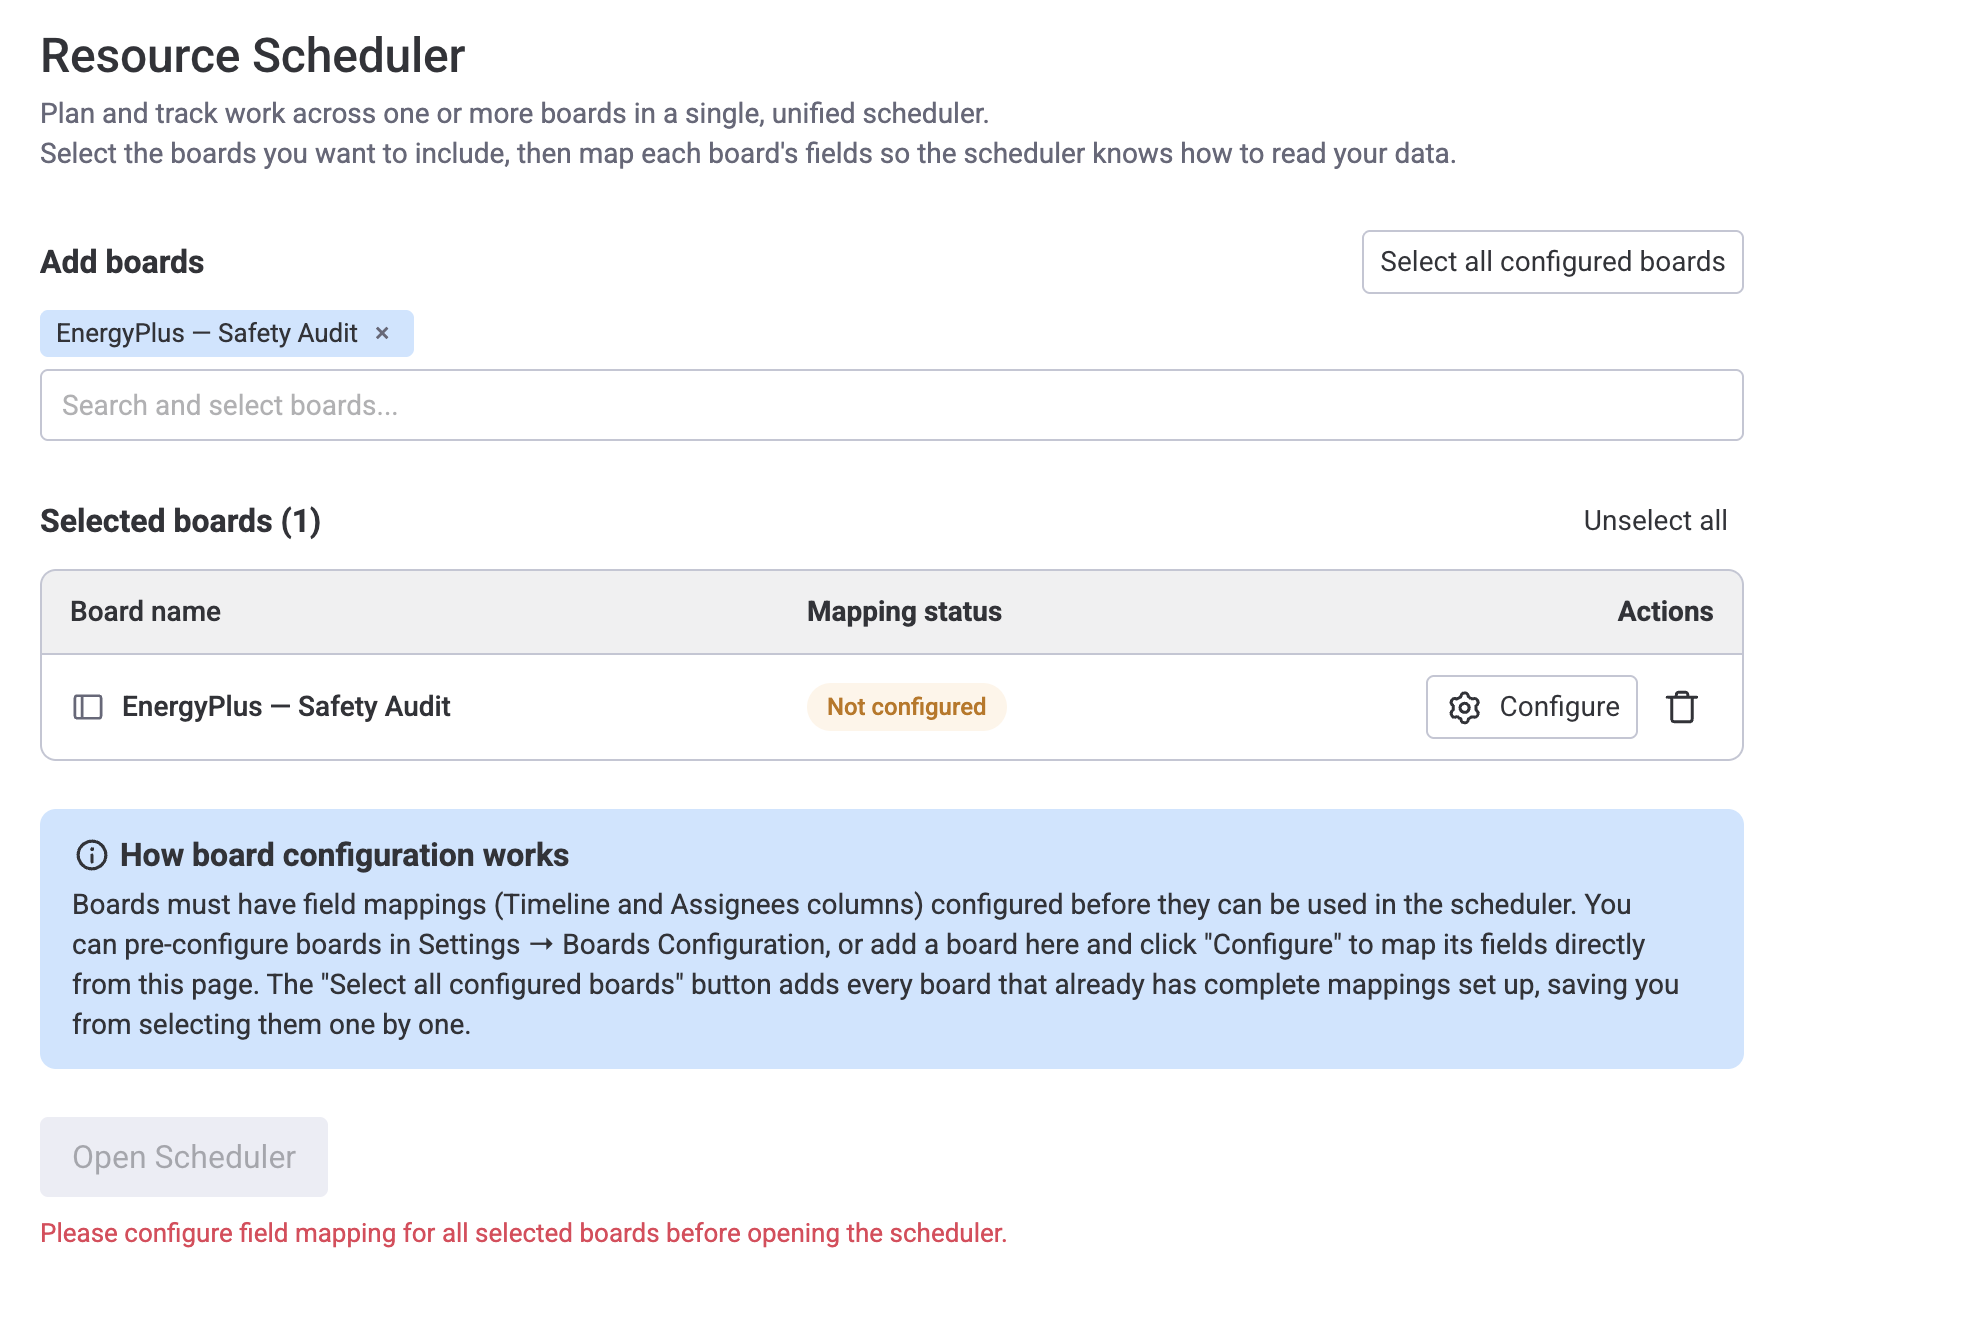
The first time you open Workspace View → Scheduler, you land on the board-selection screen. You can return to this screen any time via the Board setup button in the scheduler toolbar.
Two ways to add boards to your selection:
- Add boards search — start typing a board name in the "Search and select boards..." field. The typeahead searches every board on your monday.com account that you have access to (subitem boards are filtered out). Click a result to add it to the Selected boards table immediately.
- Select all configured boards — one-click bulk add of every board on the account that already has Timeline and Assignees mapped. Boards you already have selected aren't duplicated; this is a merge into your current selection, not a replace. It's the fastest path when an admin has pre-configured boards in Settings → Boards Configuration.
Both the search box and Select all configured boards respect your monday.com permissions. Only boards you have access to are shown — including boards from other workspaces if monday.com grants you access. Configured boards you can't see (other workspaces, revoked access) are silently skipped and won't appear in your selection.
Each row in the Selected boards table shows:
- Board name.
- Mapping status — Configured when the board has at least Timeline and Assignees mapped, otherwise Not configured (orange badge). Optional fields like Original Estimate, Status, or Color are not required for Configured.
- Configure / Edit mapping — opens the field-mapping wizard (same one described below) for that board without leaving the screen.
- Trash icon — removes the board from your current scheduler selection. The board's field mapping stays on the server, so other users with the board selected are not affected, and you can re-add the board later without re-mapping.
The Open Scheduler button is disabled until every selected board is Configured — the red message "Please configure field mapping for all selected boards before opening the scheduler" tells you why. You can also click Open Scheduler with zero boards selected; a confirmation asks whether to continue, and confirming takes you into the scheduler showing only your team with their holidays and leaves (pending and approved) — useful for requesting leave or logging time before any boards have been mapped. Add a board later via Board setup to start planning items.
Your list of selected boards is saved in the browser's local storage, so it is per device. Opening Workspace View in a different browser or on another computer starts with an empty selection. The boards' field mappings, by contrast, are saved server-side and shared across users and devices — once an admin maps a board, every user can add it from the board-selection screen without remapping.
Configuring a board's fields (field-mapping wizard)
When you configure a board for the first time — whether by clicking Configure on the board-selection screen, by adding the scheduler to a Board View, or by editing a board in Settings → Boards Configuration — the field-mapping wizard launches. It walks you through two steps:
- Item Level — choose whether to show Main items, Sub-items, or Both on the scheduler.
- Field Mapping — select which monday.com columns map to each field. The dropdowns only show compatible column types (e.g., only People columns appear for Assignee, only Timeline columns for Timeline).
You can return to the wizard at any time to reconfigure field mappings — either from the board-selection screen (Edit mapping) or from Settings → Boards Configuration. Changes apply to every user who uses that board on the scheduler.
For additional options beyond the wizard, open the scheduler for that board first — then click the settings icon in the top-right corner. This opens the board settings sidebar, which is only available while the scheduler is active and provides the same field mapping options plus display settings.
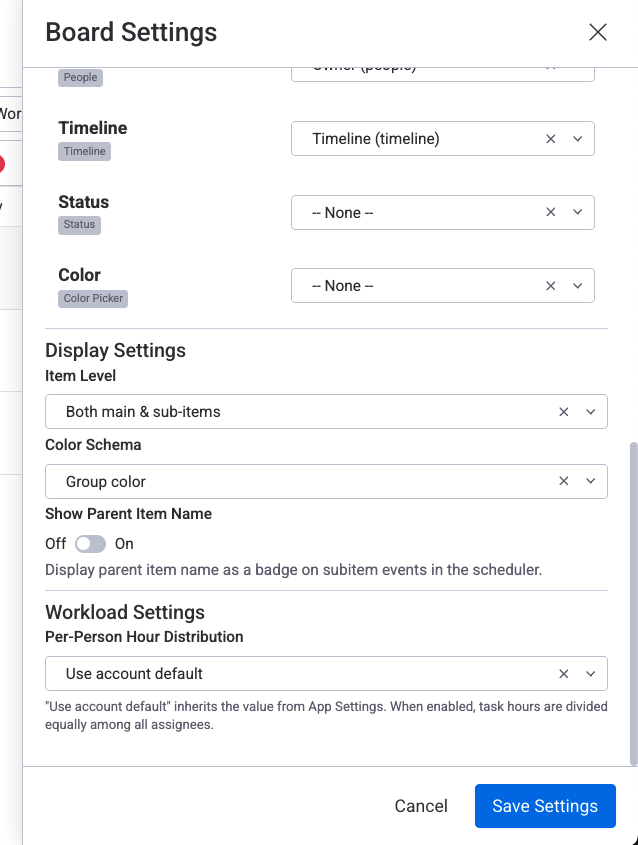
Settings like color schema, item height, and per-person distribution are not available during the initial field-mapping wizard. Access them by clicking the settings icon in the top-right corner after the board is configured.
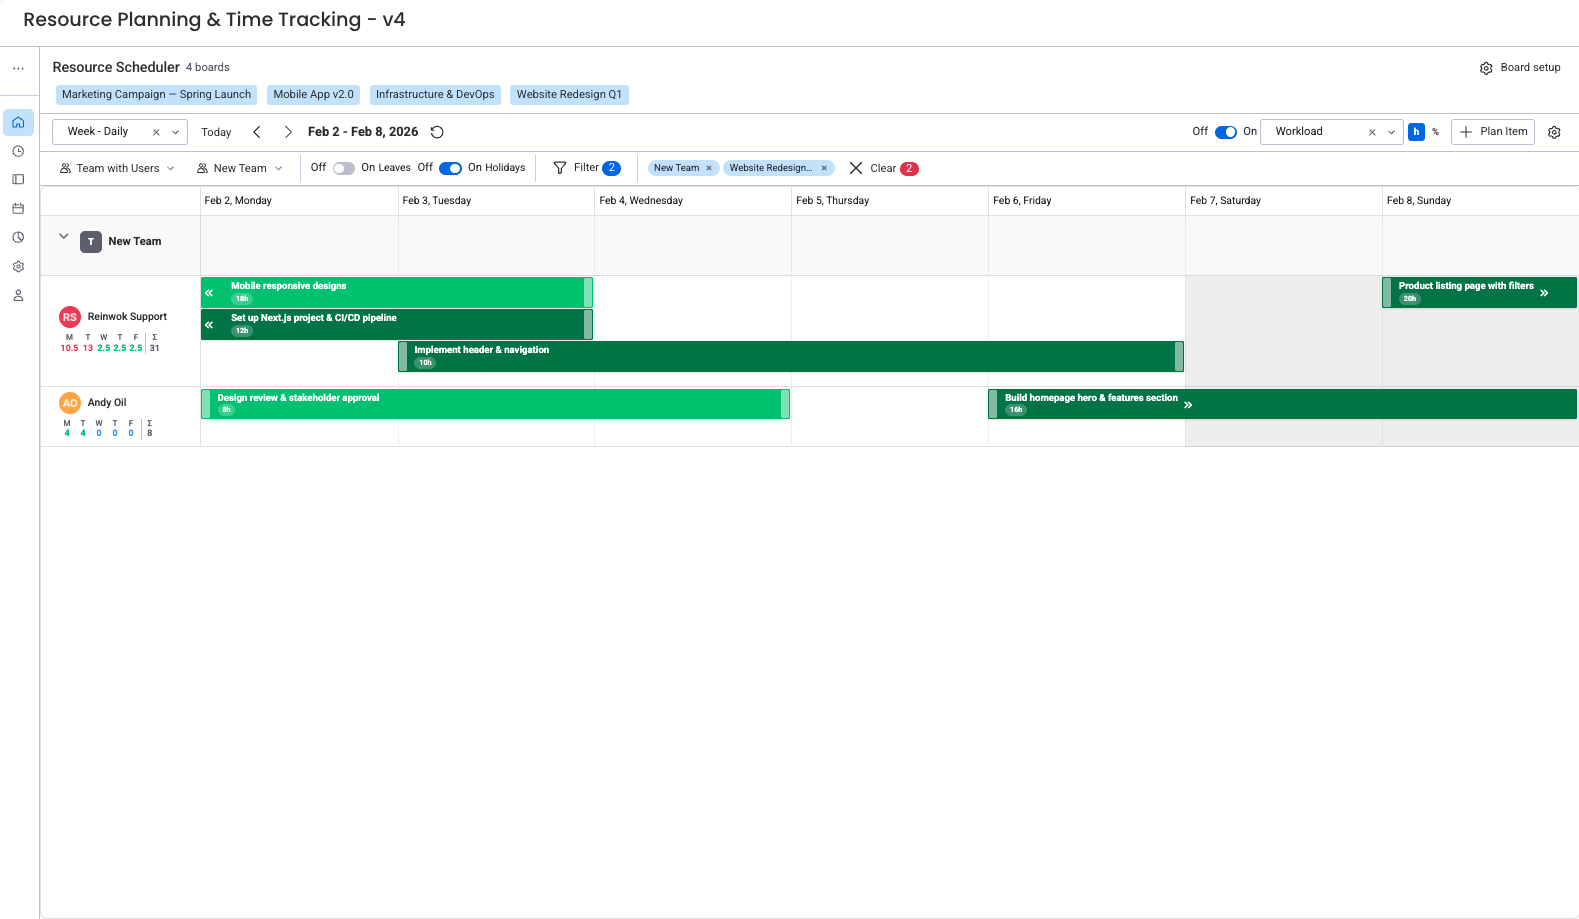
Scheduler Overview
The resource scheduler is a Gantt-like timeline where each row represents a team member and task cards are positioned by their timeline dates.
View modes
Five zoom levels let you see the right time horizon:
- Week — seven days with day columns
- 2-Week — fourteen days with day columns
- Month — one calendar month with day columns
- Year (monthly) — twelve months with month columns
- Year (daily) — twelve months with day-level granularity
Group-by modes
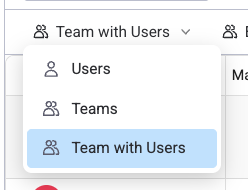
The scheduler toolbar lets you choose how rows are organized:
- Users — one row per person. This is the default and shows every assignee as a separate row.
- Teams — rows are grouped by monday.com teams. Each team appears as a collapsible section. Useful for managers overseeing multiple squads.
- Teams with Users — team headings with individual user rows nested inside each team. Gives both the team-level overview and per-person detail.
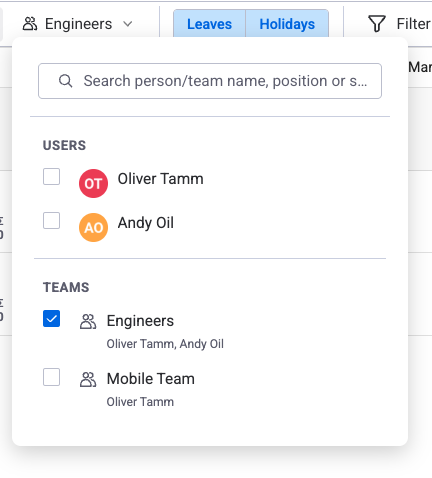
You can select multiple teams in the Team filter to display several teams side by side on the scheduler. This is useful for cross-team planning and comparing workload across departments.
Assigning items to teams
In monday.com, items can be assigned to a team (not just individual users). When an item is assigned to a team, it appears on the team's row in the scheduler. You can then drag the item from the team row to a specific user's row to reassign it to an individual. This lets managers assign work at the team level first and then distribute it to specific people during planning sessions.
You can also filter which users or teams are visible using the Assignee and Team filter dropdowns in the toolbar.
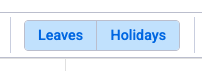
Leave & holiday display toggles
The toolbar includes Leaves and Holidays toggle buttons. When enabled, leave days (pending and approved) and holidays appear as colored blocks on the scheduler. Toggling them off hides the visual blocks for a cleaner view, but workload indicators always account for approved leave and holidays regardless of the toggle state — this is purely a visual change, not a calculation change.
Drag-and-drop
Drag a task card horizontally to reschedule it to different dates, or vertically to reassign it to another team member. Changes sync to monday.com in real time.
Capacity & Workload Basics
Each person's daily capacity is the number of hours they're available to work. Workload is the sum of planned hours (from item estimates) against that capacity, shown as a colored indicator on each day: green when under capacity, orange when near it, red when over.
Three things reduce a person's capacity for a given day:
- Work capacity scheme — defines the standard daily hours and which days are working days (for example, 8h Mon–Fri, or a 4-day week). See Work Capacity Schemes.
- Holidays — public holidays and non-working days from the assigned holiday scheme reduce capacity to zero on those days. See Holiday Schemes.
- Approved leave — vacation, sick leave, and other approved time off reduce capacity for the days covered by the request. See Leave Management.
When per-person distribution is enabled in display settings, tasks assigned to multiple people split their hours equally among assignees. For example, a 10-hour task with two assignees counts as 5 hours per person.
Workload indicator modes
The workload overlay offers four indicator modes, each showing a different perspective on your team's load. The default Remaining Estimate mode shows estimated hours minus logged worklogs for today and future days (past days show a dash), giving you a clear view of the work that remains. See Workload Management → Indicator Modes for a full explanation of all modes.
What's Next
Now that you understand the core concepts, explore the features in detail:
- Time Tracking — Log actual work hours against monday.com items and compare planned vs actual effort.
- Timesheets — Submit weekly timesheets for approval and manage the approval workflow.
- Leave Management — Request and approve time off, with leave automatically reflected in capacity calculations.
- Reports — Generate utilization, worklog, leave, and planned-vs-actual reports for data-driven planning.
- Use Cases — See real-world setups for agencies, product teams, and service organizations.
- Worklog Categories — Configure billable and non-billable categories to track invoiceable hours across timesheets and reports.
Start a live chat or email support@reinwok.com.