Overview
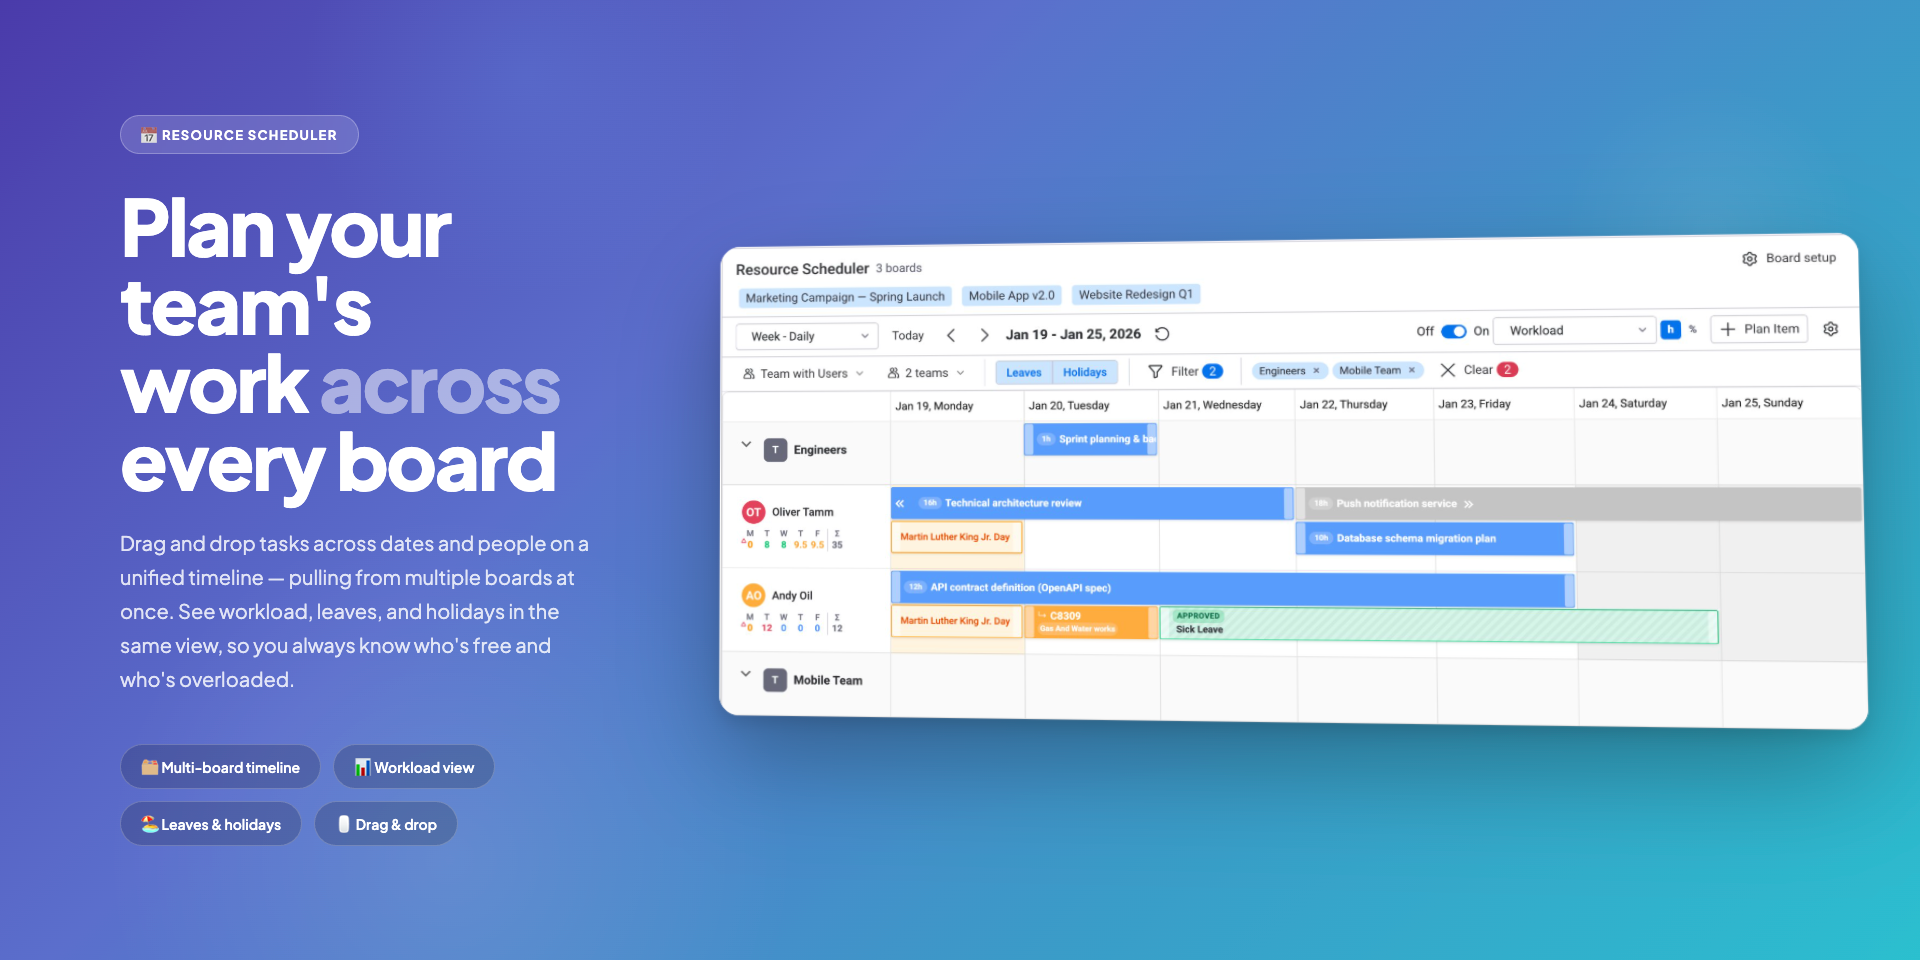
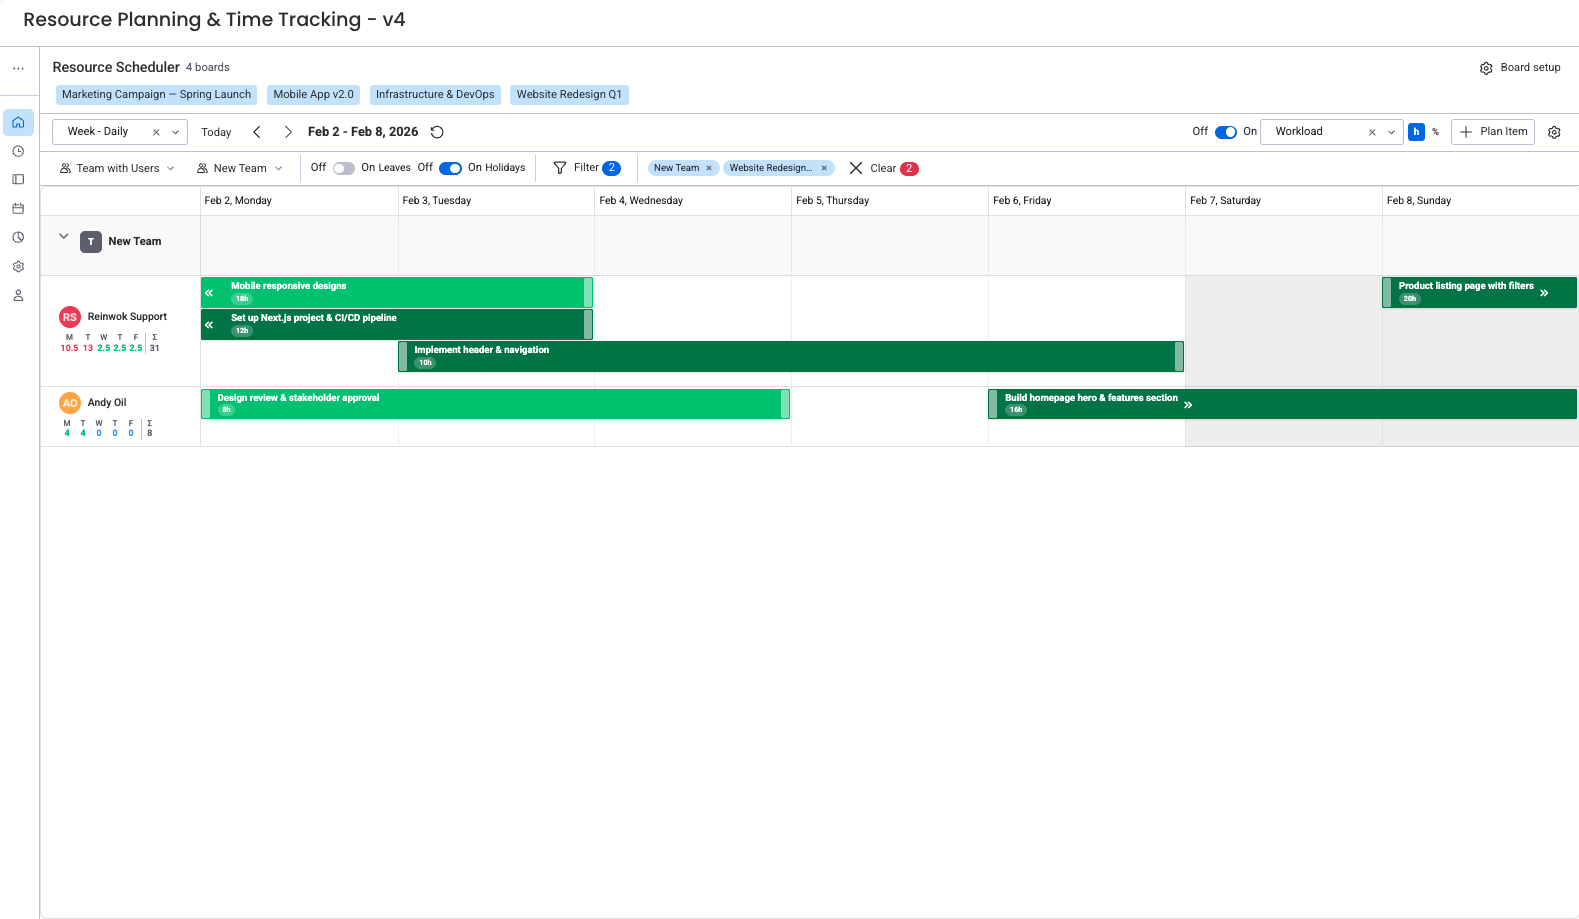
The Resource Scheduler is a Gantt-like calendar that shows your team on the left and dates across the top. Tasks appear as colored bars positioned by their timeline dates and assigned person.
Drag tasks to new dates or different people, resize bars to change duration, and create new items right on the calendar. Every change syncs back to monday.com in real time.
Accessing the Scheduler
Board View
Add the scheduler as a view on any board. Click the + button next to your existing views, search for "WorkHub: Plan, Track & Report" in the Apps section, and select it. The scheduler shows items and people from that board only.
Workspace View
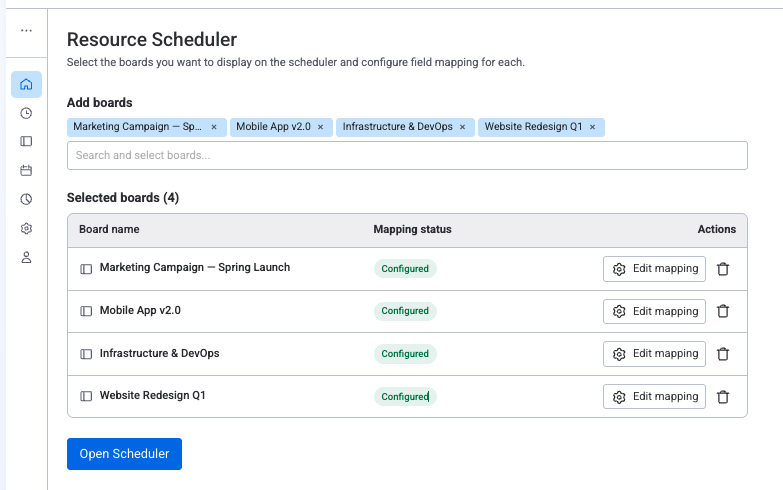
Open the WorkHub app from your workspace sidebar and click Scheduler. This view pulls items from multiple boards, giving you one planning surface for the whole workspace.
Opening without boards (leaves-only mode)
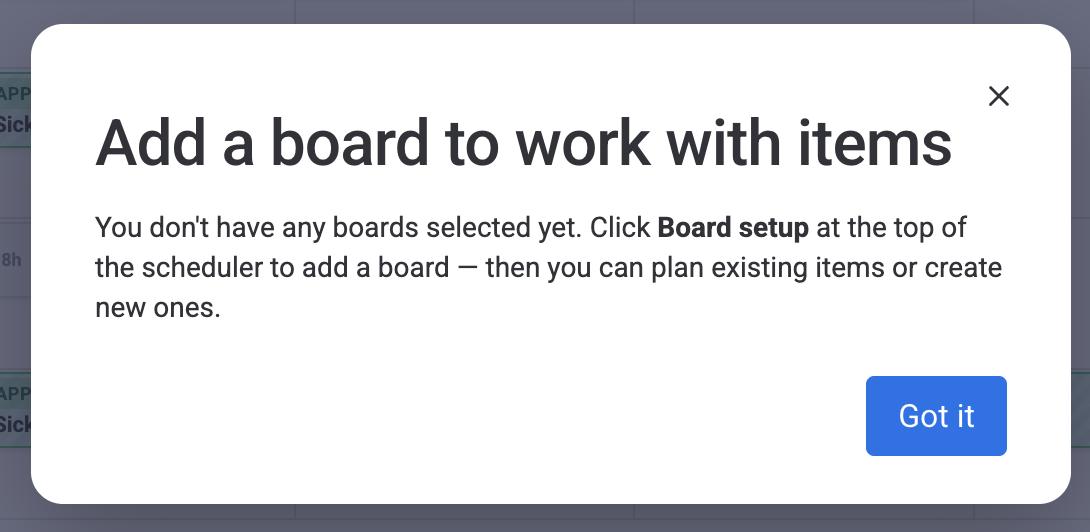
You don't need any boards configured to use the scheduler. Click Open Scheduler with no boards selected and confirm the dialog — the scheduler opens in leaves-only mode, showing your team's roster with holidays and existing leaves. You can request leave, log work, and see holidays without any board configuration.
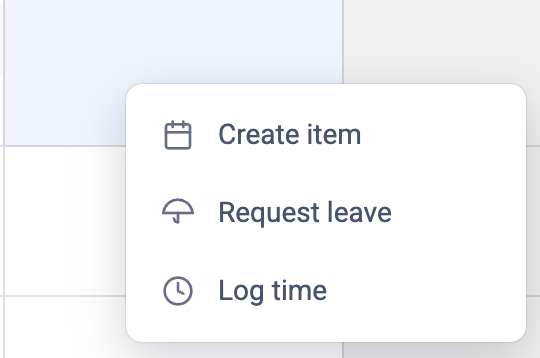
Clicking an empty cell on a person's row opens a small menu with three actions: Create item, Request leave, and Log time (see Creating Tasks for full details). In leaves-only mode, Request leave and Log time work normally — they only need a user and a date. Create item and the top-right + Plan Item button instead show a prompt asking you to add a board via Board setup, since item planning requires a board to write to.
View Modes
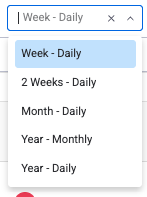
Switch between five view modes using the dropdown in the toolbar. Each mode changes how much time the calendar displays.
Week (Daily)
Shows 7 days with one column per day. This is the default view and the best choice for daily planning and stand-ups.
2 Weeks (Daily)
Extends to 14 days while keeping daily columns. Useful for seeing a full sprint plus the next one.
Month (Daily)
Displays the full month with daily columns. Task bars are more compact. Good for spotting bottlenecks and reviewing monthly capacity.
Year (Monthly)
Shows the entire year with one column per month. Gives a high-level view of long-term resource allocation and project timelines.
Year (Daily)
Shows the full year with daily columns. The most granular long-range view. Helpful for finding gaps and overlaps in annual planning.
Group-By Modes
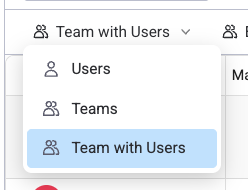
The scheduler toolbar includes a group-by dropdown that controls how rows are organized. There are three modes:
Users
The default mode. Each row represents one person. All items assigned to that person appear on their row regardless of team membership. Best for day-to-day planning when you need to see individual assignments.
Teams
Rows are grouped by monday.com teams. Each team appears as a collapsible section header, with the combined items of all team members shown underneath. Useful for managers reviewing capacity across multiple squads without seeing individual breakdowns.
Teams with Users
Team headings with individual user rows nested inside each team. Gives both the team-level overview and per-person detail in one view. This is the most common mode for team leads who need to see both team capacity and individual assignments.
Displaying Multiple Teams
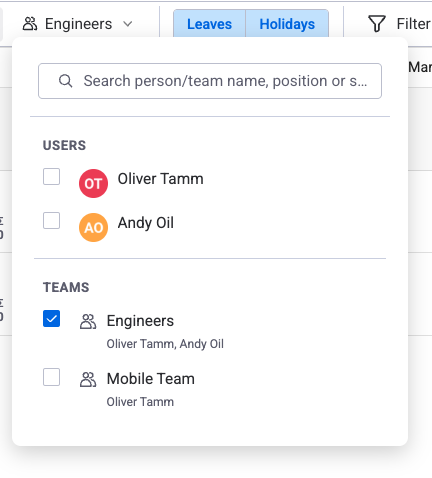
You can select multiple teams in the Team filter to display several teams side by side on the scheduler. This is useful for cross-team planning, comparing workload between departments, or getting a full picture during resource allocation meetings.
Assigning Items to Teams
In monday.com, items can be assigned to a team in addition to individual users. When an item is assigned to a team, it appears on the team's row in the scheduler (visible in Teams or Teams with Users mode).
To reassign a team-level item to a specific person, simply drag it from the team row to an individual user's row. The People column on the board updates automatically. This workflow lets managers assign work at the team level first and then distribute it during planning sessions.
Use the Assignee and Team filter dropdowns in the toolbar to narrow which users or teams are visible on the scheduler.
Toolbar Filters
The scheduler toolbar provides several filters to customize what's visible:
- Assignee filter — select specific people to show on the scheduler. Unselected users are hidden.
- Team filter — select specific teams. Works in combination with the group-by mode.
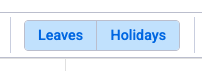
- Leaves toggle — when enabled, approved leave days appear as colored blocks on the scheduler. Toggling off hides the visual blocks but workload indicators always count leave regardless — this is a visual-only change.
- Holidays toggle — when enabled, holiday days (from assigned holiday schemes) appear on the scheduler. Toggling off hides them visually but workload calculations still account for holidays.
Task Cards
Each task appears as a colored bar on the calendar. A card shows:
- Task name from the monday.com item.
- Scheduled hours from the mapped Numbers column (either total hours divided across the timeline, or hours per day used directly — see Field Mapping for how these differ).
- Bar length matching the item's start and end dates.
- Color based on the active color schema.
- Assignee avatars for quick identification.
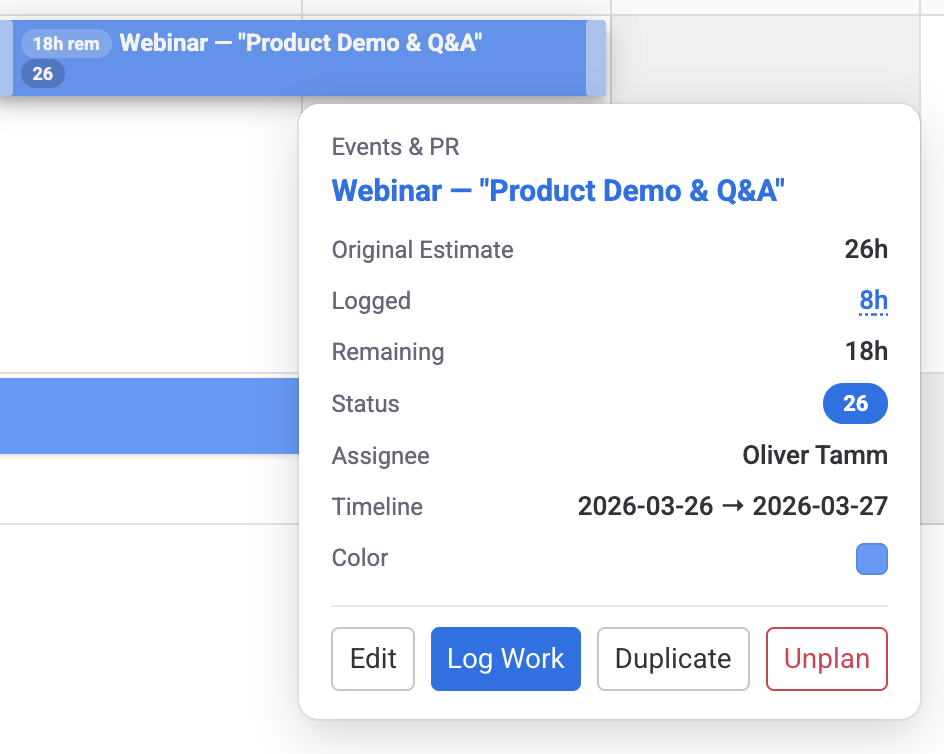
Click a card to see a tooltip with the board path, item name, and key metrics. When a remaining-estimate mode is active (Remaining Estimate or Availability), the tooltip shows:
- Original Estimate — the total estimated hours for the item.
- Logged — total hours tracked (click to open the View Worklogs dialog).
- Remaining — hours left (Original Estimate minus Logged).
- Your Allocation — your share of remaining hours (shown when the item has multiple assignees).
The tooltip also shows Status, Assignee, Timeline, and has four action buttons: Edit, Log Work, Duplicate, and Unplan (with confirmation).
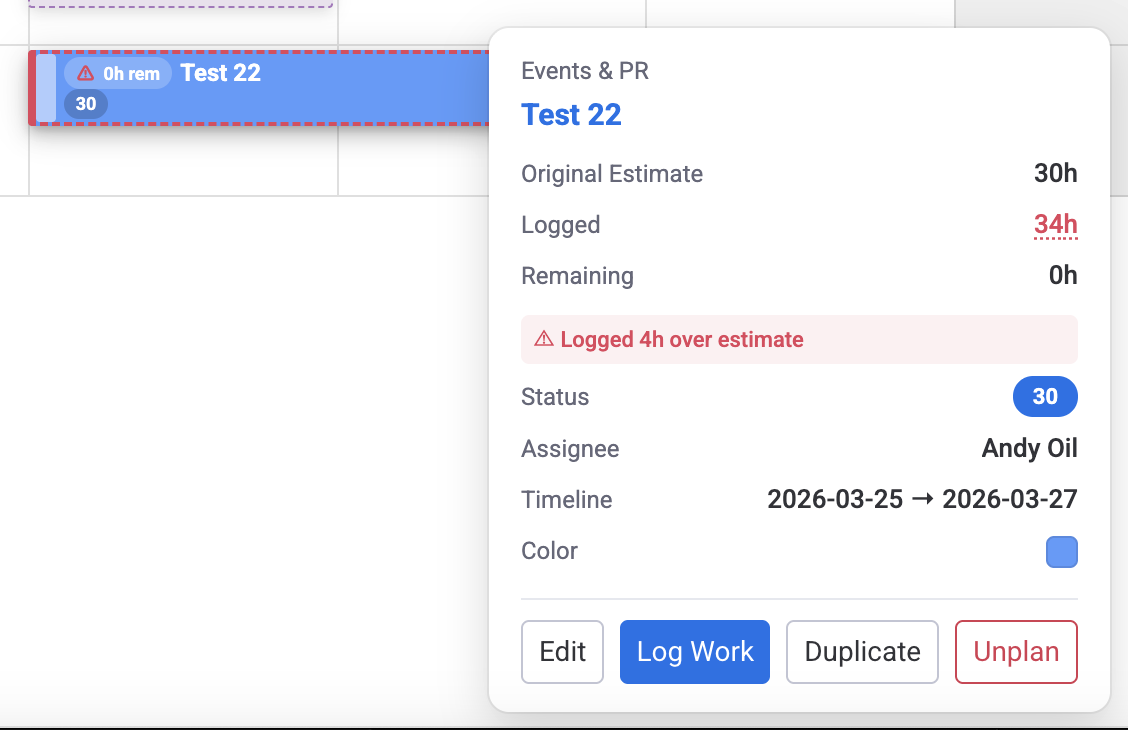
Overlog Warning
When logged hours exceed the Original Estimate, the task bar shows a red dashed border and a warning triangle icon. The tooltip displays a red warning: "Logged Xh over estimate". Remaining shows 0h.
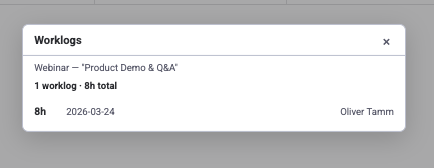
View Worklogs Dialog
Click the Logged link in the item tooltip to open a centered dialog listing all worklogs for that item (not limited to the visible date range). Each entry shows hours, date, user name, and description. Sorted newest first.
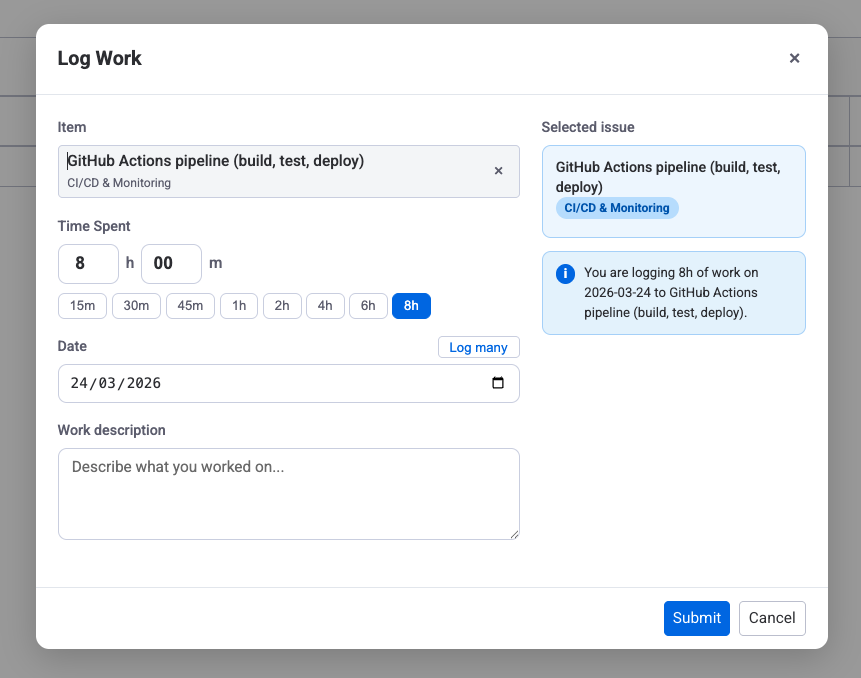
Log Work
The Log Work dialog is the main way to record time against an item. It can be opened from the task tooltip on the scheduler (the item is pre-selected), from the Time Tracking workspace (you pick the item yourself with the item search), or from the worklog event on the timeline. The dialog has the following fields:
- Item — only shown when no task is pre-selected. Search across boards and pick the item you want to log against.
- Time Spent — enter hours and minutes manually, or use the quick-pick buttons (15m, 30m, 45m, 1h, 2h, 4h, 6h, 8h). Defaults to 8h.
- Date — defaults to today. Toggle Log many to switch to a date range; the dialog will create one worklog per working day (Mon–Fri) in the range, applying the same hours to each day. Weekends are automatically excluded and the hint shows how many working days will be created.
- Category — optional worklog category dropdown. Hidden when only one category exists; when multiple are configured the default category is pre-selected. Categories are managed in Settings.
- Work description — optional free-text note describing what was done. Stored with the worklog and shown in the View Worklogs dialog, tooltips, and reports.
The right side of the dialog shows the Selected issue card (item name, assignee, status, original estimate) and a live summary sentence — for example, "You are logging 4h of work on 2026-04-10 to Task X", or in log-many mode "You are logging 4h/day for 5 working days (2026-04-06 to 2026-04-10) to Task X. Total: 20h".
App admins (and monday.com admins) can additionally log work on behalf of another user from the scheduler — when in this mode an info banner at the top of the dialog identifies whose timesheet the worklog will be saved to. Worklogs created here flow into the Time Tracking module, into the user's timesheet, and into all reports that include logged hours. They cannot be created against days that fall inside an already-approved timesheet.
Drag and Drop
All drag-and-drop changes sync to monday.com columns immediately.
Horizontal Drag (Reschedule)
Drag a card left or right to move it to different dates. The duration stays the same; only the start and end dates shift.
Vertical Drag (Reassign)
Drag a card up or down to a different person's row. The People column updates to the new assignee.
Resize
Grab the right edge of a card and drag to extend or shorten the end date. The start date stays fixed.
Ctrl/Cmd + Drag (Add Assignee)
Hold Ctrl (Windows/Linux) or Cmd (Mac) while dragging to another person's row. This adds that person as an additional assignee instead of replacing the original one. Hours are split equally between all assignees.
Cell quick actions
Click any empty cell on the scheduler to open a small menu with three actions: Create item, Log time, and Request leave. You can also drag across several cells to pre-fill a date range — the dialog that opens uses the full range as its default timeline or date selection. These actions work in both Workspace View and Board View.
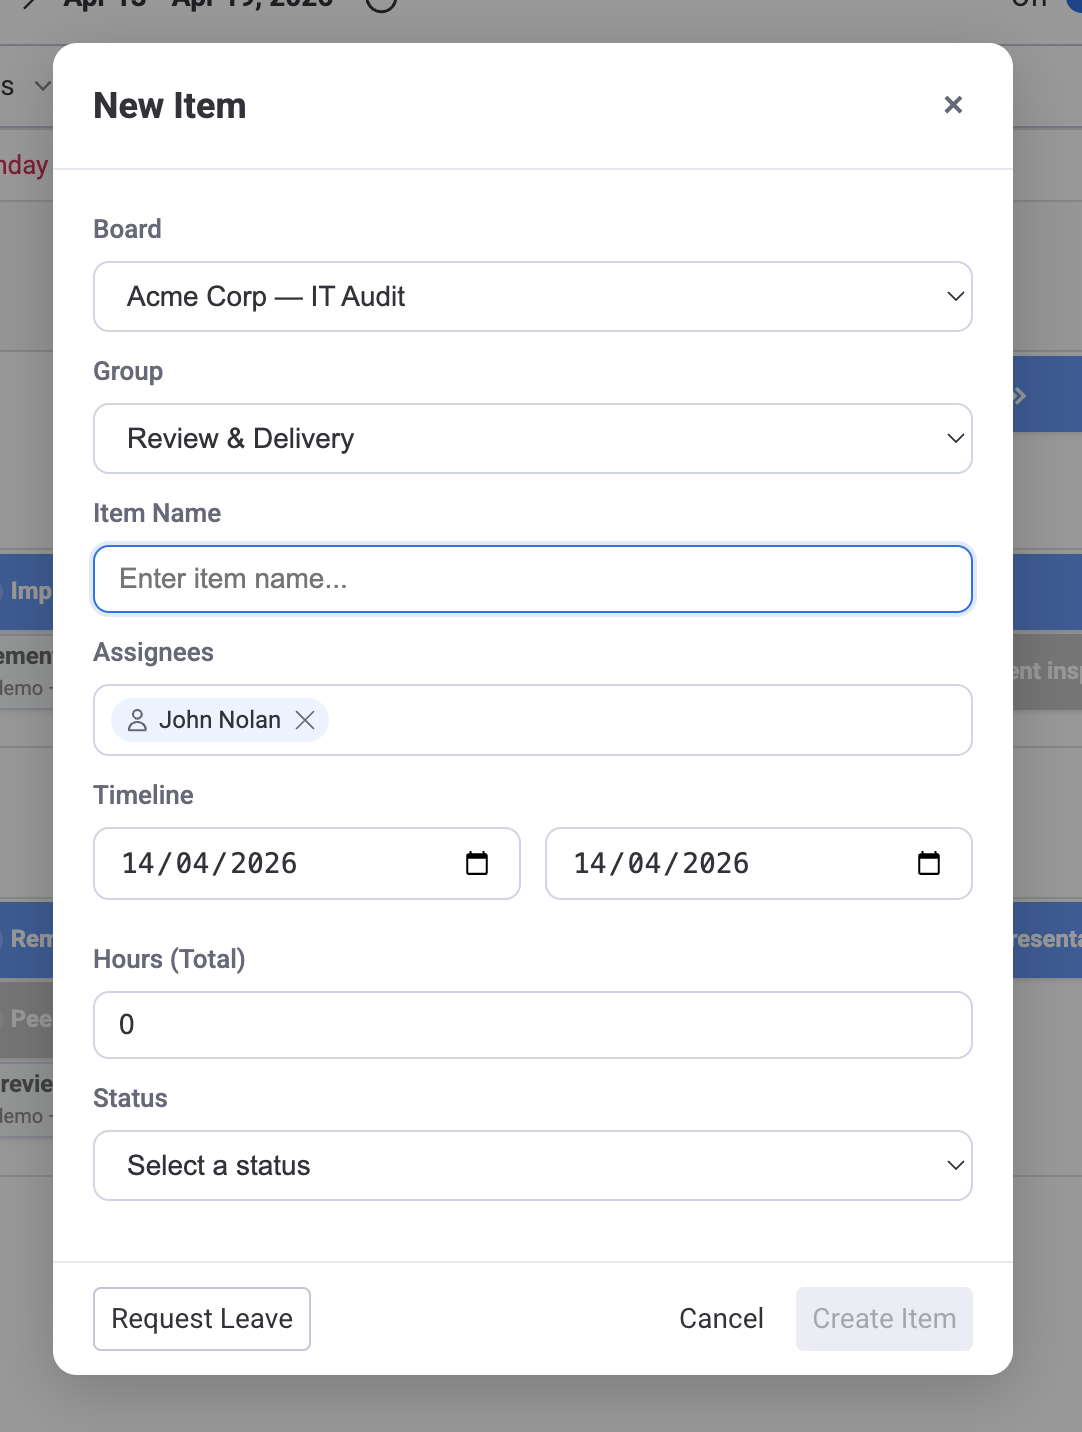
Create item
Opens the New Item dialog pre-filled with the assignee and the selected date (or full date range when you drag-selected). Fill in the name, pick a group, adjust hours or status, then click Create Item. The new item appears on the board and scheduler immediately.
Whether the new row is a main item or a subitem follows the board's Item Level setting:
- Main items only — the dialog creates a main item on the board.
- Sub-items only — a Parent Item search field appears; type to find the main item and pick from the autocomplete list. The new subitem is created under that parent.
- Both main & sub-items — the dialog shows two tabs, Item and Subitem. "Item" is selected by default; switch to "Subitem" and pick a parent to create a subitem instead.
On team rows: when the scheduler is grouped by teams, clicking an empty cell on a team row shows only Create item. The New Item dialog opens with the team pre-selected as the assignee. Log time and Request leave don't appear on team rows because teams don't log work or take leave.
Log time
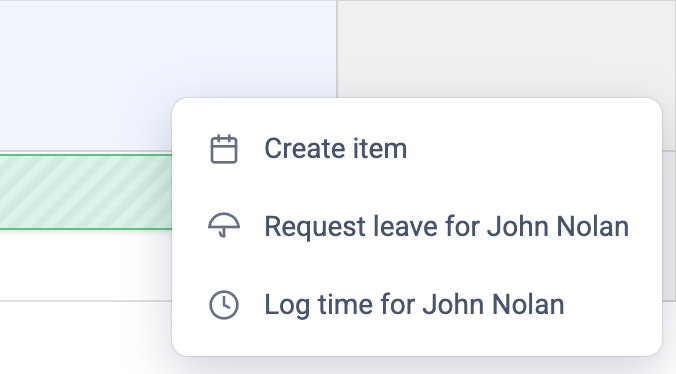
Opens the Log Work dialog pre-filled with the selected date(s) and user. On your own row the menu reads Log time. On another user's row the menu reads Log time for {name}, but the on-behalf action only actually logs against that user if you are an Admin or App Admin.
When you drag across multiple days the dialog switches to multi-day mode. It logs the same hours on each weekday in the range — Saturday and Sunday are skipped, but the hours are not split or redistributed. For example, logging 4h across Mon–Fri creates a 4h worklog on each of the five days for a total of 20h. Holidays and approved leave days are not excluded automatically — review the range before submitting.
See Time Tracking for the full workflow, including editing and deleting worklogs.
Request leave
Opens the leave request form pre-filled with the clicked date (or full range when you drag-selected). On your own row the menu reads Request leave. On another user's row it reads Request leave for {name} and creates the request on their behalf — this is available to App Admins (who can request leave for anyone) and to a user's assigned leave approver (who can only request leave for users they approve for). Approval of the request still follows the normal approver chain.
See Requesting leave from the Scheduler for the step-by-step.
Close the menu by clicking outside it or pressing Esc. When the current view has no boards mapped (for example, a freshly installed Workspace View where the scheduler is showing only leaves and holidays), Create item opens a prompt pointing you to Board setup — you need at least one mapped board before you can create items. Log time and Request leave still work in that state.
Item Box (Plan Item)
Click + Plan Item in the toolbar to open the Item Box, a slide-out panel on the left side. It lists items from your board so you can search, filter, and drag them onto the schedule.
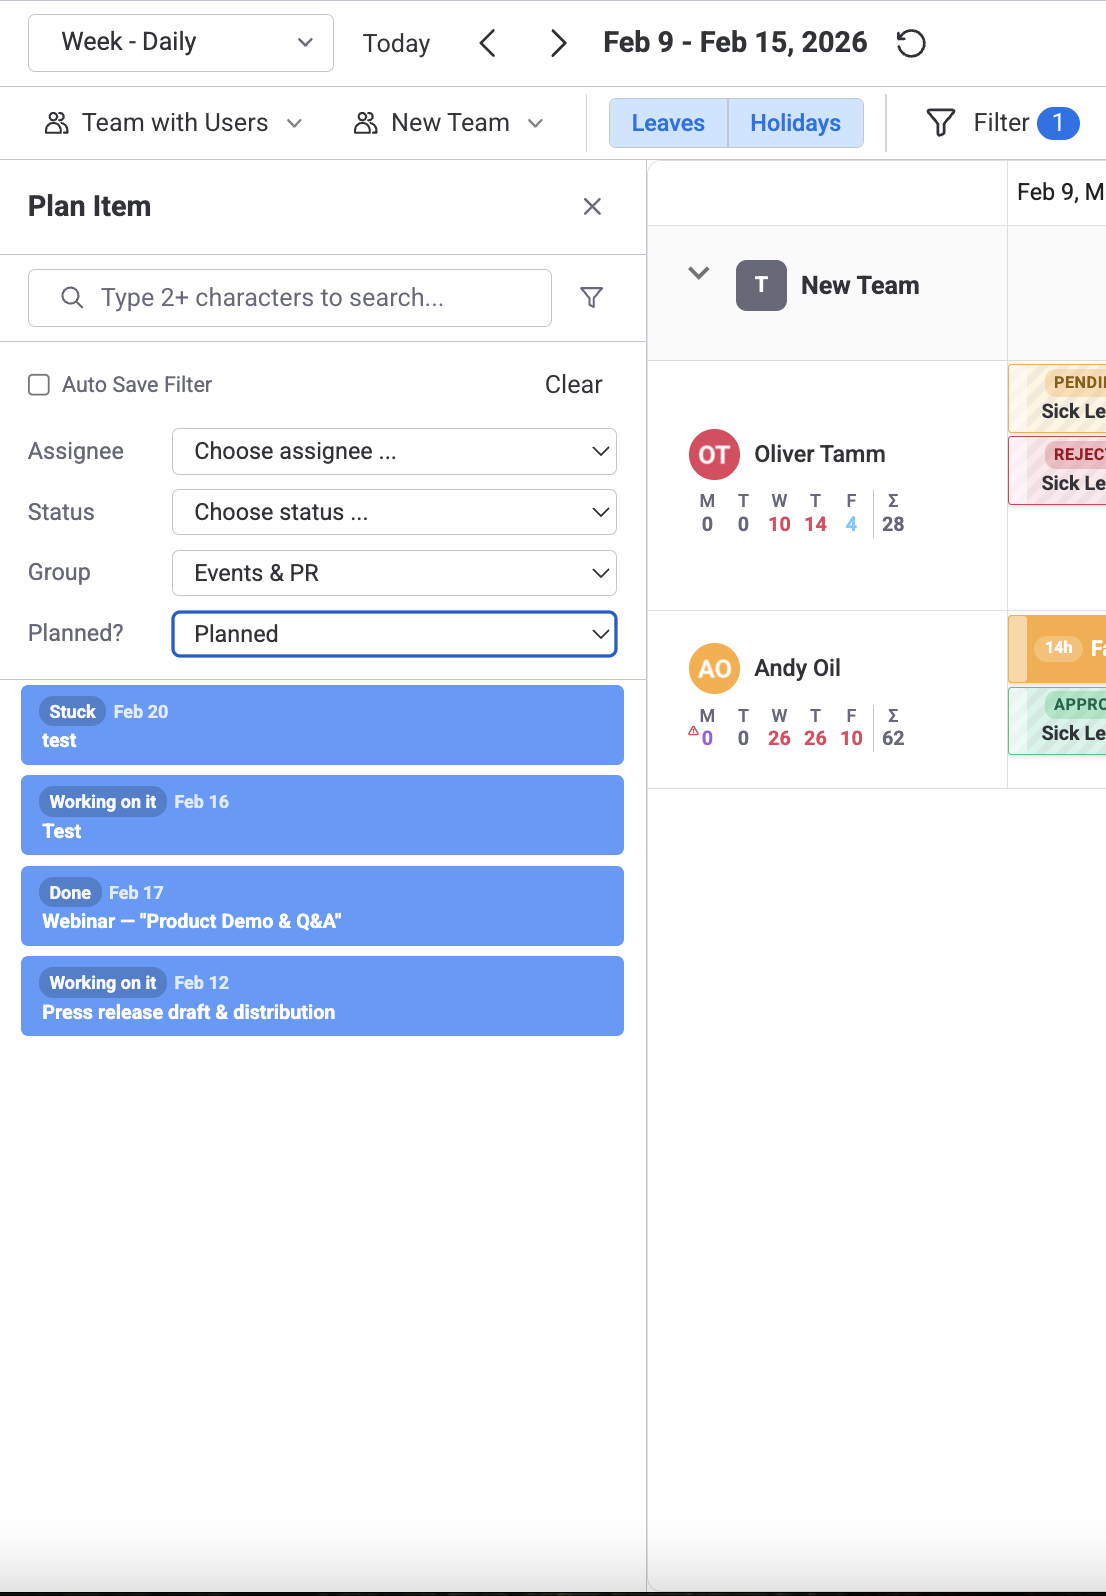
Filtering
The Item Box provides filters for Assignee, Status, Group, and Planned state. Set the Planned filter to "Unplanned" to find items that have not been scheduled yet.
Drag to Schedule
Drag an item from the list and drop it on a person's row at the desired date. The item's Timeline and People columns update automatically and the task appears on the grid.
Color Schemas
Task card colors help you identify categories at a glance. Open Board Settings (the icon) to choose a color source.
Status
Cards match the mapped Status column values. For example, "Working on it" is orange, "Done" is green, and "Stuck" is red. Best for tracking progress.
Group
Cards use the monday.com group color for each item. Useful for seeing which project phase a task belongs to.
Color Picker
If you have a Color Picker column, each item can have a manually chosen color. Use this when you want full control over card colors.
Keyboard Shortcuts
| Shortcut | Action |
|---|---|
| Ctrl/Cmd + Drag | Add an additional assignee (hours split equally) |
| Escape | Close any open dialog or deselect tasks |
On macOS use Cmd; on Windows and Linux use Ctrl. Shortcuts work in both Board View and Workspace View.
Related Pages
- Workload Management — Capacity indicators and overallocation alerts
- Getting Started — Initial setup and column mapping
- Settings — Column mappings, color schema defaults, and preferences