Settings Overview
WorkHub has two levels of configuration. Each level is scoped to a different audience.
| Level | Scope | Who can access | What it controls |
|---|---|---|---|
| App Settings | Account-wide | Admin, App Admin | Nine tabs: Boards, Permissions, Leave, Timesheet Access, Timesheet Config, Workload, Capacity, Holidays, Worklog Categories |
| My Account | Per-user | All users (read-only) | Your assigned leave approver, timesheet approver, and capacity scheme |
Your monday.com account Admin has full control over the plugin. They can also designate App Admins — users who can manage plugin settings without needing full monday.com account admin access. Throughout this page, "Admin" refers to the monday.com account Admin, and "App Admin" refers to users granted plugin-level admin rights.
Board Configuration
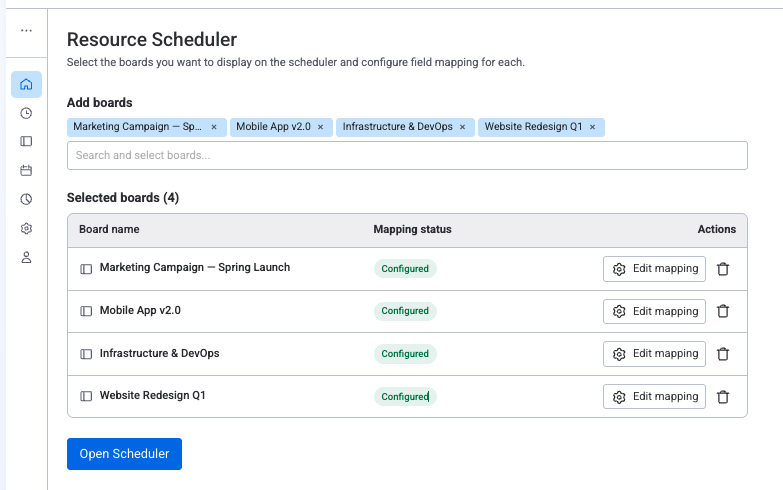
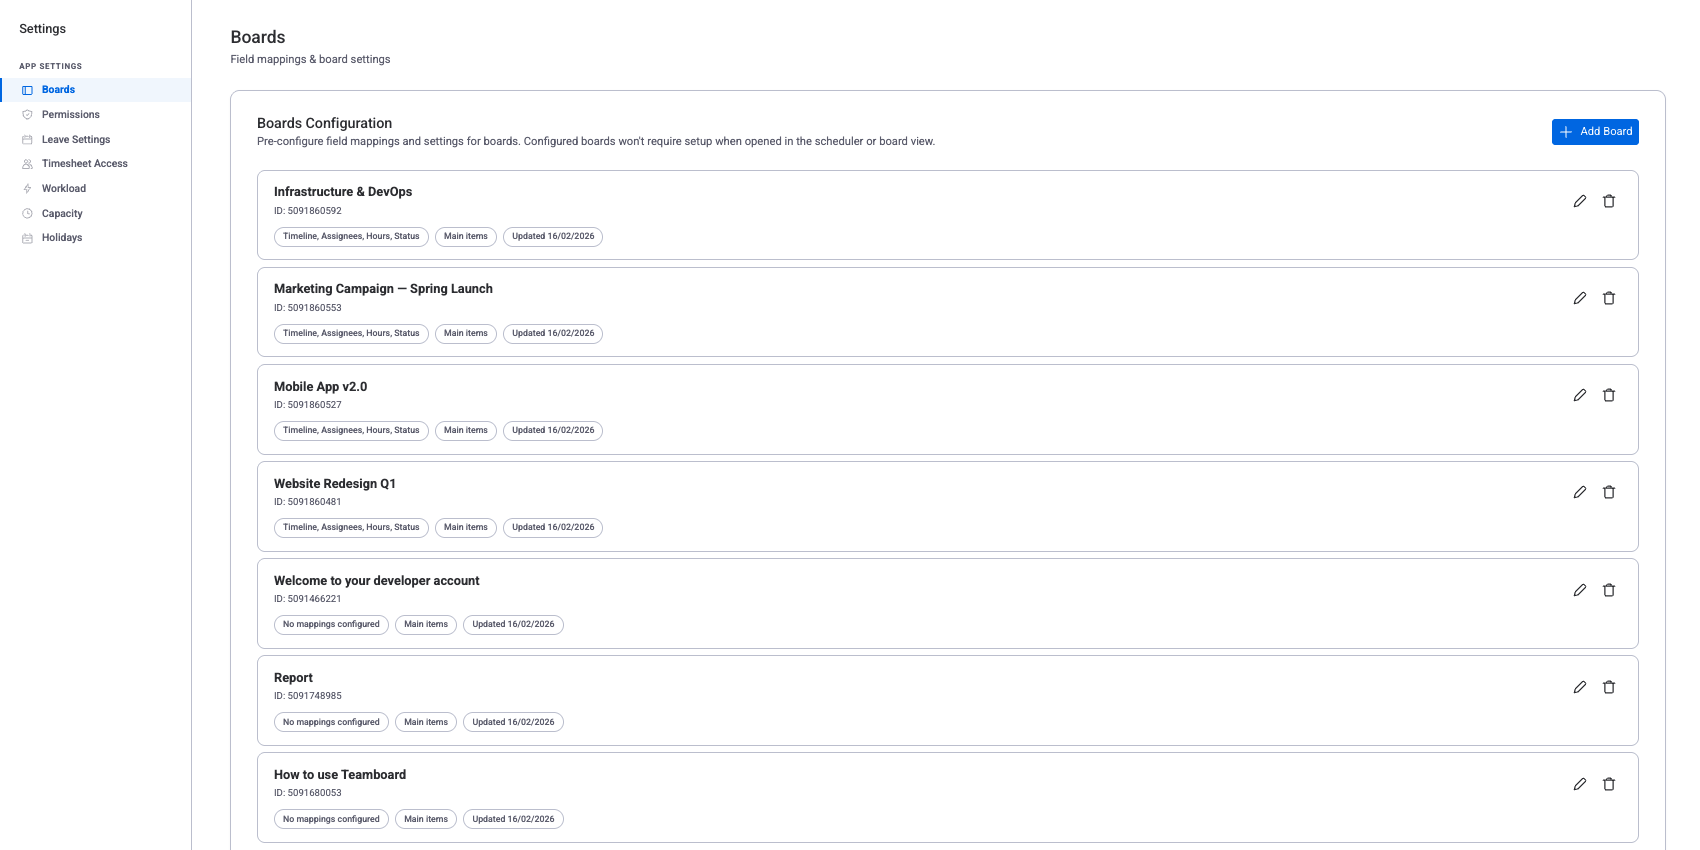
The Boards tab in App Settings shows a paginated list of every board that has been configured for the plugin. Use this tab to pre-configure field mappings and display options so a board is ready to use in the scheduler or board view without setup each time.
| Action | Description |
|---|---|
| Add Board | Search for a monday.com board and create a new configuration for it |
| Edit | Open the board settings editor to configure field mappings and display options |
| Delete | Remove a board configuration. The monday.com board itself is not affected; it will need to be reconfigured when next used in the plugin. |
Each board card in the list shows the board name, mapped fields (for example, "Timeline, Assignees, Hours, Status"), the item level setting, and the last-updated date.
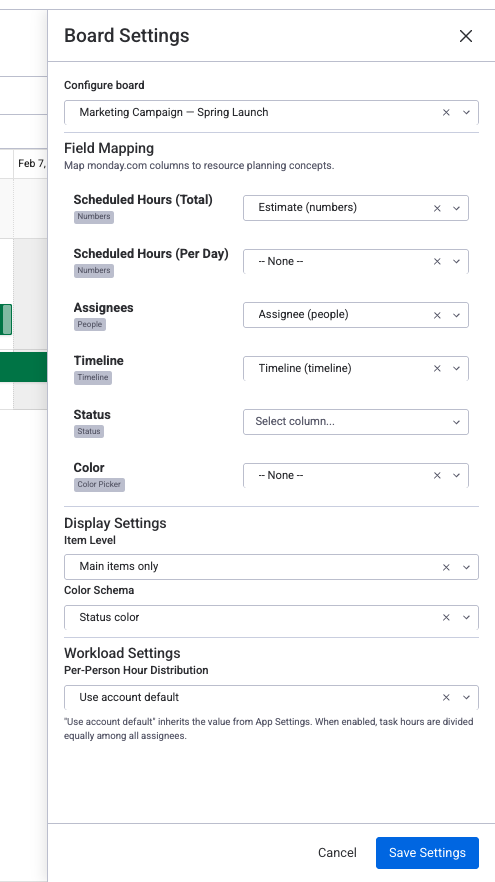
Field Mapping
Field mapping tells the plugin which monday.com columns correspond to plugin concepts such as scheduled hours, assignees, and timelines. Click Edit on any board to open the board settings editor.
| Plugin Field | monday.com Column Type | Required | Description |
|---|---|---|---|
| Original Estimate | Numbers | Yes (one or both) | Total hours allocated to the task across its entire timeline |
| Hours Per Day | Numbers | Yes (one or both) | Hours allocated per working day. When both columns are mapped, this field takes precedence over Original Estimate. |
| Assignees | People | Yes | Who is assigned to work on the task |
| Timeline | Timeline | Yes | Start and end dates for the task |
| Status | Status | No | Task status (Done, Working on it, etc.) |
| Color | Color Picker | No | Manual color for task cards |
You can map one or both hour columns. The choice determines how workload is distributed across a task's timeline:
- Scheduled Hours only — the total hours are divided evenly across the working days in the task's timeline. Example: a 16h task spanning Mon–Thu (4 working days) = 4h/day.
- Scheduled Hours per Day only — the per-day value is used directly for each working day in the timeline.
- Both mapped — the Hours per Day column takes precedence. The Scheduled Hours column is used as a fallback only when the per-day value is empty or zero.
For detailed examples and guidance on which to choose, see Scheduled Hours vs Hours Per Day in Getting Started.
See it in action: Getting Started — Step 3: Configure Field Mapping
Sub-item Field Mapping
When the Item Level is set to "Sub-items only" or "Both main & sub-items," a separate Sub-item Field Mapping section appears. Sub-items live on a different internal board in monday.com, so they have their own columns that need to be mapped independently.
The same six fields (Scheduled Hours, Scheduled Hours per Day, Assignees, Timeline, Status, Color) are available for sub-item mapping.
Display Settings
Control how items appear on the scheduler. These settings are part of the board settings editor.
| Setting | Options | Description |
|---|---|---|
| Item Level | Main items only, Sub-items only, Both main & sub-items | Choose which items the scheduler displays |
| Color Schema | Color Picker column, Group color, Status color | Determines how task card colors are assigned |
Workload Settings (Per Board)
Each board can control how scheduled hours are distributed for workload calculations.
| Option | Behavior |
|---|---|
| Use account default | Inherits the value from the Workload tab in App Settings. Recommended for most boards. |
| Enabled | Task hours are divided equally among all assignees. A 10h task with 2 assignees = 5h each. |
| Disabled | Each assignee gets the full task hours counted toward their workload. |
A project board might have the following settings configured:
- Original Estimate → "Estimate" (Numbers column)
- Hours Per Day → "Daily Hours" (Numbers column)
- Assignees → "Person" (People column)
- Timeline → "Timeline" (Timeline column)
- Status → "Status" (Status column)
- Item Level → Main items only
- Color Schema → Status color
- Per-Person Distribution → Use account default
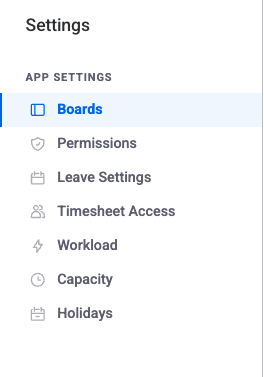
App Settings (Admin Only)
App Settings are global configurations that apply across your entire monday.com account. The settings panel is organized into seven tabs. The Boards tab is covered in the Board Configuration section above. The remaining tabs are described below.
| # | Tab | Purpose |
|---|---|---|
| 1 | Boards | Field mappings and board display settings |
| 2 | Permissions | Roles and access control |
| 3 | Leave Settings | Leave types and approver assignments |
| 4 | Timesheet Access | Timesheet viewers and approvers |
| 5 | Timesheet Config | Approval workflow and period settings |
| 6 | Workload | Default workload settings |
| 7 | Capacity | Work capacity schemes |
| 8 | Holidays | Holiday calendar schemes |
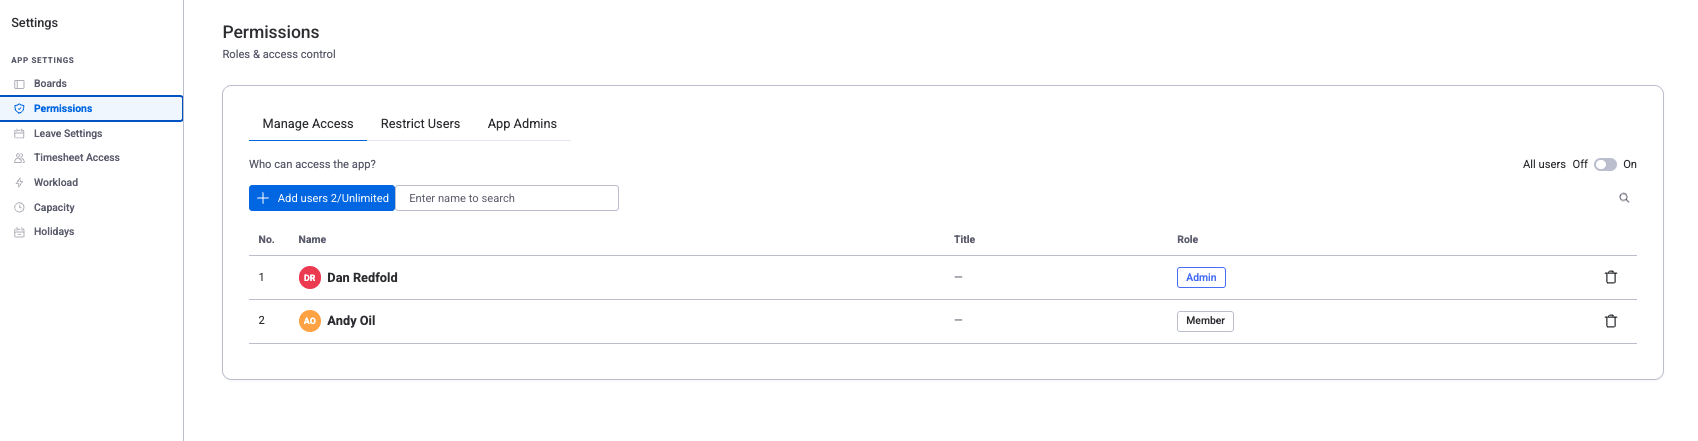
Permissions
The Permissions tab contains three sub-tabs for managing user access and roles. For the full permission system — including user roles, timesheet approval, leave approval, and the complete role matrix — see Permissions & Access.
| Sub-tab | Description |
|---|---|
| Manage Access | Toggle "All Users" to grant access to everyone, or individually add and remove users when the toggle is off. |
| Restrict Users | Block specific users from accessing the plugin entirely. Restricted users cannot see any plugin views or data. |
| App Admins | Designate users who receive full app-level permissions, including the ability to manage all settings, schemes, and other users. |
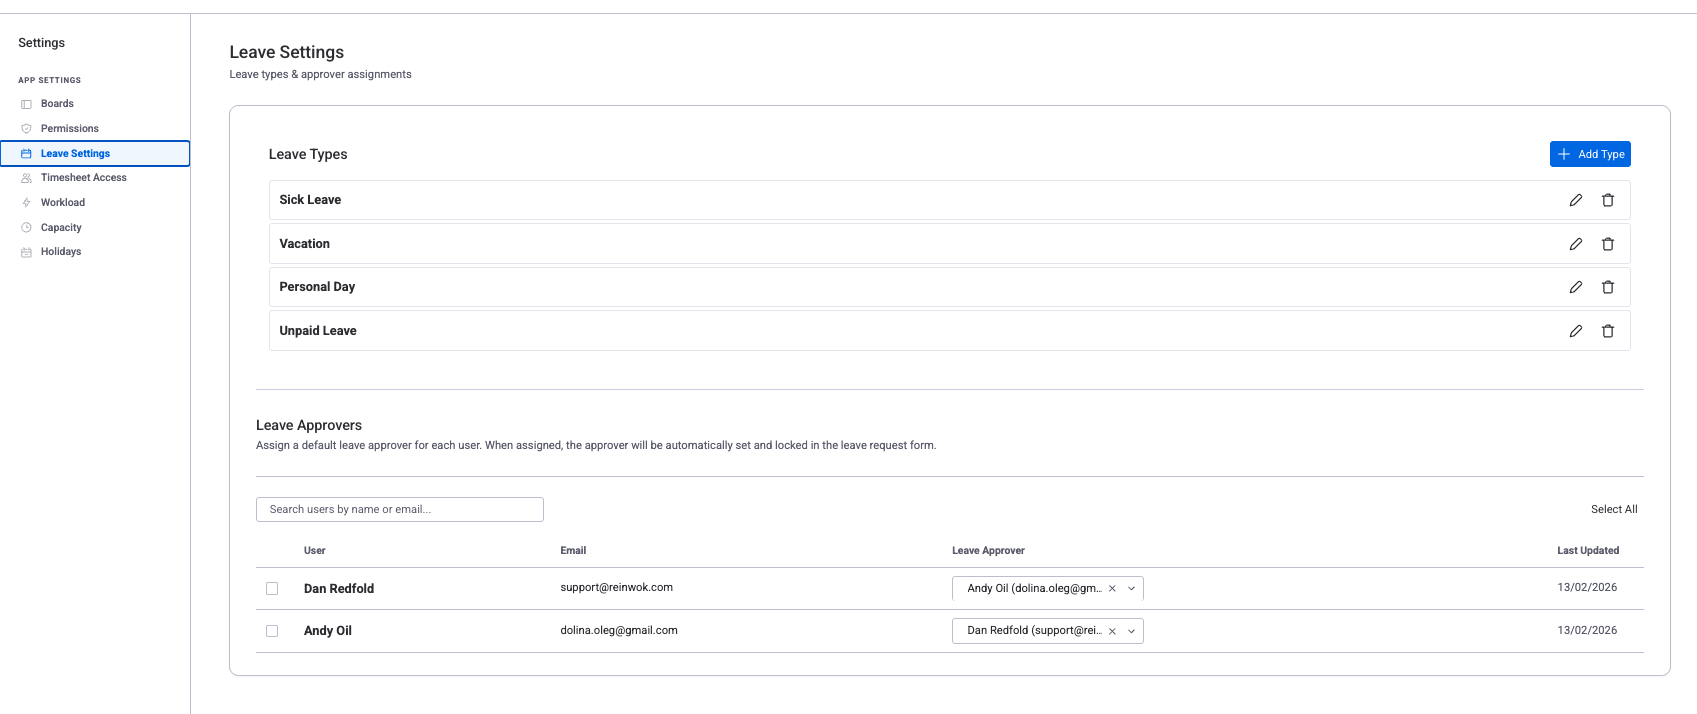
Leave Configuration
The Leave Settings tab has two sections: Leave Types and Leave Approvers.
Leave Types
Create and manage leave categories that users select when submitting leave requests.
| Field | Description |
|---|---|
| Name | The label shown in the leave request form (for example, "Annual Leave," "Sick Leave," "Parental Leave") |
| Description | Optional text describing the leave type |
Use the Add Type button to create a new leave type. Existing types can be edited or deleted using the action icons on each row.
Leave Approvers
Assign a default leave approver for each user. When an approver is assigned, it is automatically set and locked in the leave request form so the user cannot change it.
- Per-user assignment — Each row shows a user and a dropdown to select their leave approver.
- Search — Filter the user list by name or email.
- Bulk assign — Select multiple users with checkboxes, then assign the same approver to all of them in one action.
Timesheet Access
Configure who can approve and view timesheets. Approvers automatically get view access; use the Viewers sub-tab to grant view-only access to additional users. See Permissions & Access › Timesheet Permissions for a detailed explanation.
Approvers
The Approvers sub-tab has two sections: Rules and Per-User Assignments.
| Section | Use case | Fields |
|---|---|---|
| Rules | Team-wide or workspace-wide approver assignments | Target (All users or a specific team) and Grantee (user or team who receives approval rights) |
| Per-User Assignments | One-off assignments that do not fit a team-wide rule | Multi-select users and approvers; search by name or email |
When determining who can approve a user's timesheet, the system checks rules in this order:
- Per-user assignment — direct user-to-approver mapping (highest priority)
- Per-team rule — team-level approver assignment
- All-users rule — workspace-wide approver assignment (lowest priority)
Admins always have implicit approval rights regardless of these rules.
Viewers
Grant view-only access to timesheets without approval privileges.
- Approvers (read-only list) — Shows users and teams that already have view access because they are configured as approvers. Manage them in the Approvers sub-tab.
- Additional Viewers — Add users who should see all timesheets but do not need approval rights (for example, HR managers, finance team members, or project coordinators).
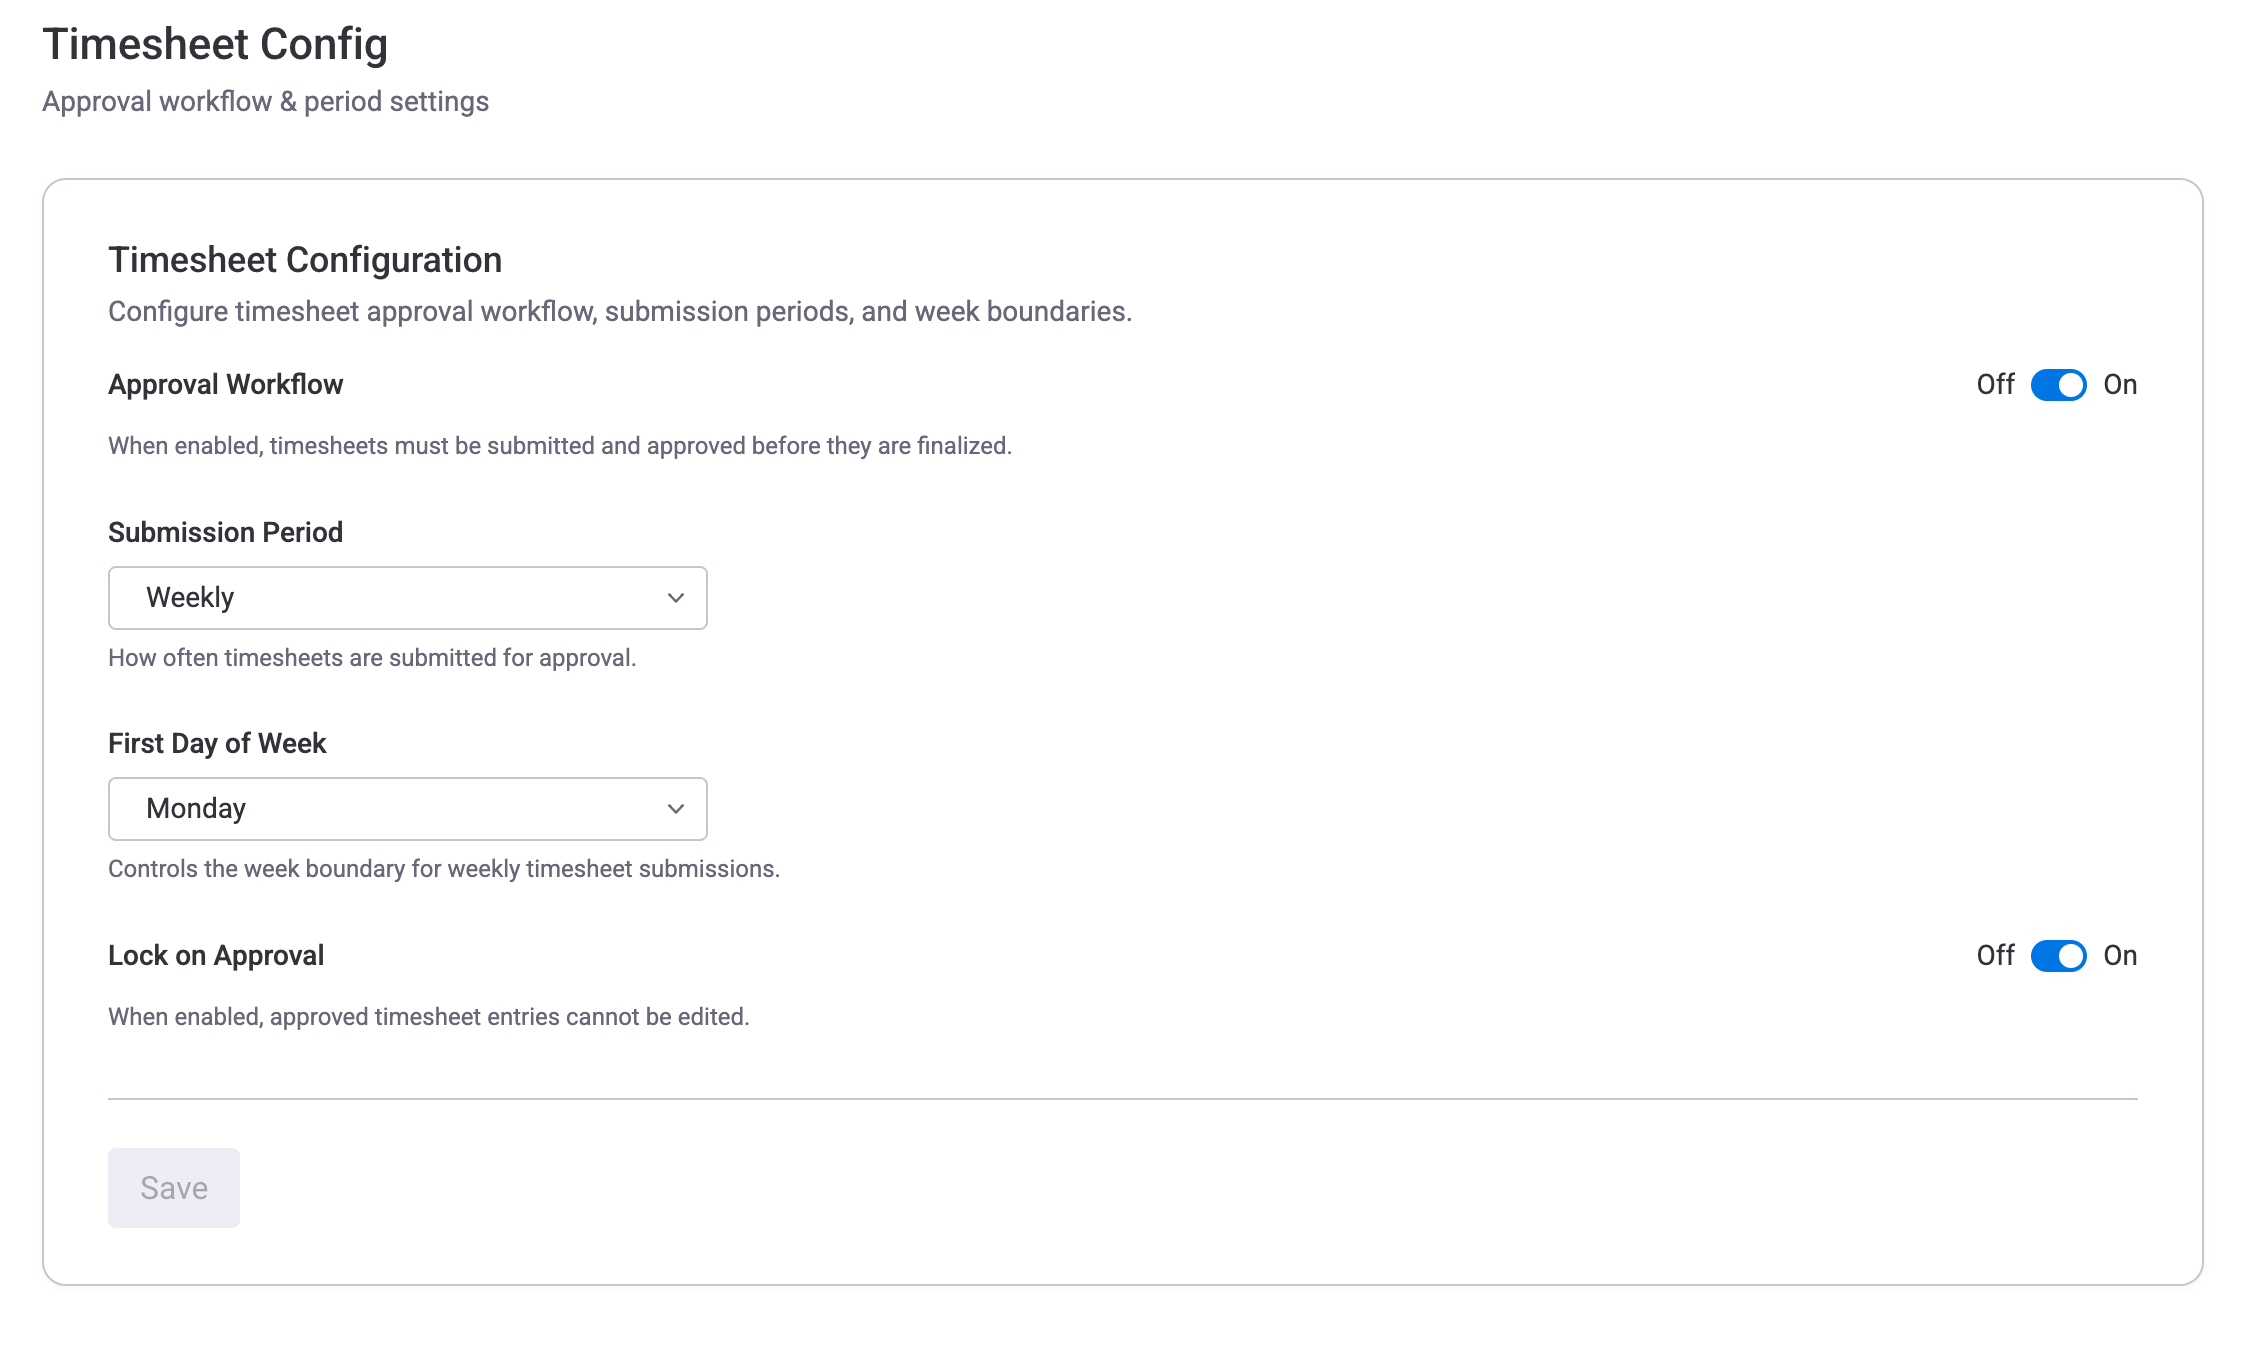
Timesheet Config
Configure the timesheet approval workflow, submission periods, and week boundaries. These settings control how timesheets are submitted, reviewed, and locked across the organization.
| Setting | Options | Description |
|---|---|---|
| Approval Workflow | On / Off | When enabled, timesheets must be submitted and approved before they are finalized. When disabled, the Submit for Approval button and all approval-related UI are hidden from the Time Tracking tab, and worklog locking is turned off — users can freely edit entries at any time. |
| Submission Period | Weekly / Monthly | How often timesheets are submitted for approval. When set to Weekly, users submit one timesheet per week. When set to Monthly, users submit one timesheet per calendar month. |
| First Day of Week | Monday / Sunday / Saturday | Controls the week boundary for weekly timesheet submissions. For example, setting this to Sunday means a weekly period runs Sunday through Saturday. This setting also controls which day the Time Tracking tab starts its week view on when approval is enabled. See First Day of Week below for the full explanation. |
| Lock on Approval | On / Off | When enabled, worklog entries are locked (read-only) as soon as a timesheet is submitted for approval, and remain locked after approval. When disabled, entries are only locked after the timesheet is approved — users can still edit worklogs while the timesheet is pending review. |
Disabling the Approval Workflow does not delete any existing timesheet submissions. If you re-enable it later, previously approved or submitted timesheets will still be visible.
First Day of Week
WorkHub uses your monday.com account’s first day of the week setting as the default across the app. This affects how weeks are displayed and calculated in the following areas:
- Resource Scheduler — week and 2-week view boundaries
- Reports — “Current Week”, “Previous Week”, and other week-based period presets, as well as weekly column boundaries
The Time Tracking tab has its own behavior:
- When the Approval Workflow is enabled, the Time Tracking tab uses the First Day of Week from the Timesheet Config setting above. This ensures the week view matches the approval submission period.
- When the Approval Workflow is disabled, the Time Tracking tab falls back to the monday.com account setting, consistent with the rest of the app.
Workload Defaults
The Workload tab sets the account-level default for how workload is calculated. Individual boards can override this value in their own board settings.
| Setting | When enabled | When disabled |
|---|---|---|
| Per-Person Hour Distribution | Task hours are divided equally among all assignees. A 10h task with 2 assignees = 5h each. | Each assignee gets the full task hours counted toward their workload. |
Capacity Schemes
Manage work capacity schemes from the Capacity tab. Capacity is the number of working hours a team member is available per day, defined through schemes. See Work Capacity Schemes for full details.
- Create, edit, duplicate, and delete schemes — define custom weekly hour patterns (for example, 8h Mon–Fri, 4h on Fridays).
- Assign users to schemes — each user can be assigned to one capacity scheme at a time.
- Set default scheme for unassigned users — users without an explicit assignment inherit the default scheme.

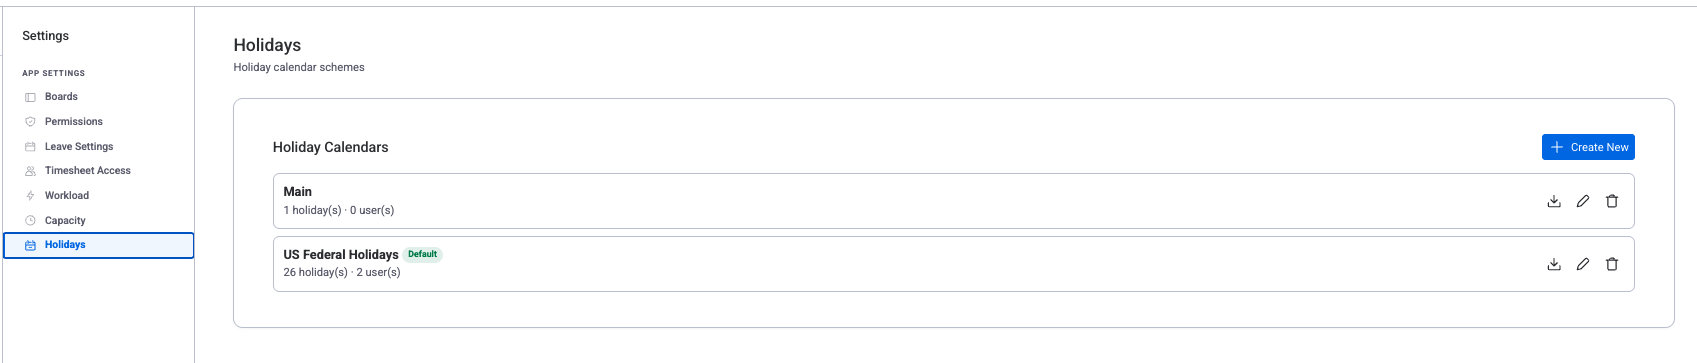
Holiday Calendars
Manage holiday calendars from the Holidays tab. Holiday calendars reduce available capacity on specific dates. See Holiday Schemes for full details.
- Create calendars with fixed and floating holidays — fixed holidays recur annually on the same date; floating holidays change each year.
- Import country-specific holidays — quickly populate a calendar with official public holidays for a given country.
- Assign calendars to users — team members in different regions can have different holiday calendars.
Worklog Categories
Worklog categories let you classify time entries as Billable, Non-Billable, or any custom classification. Categories are used across Time Tracking, Timesheets, and Reports to separate billable from non-billable hours.
Two categories are created automatically: Billable (default) and Non-Billable. When only one category is active, it is assigned automatically and the category dropdown is hidden from the log work dialog. When two or more categories are active, users choose a category when logging work.
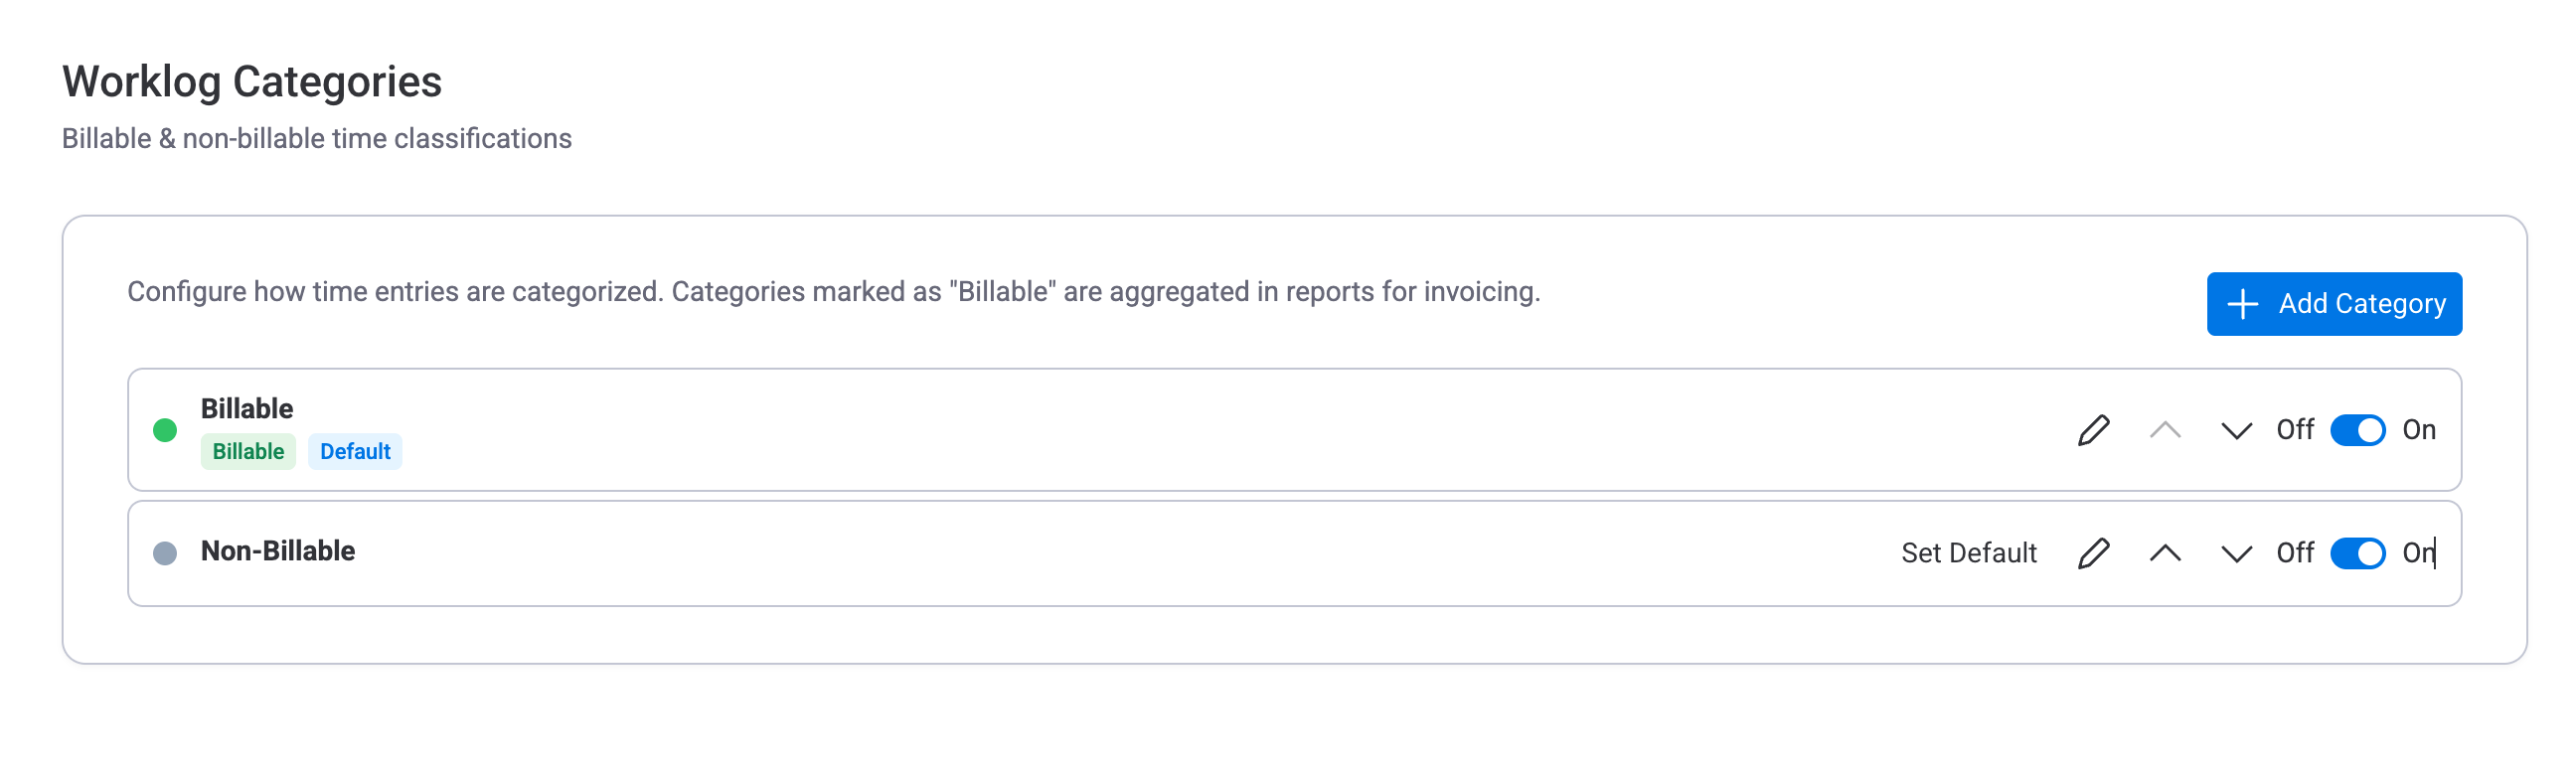
| Action | How |
|---|---|
| Add | Click + Add Category. Enter a name, choose billable/non-billable, pick a colour. |
| Edit | Click the pencil icon next to the category. |
| Set Default | Click Set Default. The default is pre-selected when logging work. |
| Reorder | Use the up/down arrows to change dropdown order. |
| Deactivate | Toggle Off. Existing worklogs keep their category for historical data. |
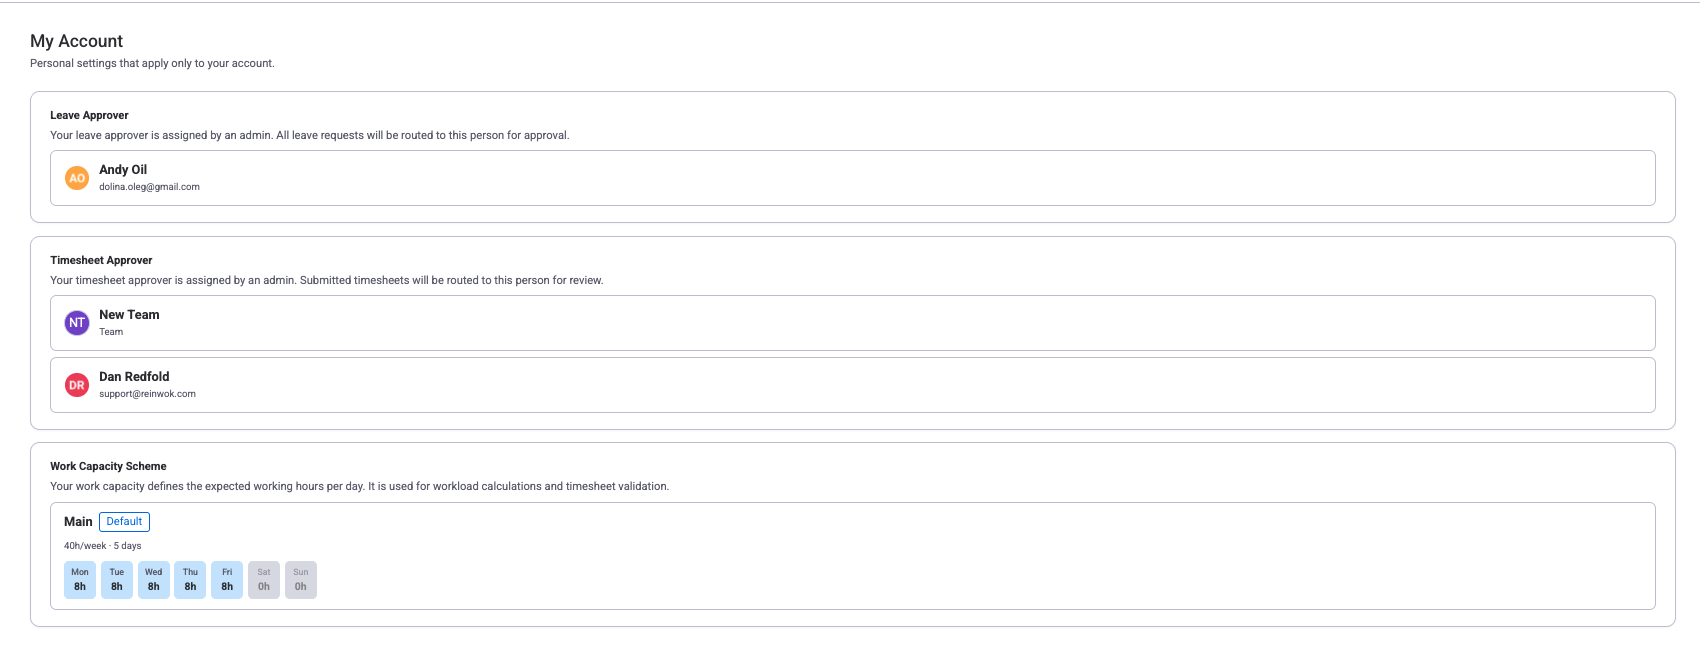
My Account Settings
My Account is a read-only panel that shows your personal configuration. These values are assigned by an Admin or App Admin and cannot be changed by you directly. If something looks incorrect, contact your admin.
| Field | What it shows |
|---|---|
| Leave Approver | Who is assigned to approve your leave requests. If no approver is assigned, a message prompts you to contact your admin. |
| Timesheet Approver | Who is assigned to approve your timesheets. May display a user, team, or multiple approvers depending on how rules are configured. |
| Work Capacity Scheme | Which capacity scheme applies to you, along with the weekly hour breakdown per day (for example, "40h/week, 5 days: Mon 8h, Tue 8h, ..."). A "Default" badge indicates you are using the account default scheme. |
Related Pages
- Getting Started — Initial setup and first-time configuration walkthrough
- Permissions & Access — User roles, access control, timesheet and leave approval permissions, full role matrix
- Work Capacity Schemes — Detailed guide on creating and assigning capacity schemes
Need Help?
If you have questions about settings, permissions, or configuration, our support team is here to help.
Live Chat