Overview Back to top
The Leave Management feature lets team members request time off and allows managers or approvers to review and act on those requests — all within the app. Approved leave automatically reduces a user's available capacity on the scheduler, giving project managers an accurate picture of who is available and when.

Key Capabilities
- Two tabs: "My Leaves" for your own requests, "Approvals" for requests you need to review
- Custom leave types: admin-defined types with name, color, and abbreviation (e.g., Vacation, Sick Leave, Personal)
- Full-day and partial-day support: Request a full day off, or — for leave types an admin has enabled for partial requests — a set number of hours per day
- Status filter pills: Quickly filter by All, Pending, Approved, Rejected, Recalling, or Recalled
- Scheduler integration: Approved leave appears as colored blocks on the resource scheduler
Requesting Leave Back to top
To request leave, navigate to the Leave view and open the My Leaves tab. Click the "Request Leave" button to open the request form.
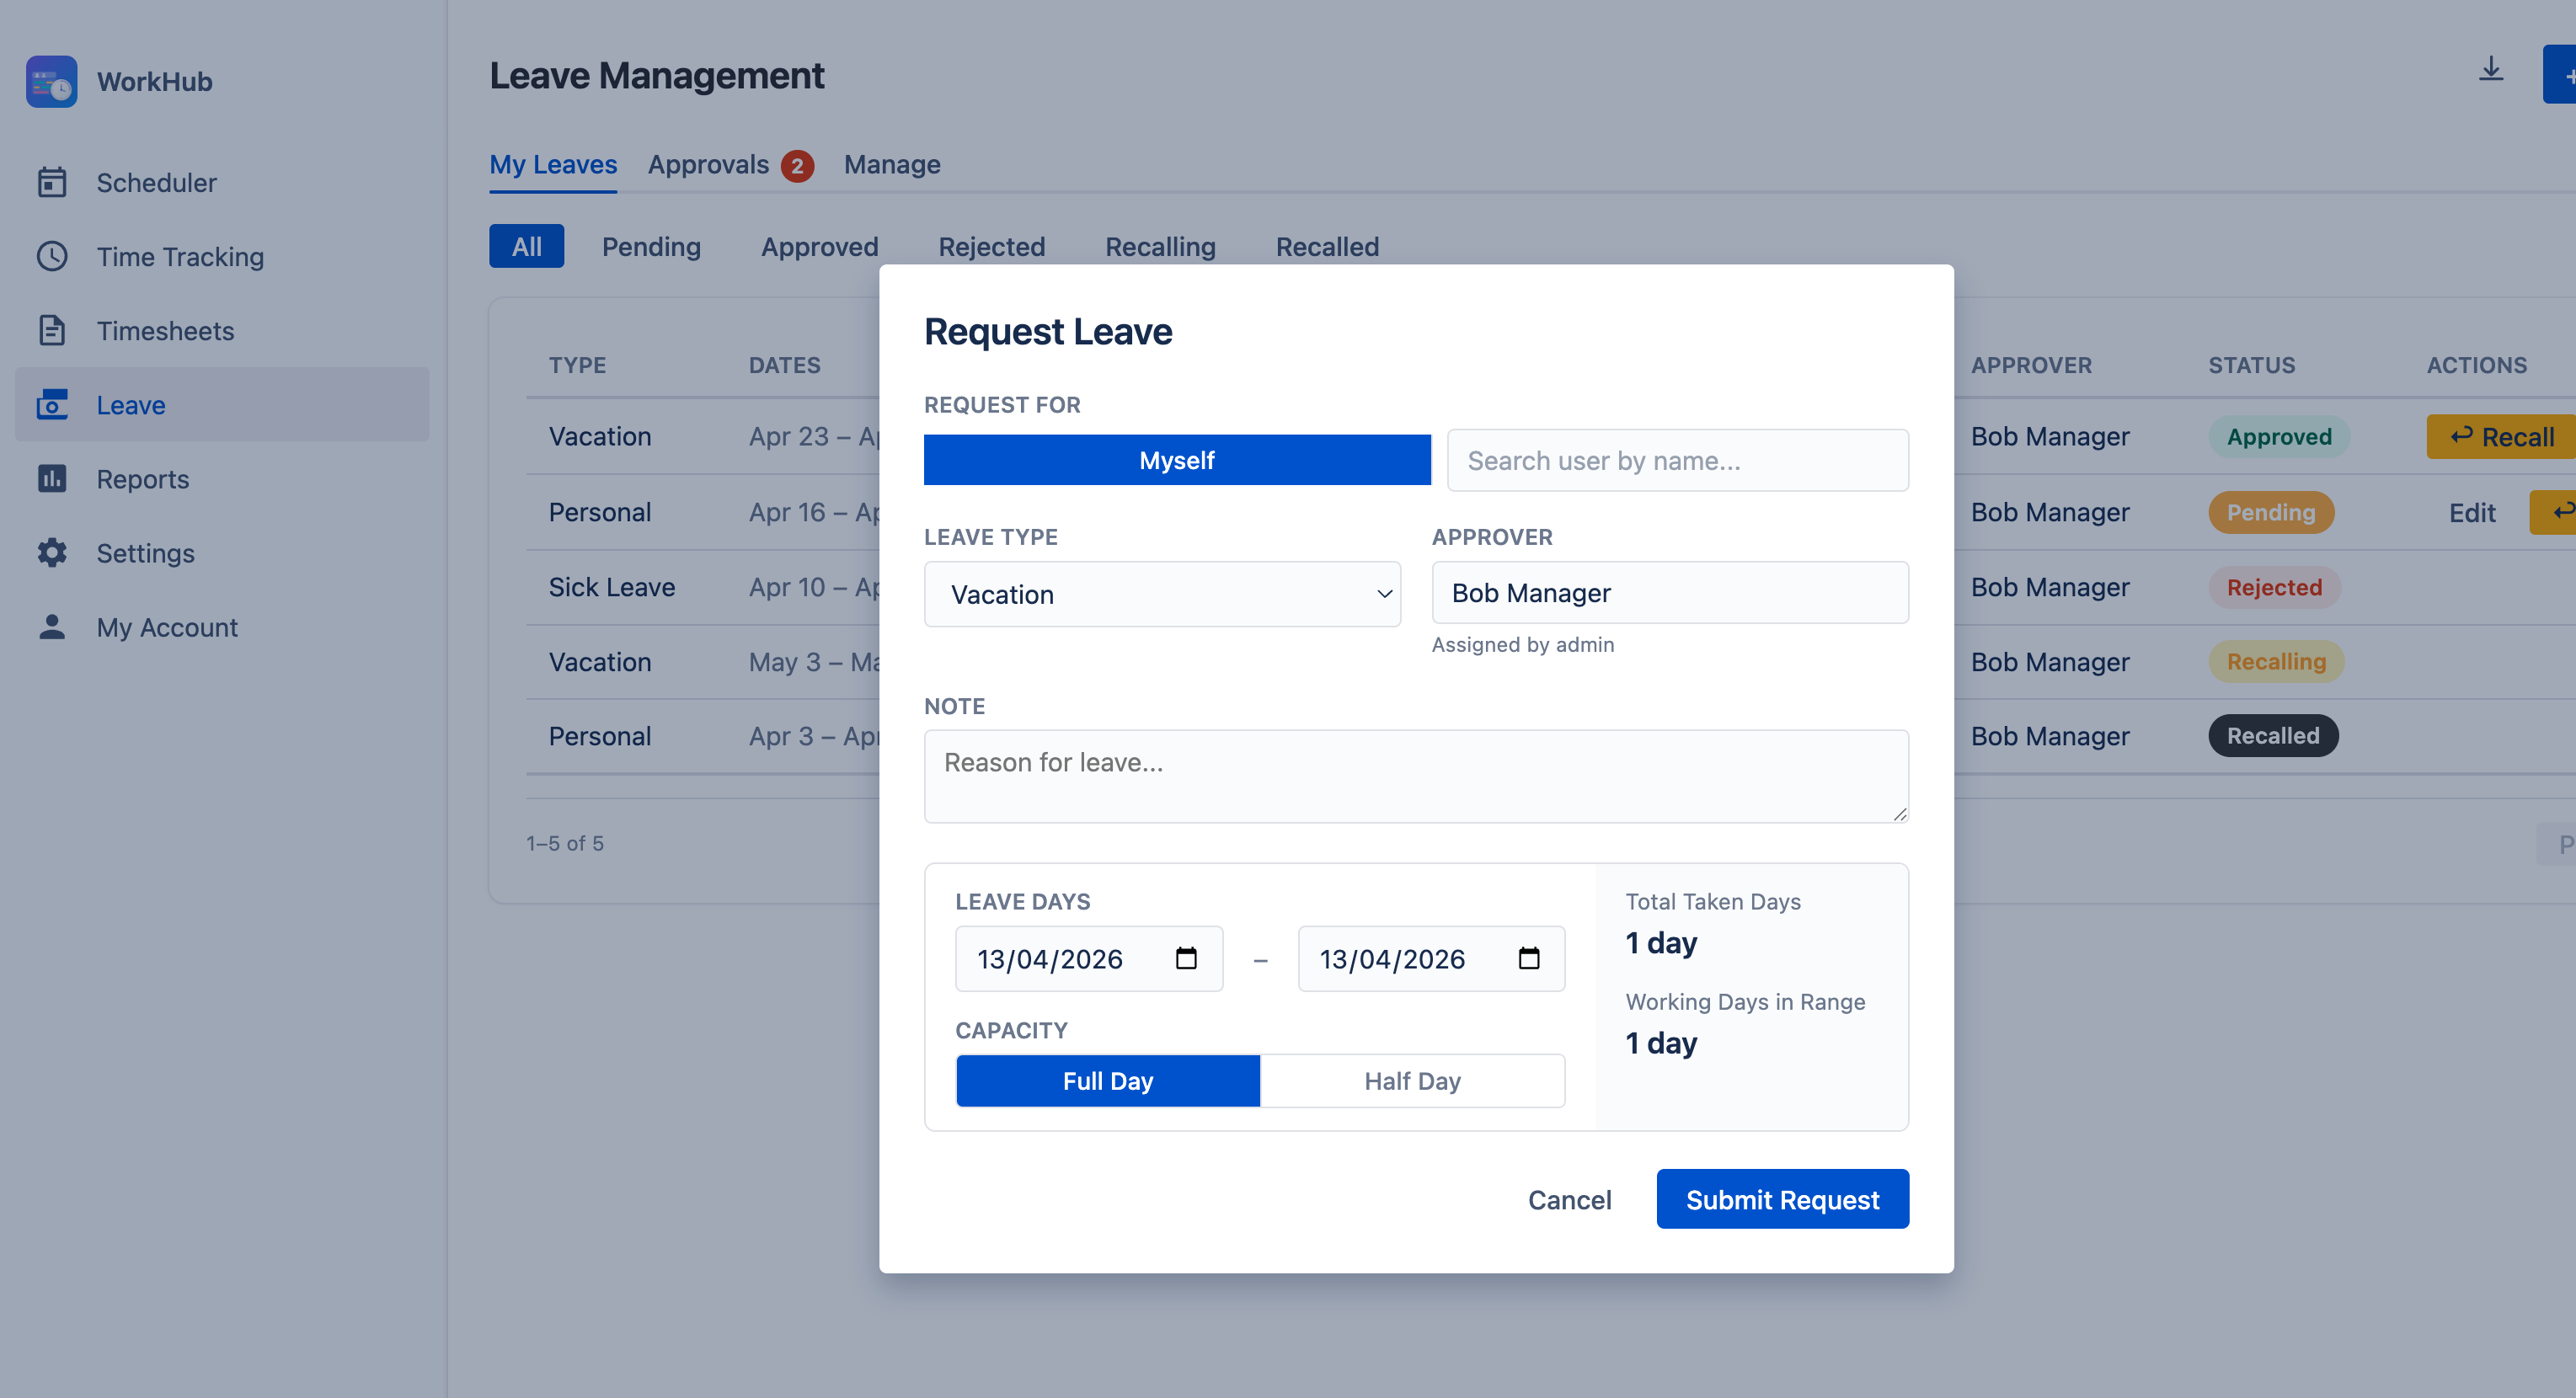
The request form includes the following fields:
- Leave Type — Select from the leave types your admin has configured in Settings (e.g., Vacation, Sick Leave, Personal). The list is empty until at least one type is created.
- Duration — For leave types your admin has enabled for partial requests, choose Full Day or Partial. A partial request takes a set number of hours per day off, applied to each working day in the range. Leave types without partial enabled are always full-day.
- Date Range — Pick the start and end dates for your leave. For a single-day request, set both dates to the same day. The form shows how many days the request takes, counting only the working days from the requester's capacity scheme (or the org-wide work days when no scheme applies).
- Approver — The person who will review your request. This may be pre-assigned by your admin in Settings > Leave Settings.
- Note (optional) — Add any additional context or reason for the leave request.
Once submitted, the request enters Pending status and appears in your approver's Approvals tab. You can view all your submitted requests and their current status in the My Leaves tab.
On Behalf of Another User Back to top
Admins and designated approvers can create leave requests on behalf of other users. This is useful when a manager needs to record leave for a team member who is unable to submit the request themselves (e.g., emergency sick leave).
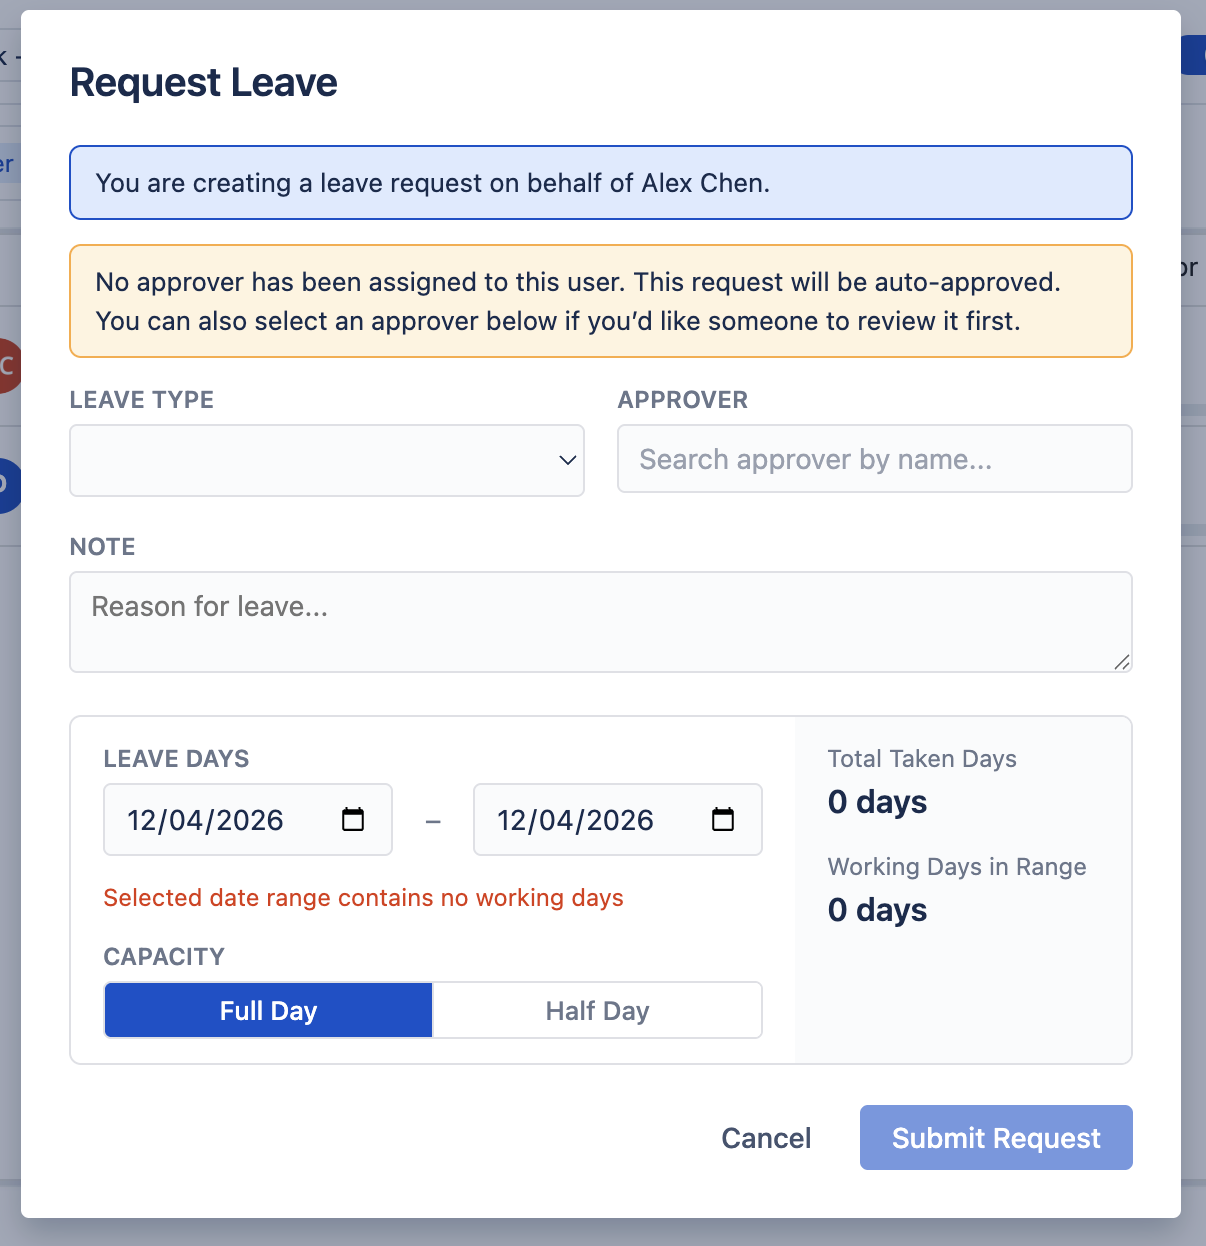
When creating leave on behalf of another user, an additional User field appears in the request form, allowing you to search for and select the team member. The rest of the form fields remain the same. The created request will appear in the selected user's My Leaves tab.
Approval Workflow Back to top
Leave requests follow a defined status workflow. When a request is submitted, it starts as Pending and moves through the following transitions:
Status Transitions
- Pending → Approved — The approver or admin approves the request. Capacity is reduced on the scheduler.
- Pending → Rejected — The approver or admin rejects the request. No capacity impact.
- Pending → Recalled — The requester recalls their own pending request before a decision is made. The recall is immediate.
- Approved → Recalling — The requester asks to recall an already-approved leave. This requires approver consent and enters Recalling status.
- Approved → Recalled — The approver directly revokes an approved leave (e.g., due to changed plans).
- Recalling → Recalled — The approver approves the recall request. The leave is returned and capacity is restored.
- Recalling → Approved — The approver denies the recall request. The leave remains approved and capacity stays reduced.
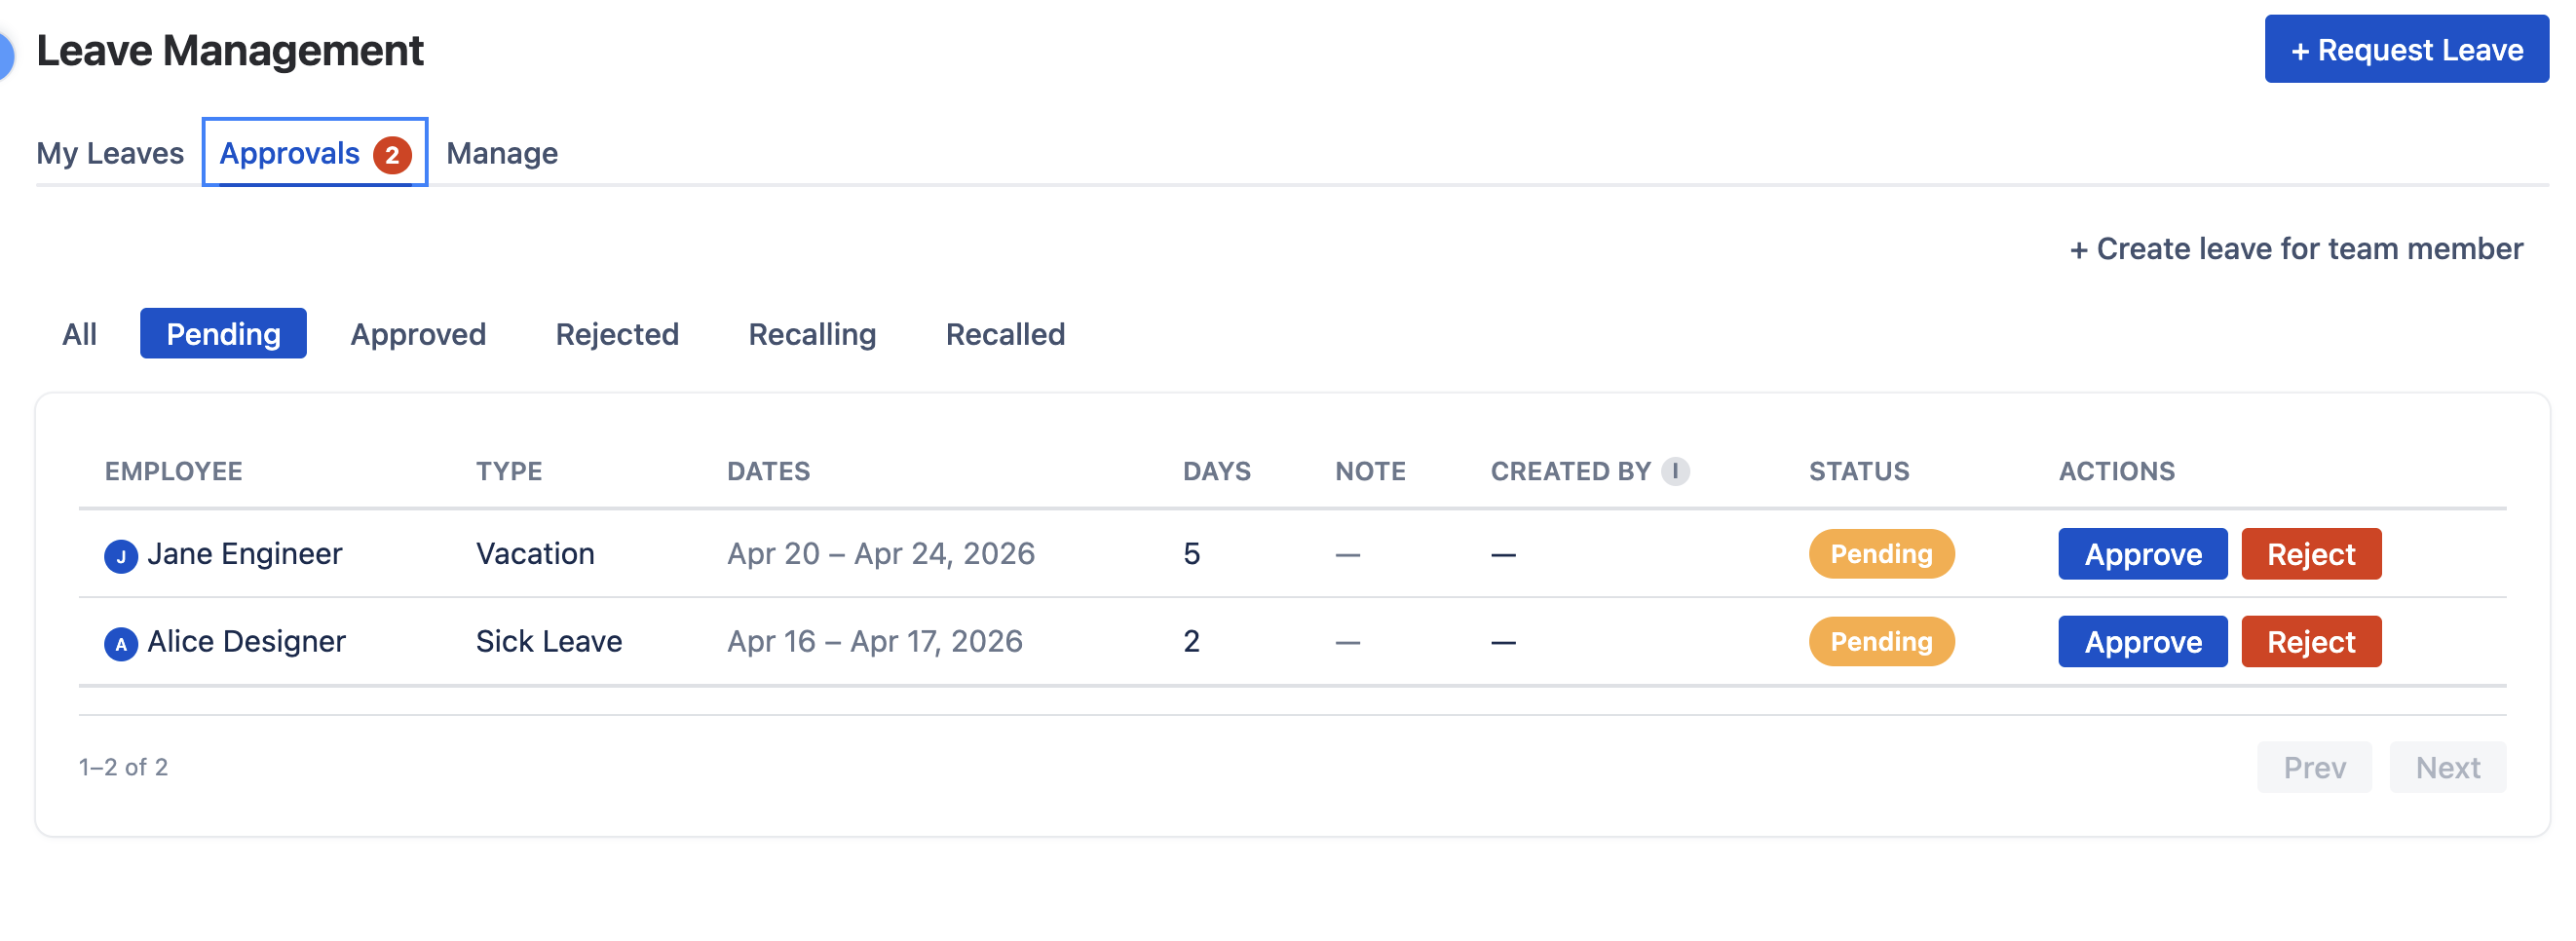
Approver Actions
In the Approvals tab, approvers see all pending and recalling requests from their team. Each request shows action buttons based on its current status:
- Pending requests: Edit (fix dates, type, or note), Approve, or Reject. Editing a pending approvee leave is symmetric with creating one on their behalf — useful for correcting a typo without forcing the requester to recall and resubmit.
- Recalling requests: Approve Recall (sets status to Recalled) or Deny Recall (sets status back to Approved)
- Approved requests: Revoke (directly recalls the leave)
These decisions belong to the request's chosen approver — and an app admin can always step in as an override. If a request was auto-approved because the user has no approver assigned, their manager (an Org Manager or Team Manager) can act on it instead. The same buttons appear on the leave's popup on the Resource Scheduler.
Why Recall Requires Approval
When a team member wants to cancel an already-approved leave, the approver needs to be notified because project plans and resource assignments may have already been adjusted around that absence. The Recalling intermediate status ensures the approver can decide whether the team member can return to the schedule.
When the approval workflow is off
When the approval workflow is turned off, every new request is auto-approved on creation. With no approver to consult, approved leaves can be adjusted directly:
- Edit an approved leave: In My Leaves the Edit button appears on your own approved requests; on the Scheduler popover it also appears for anyone who manages that user's leave (an app admin, Org Manager, or their Team Manager). Changes save immediately — no re-approval cycle.
- Recall an approved leave: Recall takes the leave straight to Recalled, skipping the Recalling step (there is no approver to consult).
- Drag and resize on the Scheduler: Same rule as Edit — the owner, or anyone who manages that user's leave, can shift the dates or change the duration. Rejected, recalling, and recalled leaves are always read-only.
Recall stays owner-only — it expresses the requester's intent to withdraw, not the approver's call.
Leave on the Scheduler Back to top
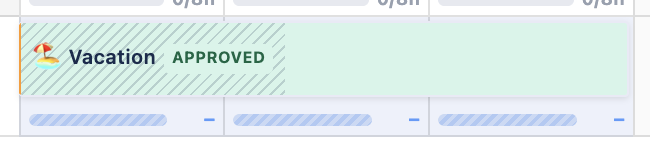
Approved leave requests automatically appear as colored blocks on the resource scheduler timeline. Each leave type has a distinct color so managers can quickly identify the type of absence at a glance.
Capacity Impact
Leave directly affects a user's available capacity for each day:
- Full-day leave: Capacity is reduced to 0 hours for that day. The workload indicator shows no available hours.
- Partial-day leave: Capacity is reduced by the requested hours per day. If the user's scheme specifies 8 hours and they take 2 hours off, 6 hours remain available.
This capacity reduction is reflected in the workload indicators at the top of each user row. If a user has approved leave on a day, the workload bar accounts for the reduced capacity, making it easy to spot over-allocation on partial leave days.
Configuring Leave Types Back to top
The app does not ship with any pre-defined leave types — the list starts empty. Admins create the types their organization needs (e.g., Vacation, Sick Leave, Personal, Parental, Bereavement, Study Leave) via Settings > Leave Settings before users can submit requests.
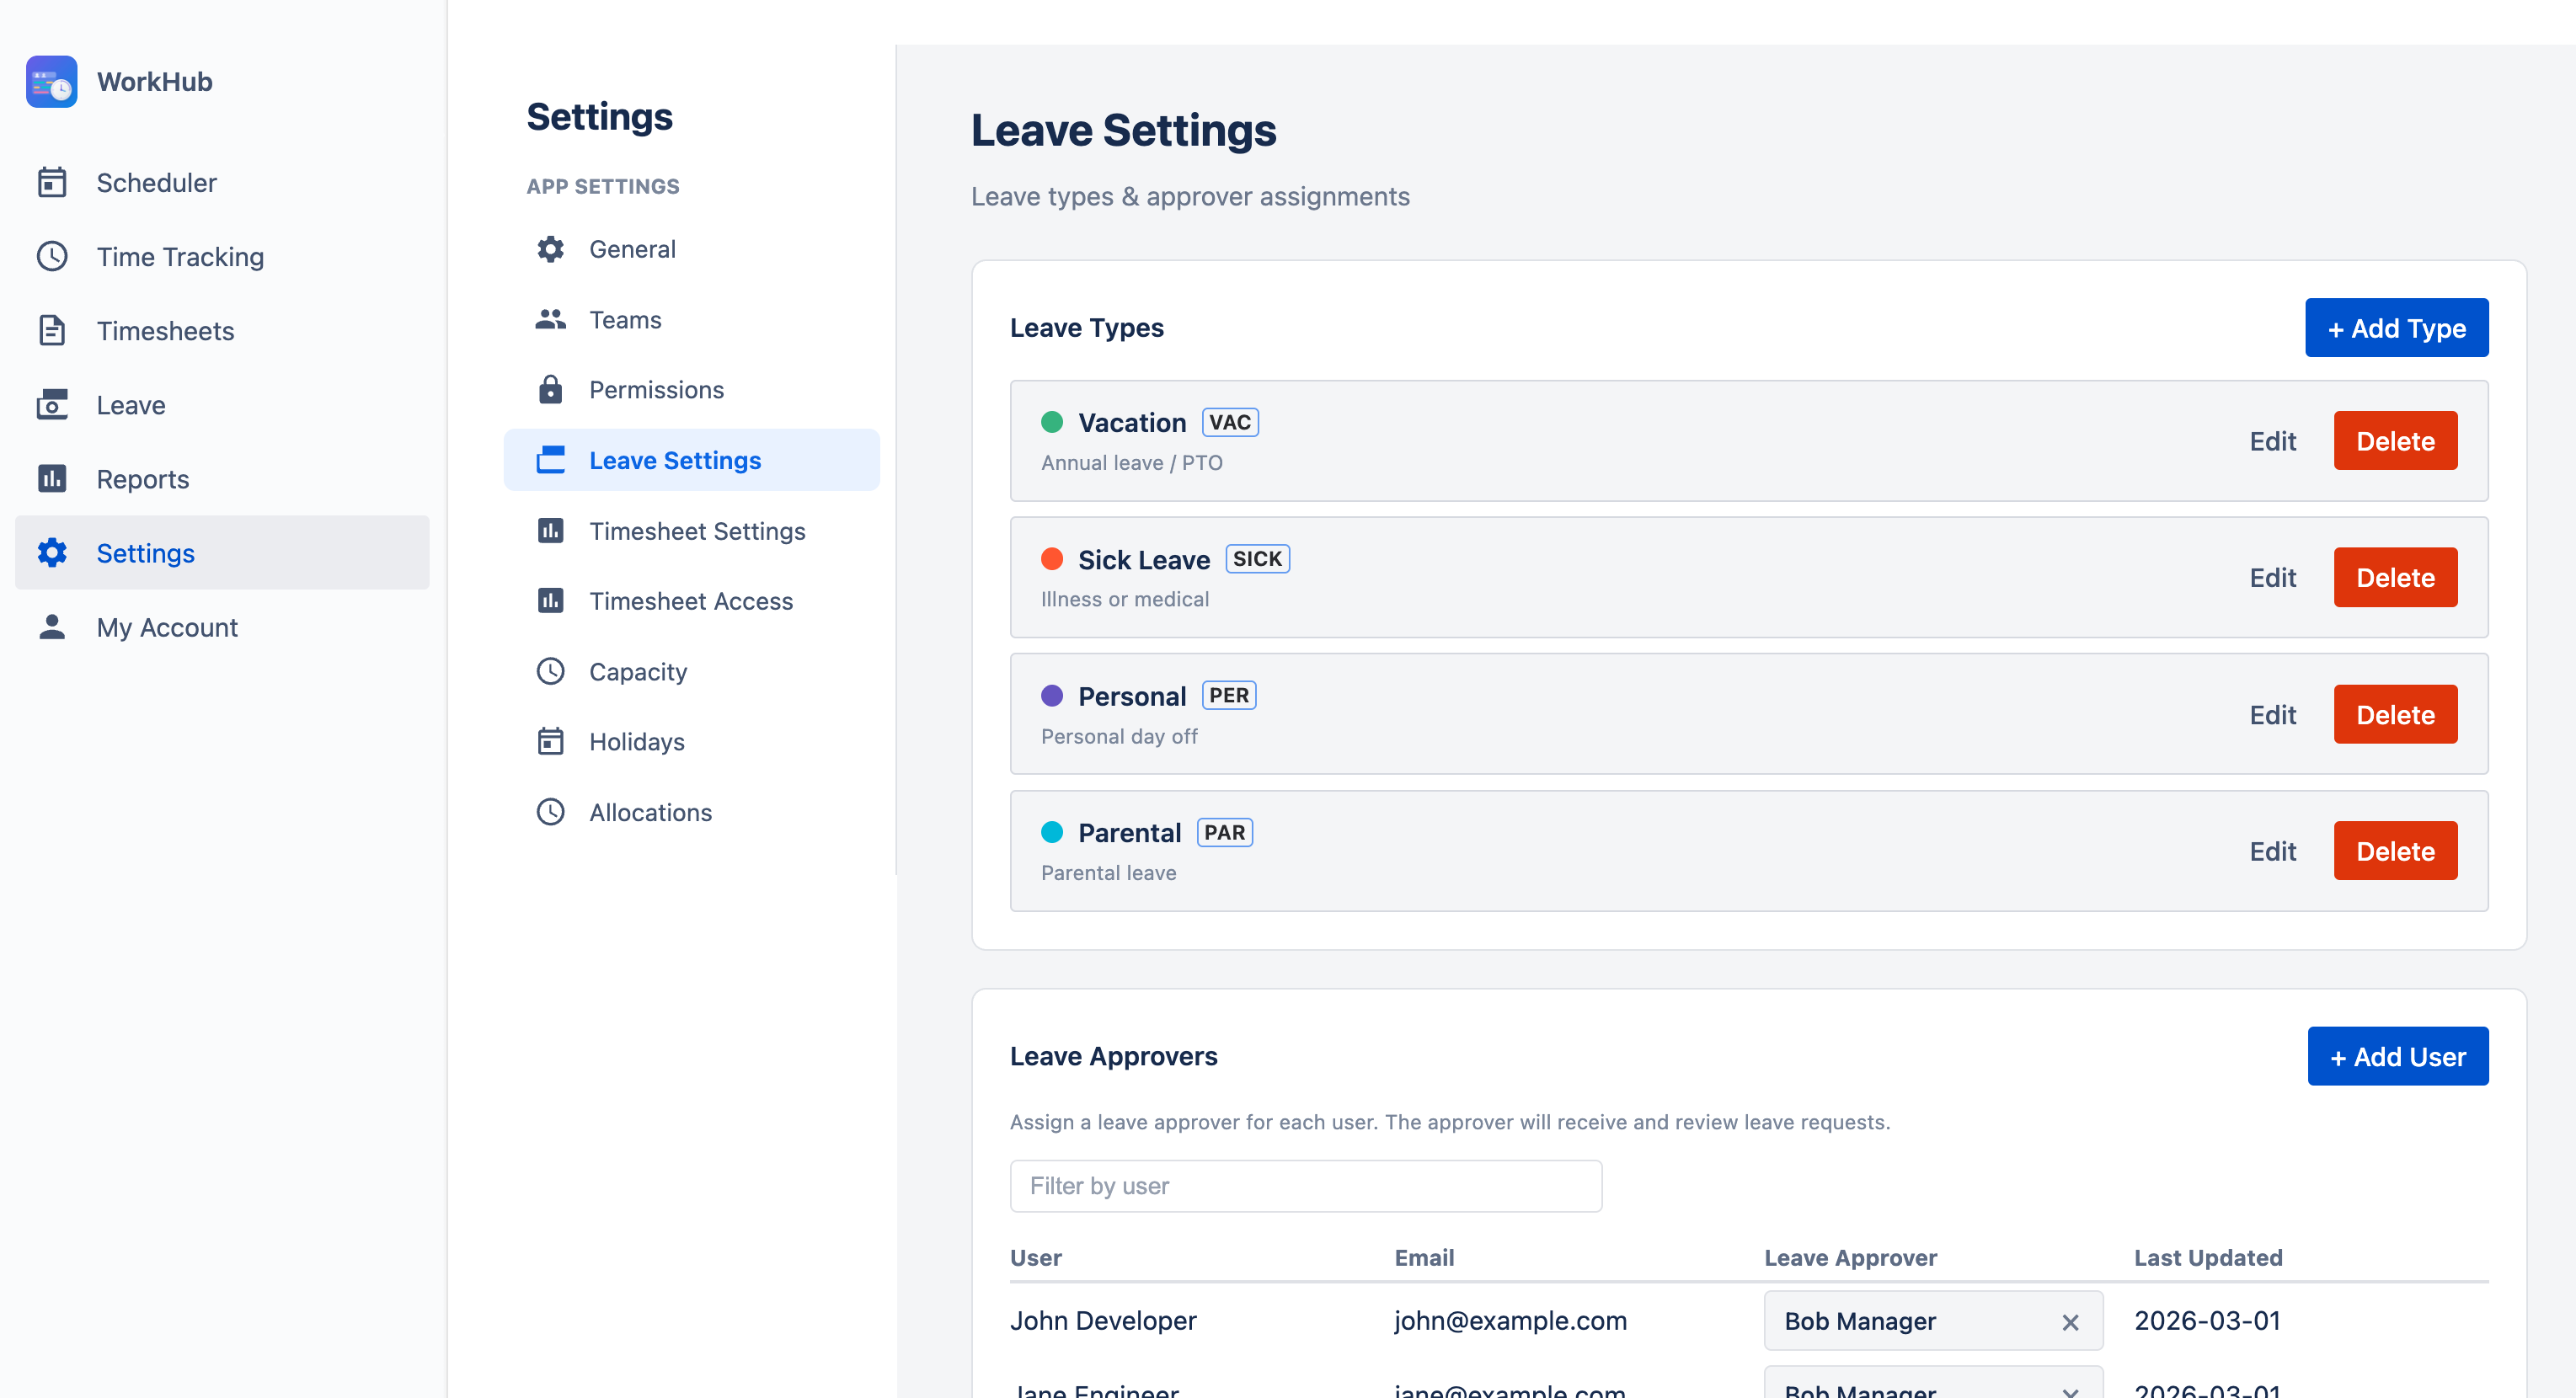
Creating Leave Types
To add a leave type, go to Settings > Leave Settings and click "+ Add Type". Each leave type has the following properties:
- Name — The display name shown in the request form and on the scheduler (e.g., "Vacation", "Bereavement", "Study Leave")
- Color — The color used for the leave block on the scheduler timeline
- Abbreviation — A short code displayed inside the leave block (e.g., "VAC", "BER", "STU")
You can edit or delete leave types at any time. Deleting a leave type does not remove existing requests of that type — they will retain their data but may display a "deleted type" indicator.
Need Help?
If you have questions or need assistance with leave management, our support team is here to help.
Contact Support