If you have not installed WorkHub yet, get it from the monday.com Marketplace. Once installed, you can open it from any workspace and add it to any board.
Setting up takes three steps:
- Open WorkHub.
- Choose the boards you want to plan.
- Tell WorkHub which columns to use on each board.
Opening WorkHub Back to top
There are two ways to open WorkHub. Most people use Workspace View.
| Workspace View | Board View | |
|---|---|---|
| What it is | The full app, opened from a workspace. | A view tab on one board. |
| Shows | Items from all the boards you choose. | Items from that board only. |
| Includes | Everything: planning, time, leave, reports and settings. | Planning and time logging for that board. |
Workspace View
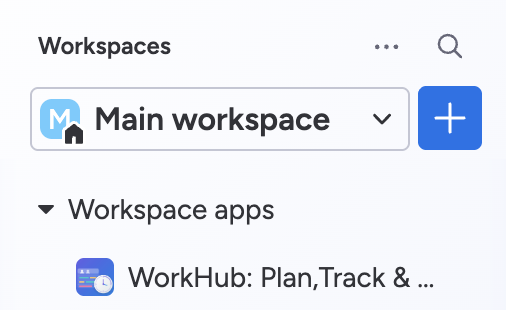
- In the monday.com left sidebar, open the Workspaces panel.
- Select the workspace you want to work in.
- Expand Workspace apps.
- Click WorkHub: Plan, Track & Report.
The areas of the app
The app navigation takes you to each area:
- Scheduler — plan your team's work on a timeline.
- My Work — your own logged hours and your own row of the Scheduler.
- Time Tracking — log the hours you worked on items.
- Timesheets — review, submit and approve logged time.
- Leave — request time off and handle approvals.
- Reports — utilization, planned vs actual, leave and worklog reports.
- Settings — boards, permissions, capacity and holidays (admins only).
- My Account — your work schedule and approvers.
Timesheets and Leave show a number when approvals are waiting for you. The app follows your monday.com theme, light or dark.
Board View
Use Board View when you want to plan one board without leaving it.
- Open the monday.com board.
- Click the + button in the row of view tabs.
- In the Board views menu, hover over Apps.
- Under Installed, pick the WorkHub entry by Reinwok.
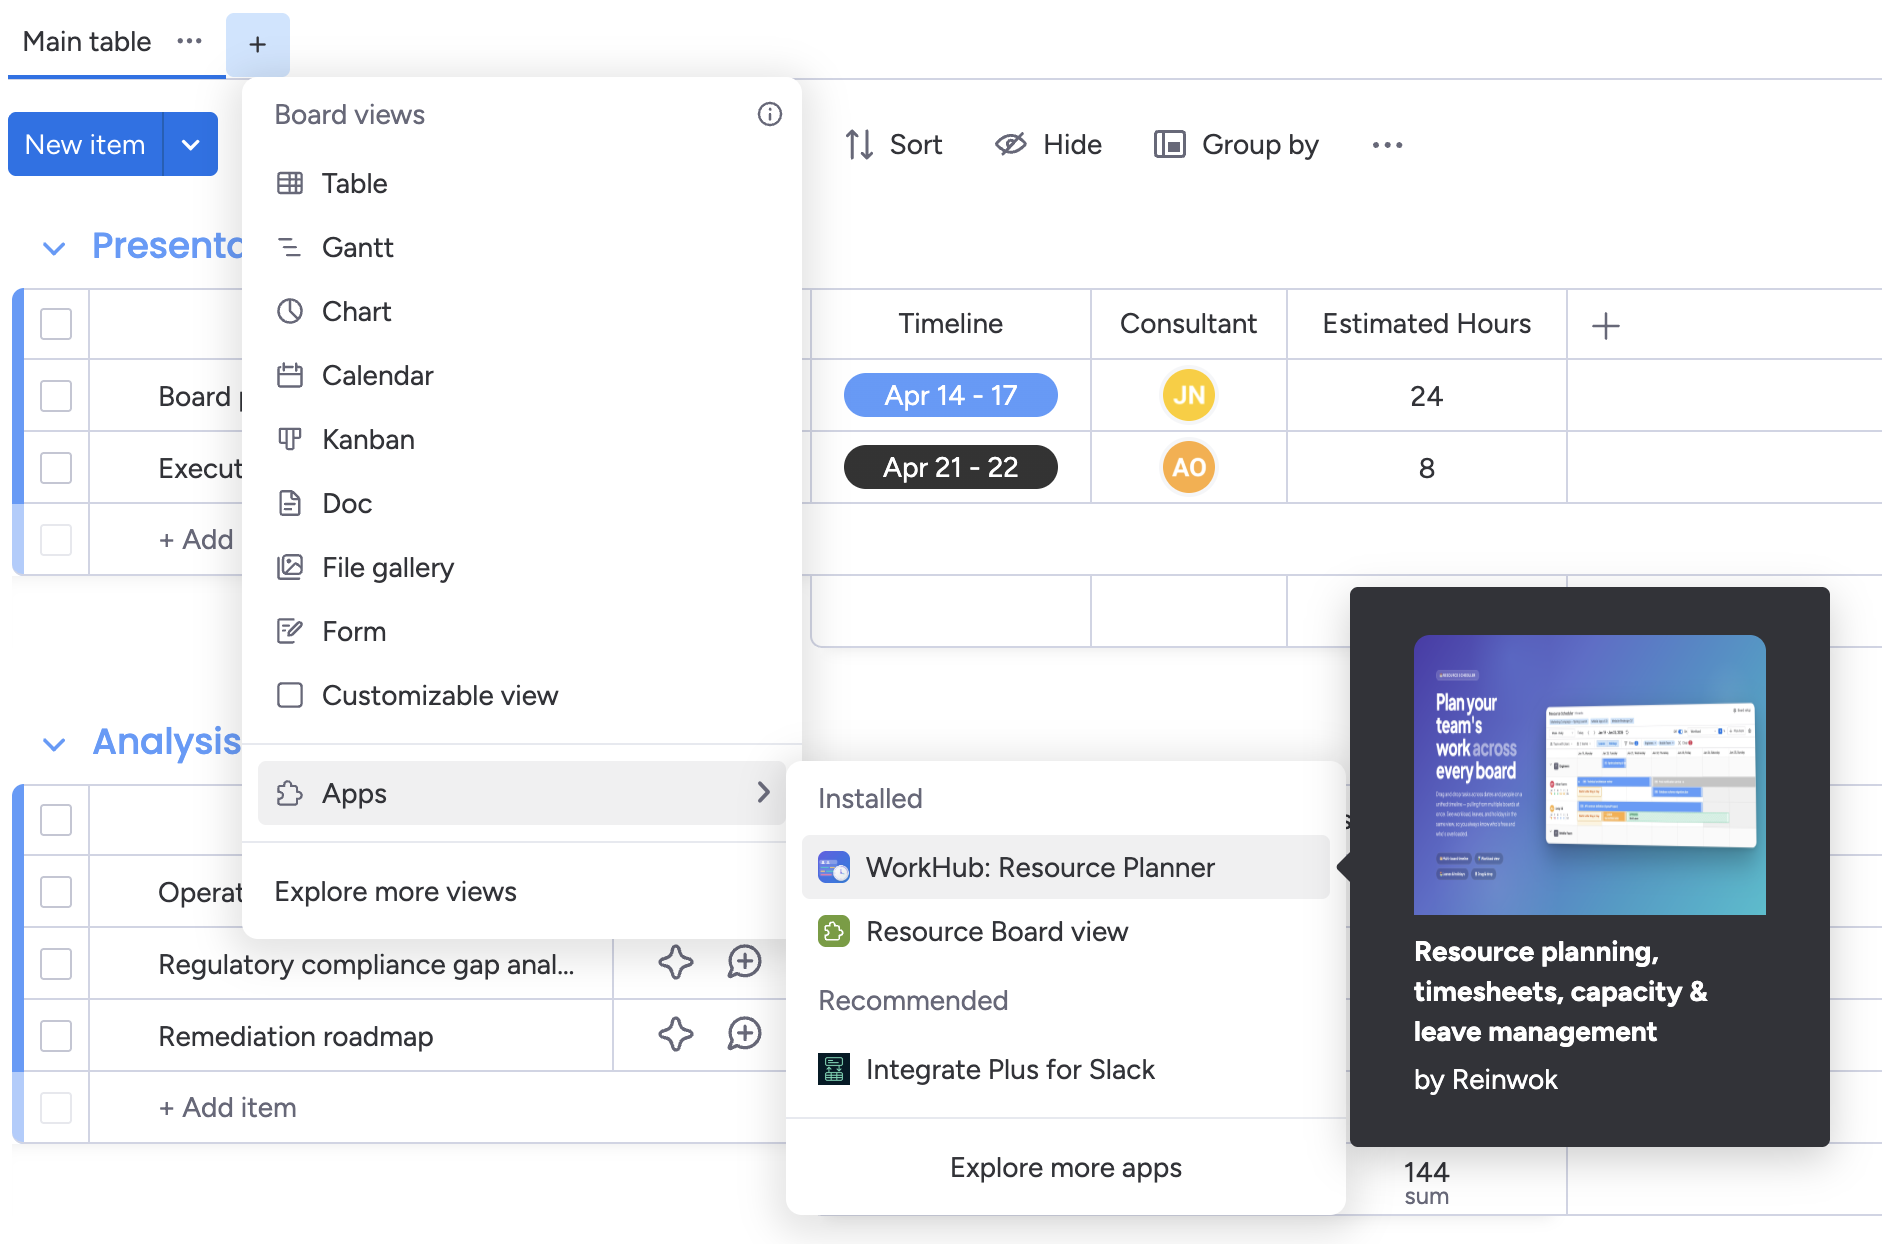
The new view has two tabs:
- Capacity Planning — the Scheduler for this board.
- Worklog — time logging for this board's items. Shown only when Time Tracking is on.
The first time you add Board View to a board, WorkHub asks you to map the board's columns.
If WorkHub is not listed under Workspace apps or under Apps › Installed, it is not installed on your account yet. Install it once from the monday.com Marketplace.
Choosing Your Boards Back to top
In Workspace View, the Scheduler first asks which boards you want to plan. You can come back to this screen at any time with the Board setup button at the top of the Scheduler.
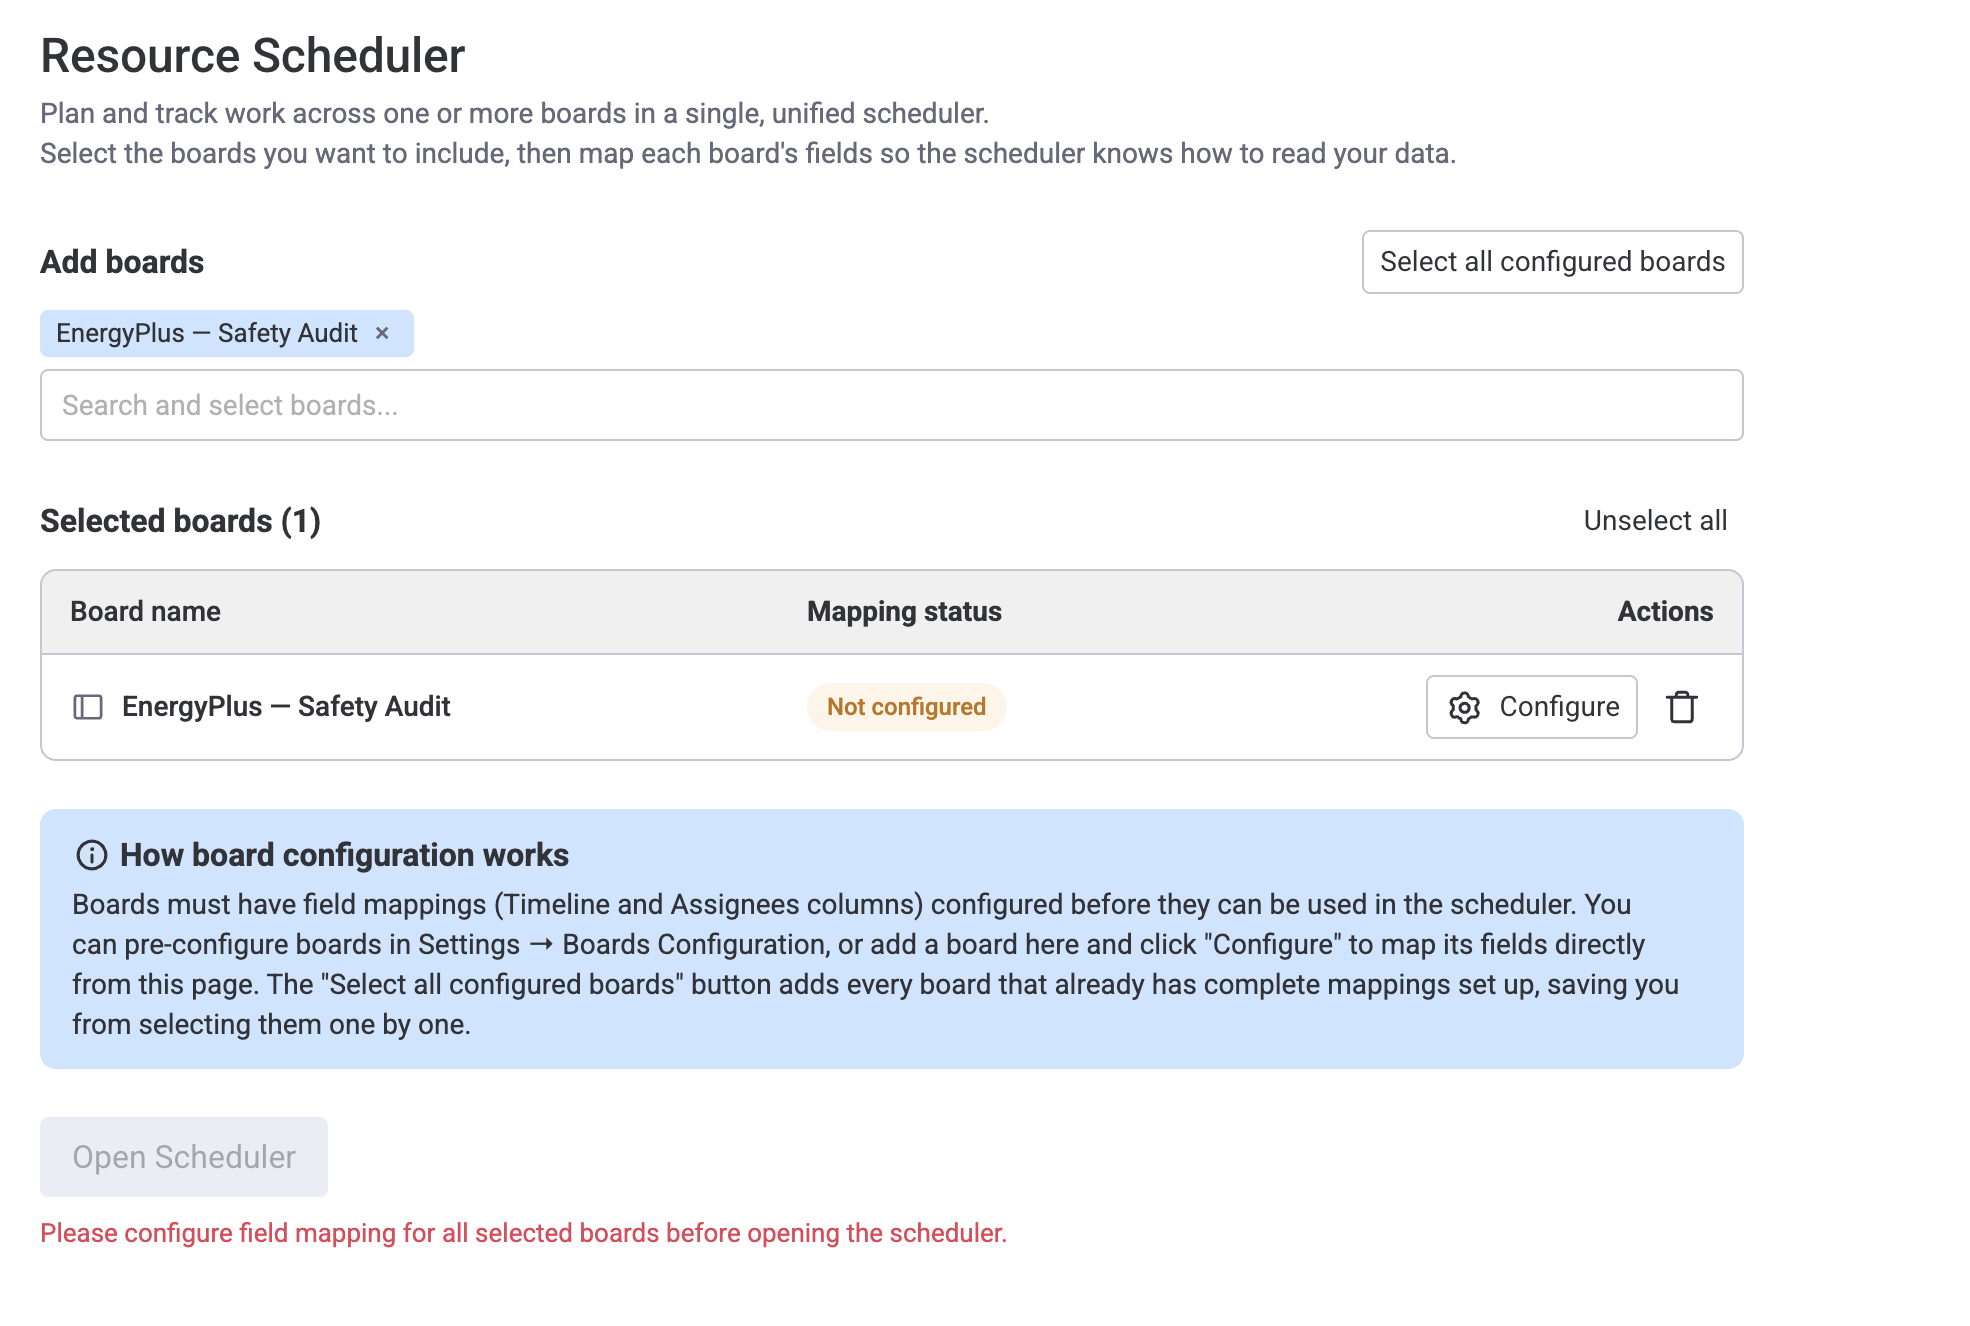
- Under Add boards, type a board name and click a result. Or click Select all configured boards to add every board that is already set up.
- Look at the Mapping status of each board in the Selected boards table. Configured means the board is ready. Not configured means WorkHub does not know its columns yet.
- For each board that is Not configured, click Configure and map its columns.
- Click Open Scheduler. The button works once every selected board is Configured.
- You only see boards you have access to in monday.com, including boards from other workspaces.
- The bin icon removes a board from your list. The board's column mapping is kept, so you can add it again later.
- Edit mapping changes the columns of a board that is already configured.
Starting without boards
You can click Open Scheduler with no boards selected and confirm with Open anyway. The Scheduler then shows your team with their leave and holidays. You can request leave, and log time if Time Tracking is on. To plan items, add a board later with Board setup.
Field Mapping Back to top
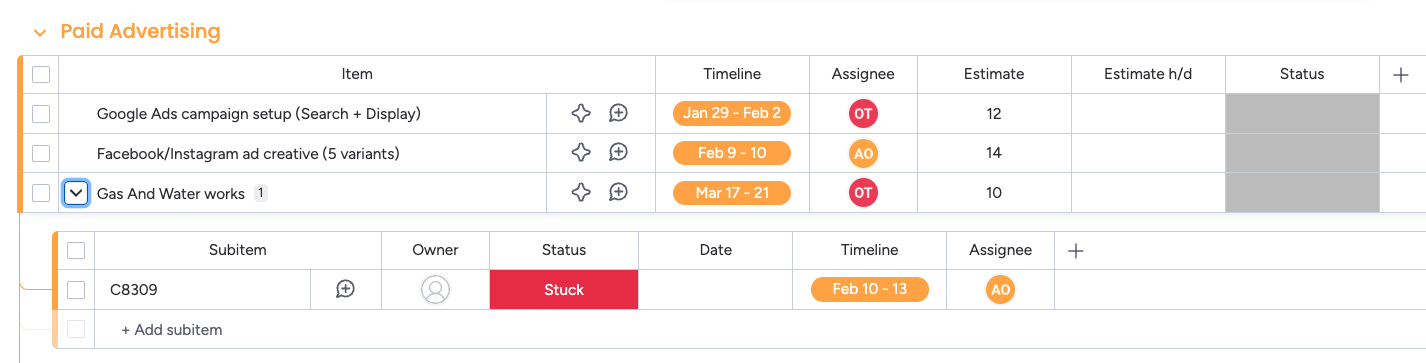
WorkHub reads your work from the columns of your monday.com boards. Field mapping tells it which column holds what. You do this once per board, and it applies to everyone who uses that board.
| Field | Column type | Required? | What it is for |
|---|---|---|---|
| Timeline | Timeline | Yes | The start and end date of an item. It decides where the bar sits on the timeline. |
| Assignee | People | Yes | Who does the work. It decides whose row the bar is on. |
| Original Estimate | Numbers | No | The total hours planned for the item. WorkHub spreads them over the item's working days. |
| Hours Per Day | Numbers | No | The hours planned for each working day of the item. |
| Status | Status, Text or Numbers | No | Shown on the bar. Lets you colour bars by status and filter out completed items. |
| Color | Color Picker | No | Lets you choose a colour for each item. |
Only Timeline and Assignee are required. They answer the two questions of planning: when and who.
Map a board's columns
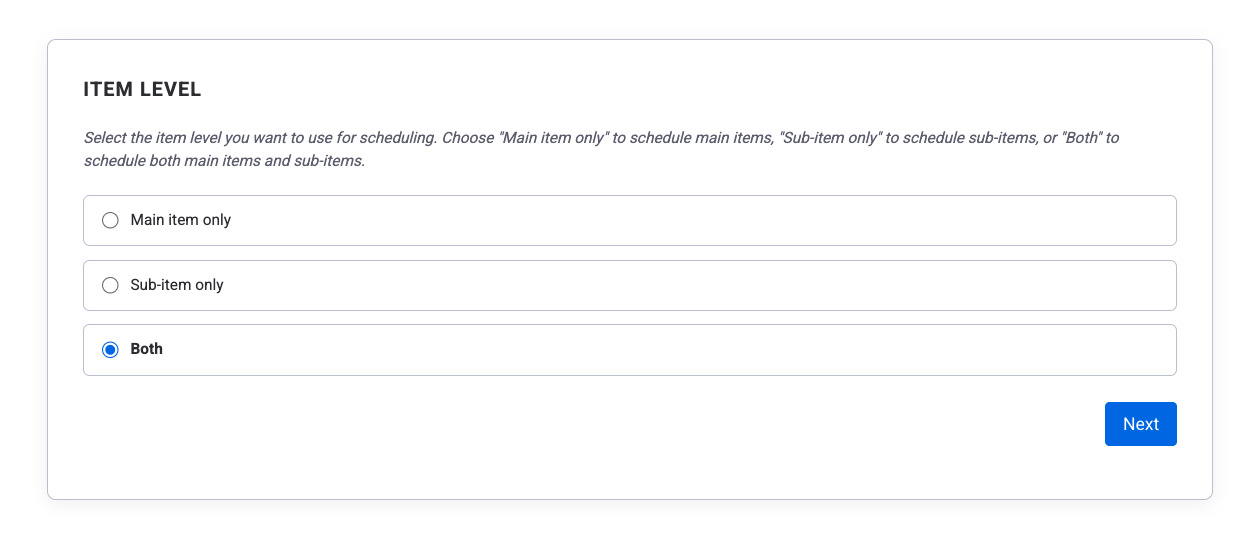
- Item level — choose which rows of the board to plan: Main item only, Sub-item only or Both.
- Mapping fields — pick a column for each field. Each dropdown lists only columns of the right type.

Items and subitems
A monday.com board has main items (the rows of the board) and subitems (rows nested under an item). The Item Level setting decides which of them appear on the Scheduler.
Subitems have their own columns in monday.com. When you include subitems, you map their columns separately, under For sub items.
Original Estimate or Hours Per Day?
An estimate is how many hours you expect the work to take. The workload bars need one. Without it, items still appear on the Scheduler but add 0 hours.
| Original Estimate | Hours Per Day | |
|---|---|---|
| You enter | The total for the item, for example 16 hours. | The hours for each day, for example 3 hours a day. |
| WorkHub counts | The total divided evenly over the item's working days. | That number on every working day of the item. |
| Use it when | You estimate whole tasks. Most teams do. | You plan in daily blocks, such as a support shift. |
An item has an Original Estimate of 16 hours and runs Monday to Thursday. WorkHub counts 4 hours a day (16 ÷ 4).
If the assignee is on approved leave on Wednesday, the 16 hours are spread over the other three days: about 5.33 hours a day.
- Working days come from the assignee's capacity scheme. A person who does not work Fridays gets no hours on Fridays.
- You can map both columns. If an item has a value in Hours Per Day, that value is used. Otherwise the Original Estimate is used.
- Not sure? Map only Original Estimate. You can add Hours Per Day later.
Change the mapping later
You can change a board's mapping at any time. Changes apply to everyone who uses that board.
- On the board selection screen, click Edit mapping.
- On the Scheduler, click the gear icon to open Board Settings. It also has the display options: Item Level, Color Schema and Workload Settings.
- Admins can also do it in Settings › Boards.

Scheduler Overview Back to top
The Scheduler shows one row per person and places items on a timeline by their dates. The timeline is empty until you pick people or teams at the top left.
- Drag a bar to move it to other dates.
- Drag it to another row to give it to another person.
- Drag an edge to make it longer or shorter.
- Click an empty day to create an item, add an allocation (time booked without an item), request leave or log time.
Every change is saved to your monday.com board right away. See Resource Scheduler for details.
My Work Overview Back to top
My Work shows your own Scheduler row with a daily chart of the hours you logged against the hours you had available. See My Work.
Capacity & Workload Basics Back to top
Capacity is the hours a person can work on a day. Workload is the hours planned for them on that day. With workload turned on, a small coloured bar under each day compares the two, so you can spot who is overloaded and who is free.
A person's available hours come from:
- Work Capacity Schemes — working hours per day (8 hours, Monday to Friday by default).
- Holiday Schemes — public holidays.
- Leave — approved time off.
See Workload Management for the colours and the modes.
What's Next Back to top
- Resource Scheduler — every control of the timeline and the Plan Item panel.
- Allocations — book hours per day without a monday item.
- Time Tracking — log the hours you worked on items.
- Leave Management — request and approve time off.
- Permissions — who can see and do what.
- Use Cases — example setups for different kinds of teams.
Need Help?
If you have questions or need assistance, our support team is here to help.
Contact Support