Adding Calendars Back to top
The calendar sidebar provides two ways to add calendars to your view. Click the Add Calendar dropdown button at the top of the sidebar to see all options:
- Create — build a new calendar from scratch with full control over event sources, event types, and permissions. Opens the Create Calendar dialog with four configuration tabs.
- Add Existing — add a calendar that was already created by another user to your sidebar. This does not duplicate the calendar; it simply makes it visible in your view.
Create Calendar Dialog Back to top
When creating a new calendar, the dialog provides four tabs to configure every aspect of the calendar.
General Tab
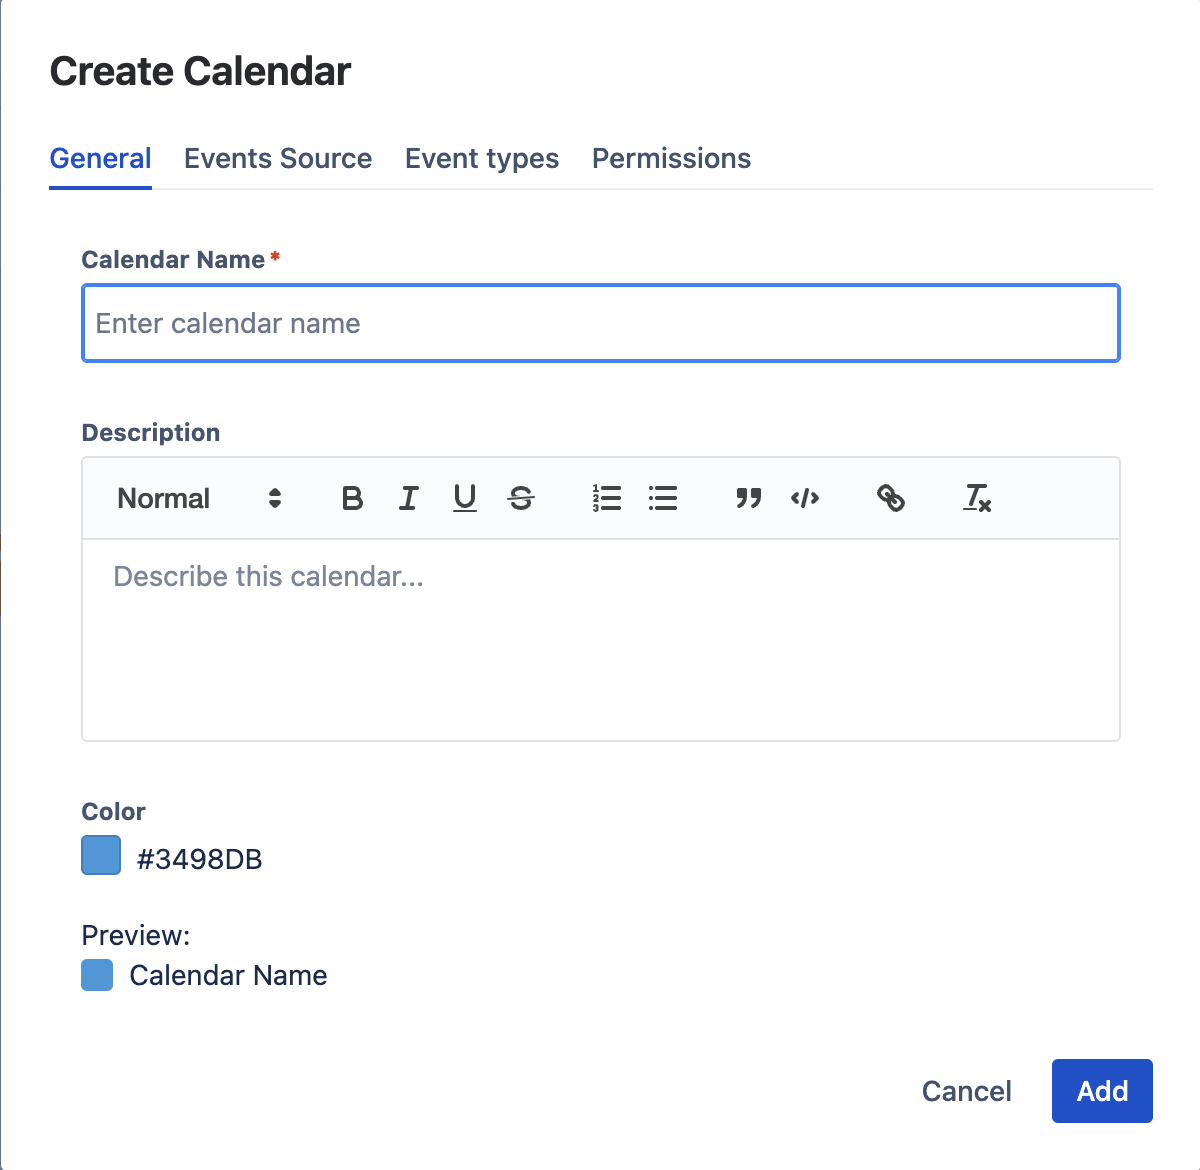
Set the calendar's name, color, and optional description. The color is used throughout the UI to distinguish this calendar's events from others. A live Preview shows how the calendar name and color will appear in the sidebar.
Events Source Tab
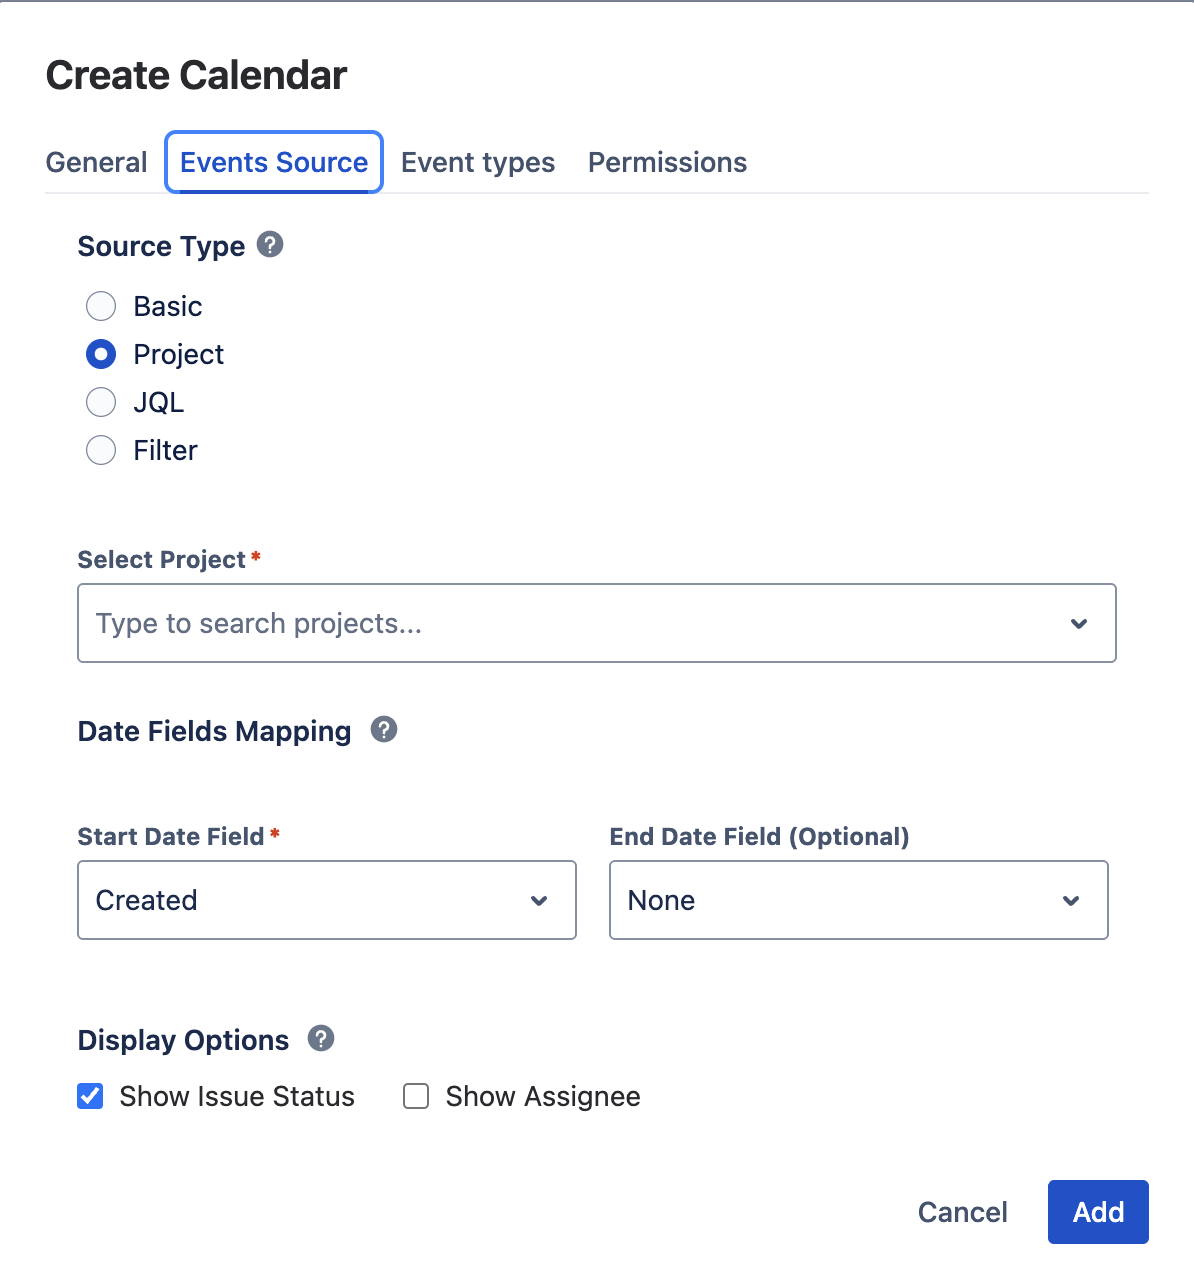
Choose what data populates the calendar. Four source types are available:
- Basic — a standalone calendar with only custom events (no Jira issues). Ideal for team schedules, holidays, or company-wide events.
- Project — display Jira issues from one or more selected projects. Choose which date fields to use (due date, created, updated, sprint dates, custom date fields) and which issue types to include.
- JQL — write a custom JQL query to define exactly which issues appear. This is the most flexible option and supports any valid JQL expression.
- Filter — use a saved Jira filter as the issue source. The calendar shows all issues returned by the filter, using your chosen date fields.
Configure Date Fields Mapping to set the Start Date Field (required) and optional End Date Field. Under Display Options, toggle whether to show issue status and assignee on calendar events.
Event Types Tab
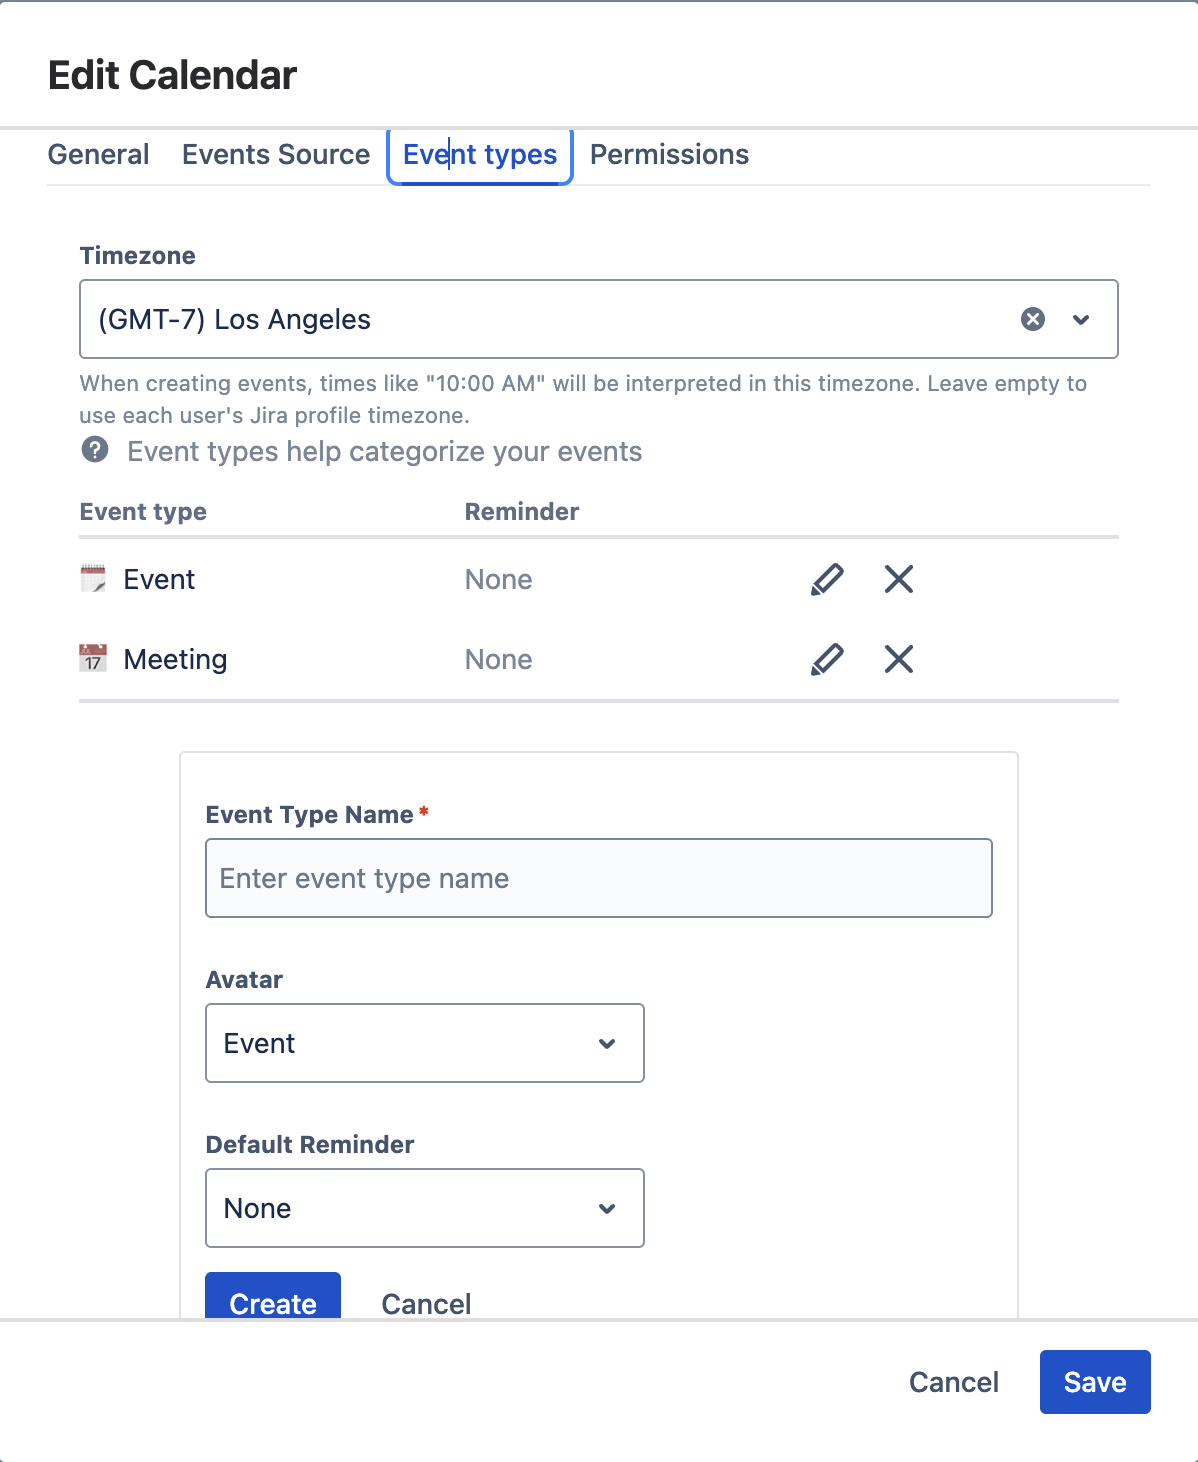
Configure the calendar's timezone — when creating events, times will be interpreted in this timezone. Leave empty to use each user's Jira profile timezone.
Define custom event type categories (e.g., Event, Meeting, Holiday, Travel). Each type can have a reminder configured. Click + Create to add new types. When users create custom events, they select from these types.
Permissions Tab

Control who can view, create events in, and administer this calendar. Add users, groups, or project roles with one of three access levels: Admin, Use, or Read Only. The creator is automatically added as an Admin owner and cannot be removed.
See Permissions & Roles for what each level can do and how to change a role, and Sharing Calendars with Users for the full sharing workflow (including how recipients pick up the shared calendar).
Calendar Sidebar Back to top
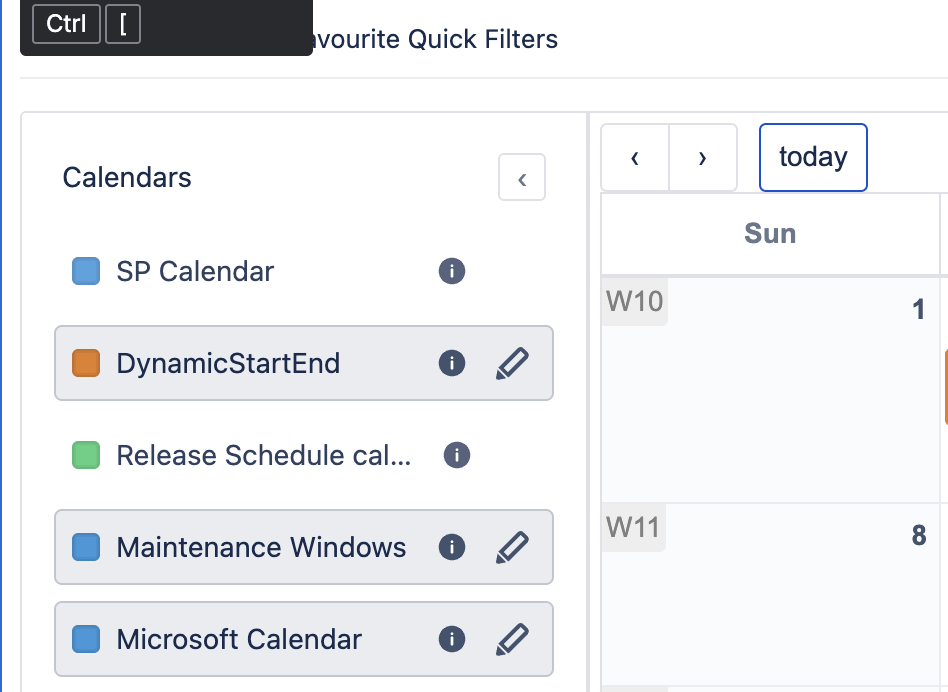
The left sidebar lists all calendars in your view. Each calendar entry provides quick controls:
- Visibility Toggle — click the colored checkbox next to a calendar name to show or hide its events on the calendar view. Hidden calendars remain in your sidebar but their events are not rendered.
- Collapse Button — collapse the sidebar to maximize the calendar view area. Click again to expand it.
- Dropdown Menu — hover over a calendar name and click the edit icon (pencil) to access the per-calendar action menu.
Calendar Dropdown Actions Back to top
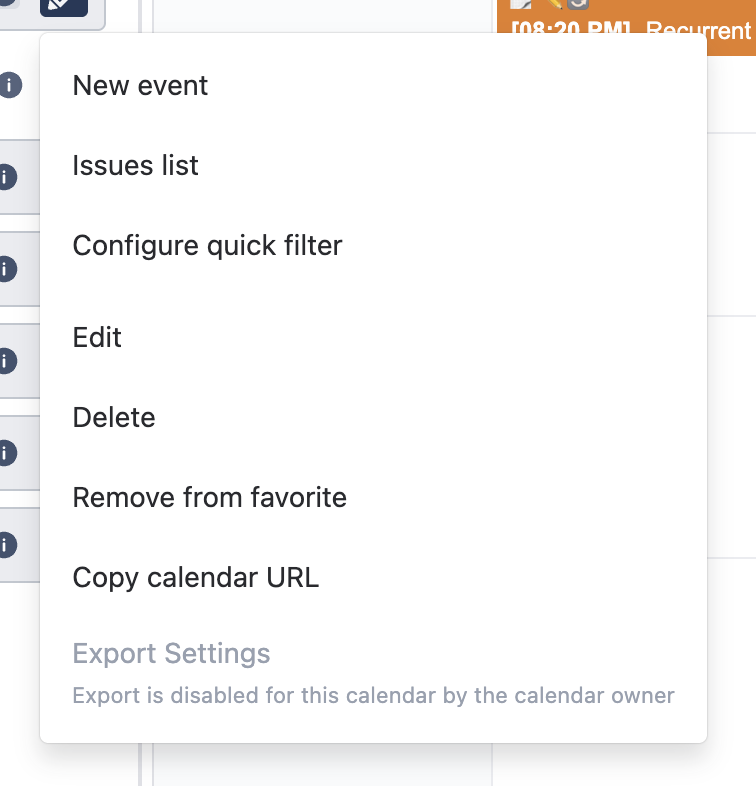
The per-calendar dropdown menu provides the following actions (availability depends on your permissions):
- New Event — quickly create a custom event in this calendar
- Issue List — view all Jira issues associated with this calendar in a list format
- Quick Filters — apply or manage quick filters to narrow displayed events by assignee, status, priority, or custom criteria
- Edit — open the calendar settings dialog to modify name, color, event sources, event types, or permissions
- Delete — permanently remove the calendar and all its custom events (Jira issues are not affected)
- Remove from Favorites — remove the calendar from your sidebar without deleting it. Other users who have added it are not affected.
- Copy URL — copy a direct link to this calendar view for sharing with teammates
- Export Settings (admin only) — open the export configuration panel for this calendar. Only visible to calendar administrators and only when exports have been enabled globally.
Permissions & Roles Back to top
Every calendar has its own permission list. Access is granted to users, groups, or project roles, and each entry is given one of three access levels. Permissions live on the Permissions tab of the calendar dialog (same dialog as Create — reopened via the calendar dropdown → Edit).
The three access levels
| Access level | What this level can do |
|---|---|
| Admin |
Full control over the calendar:
|
| Use |
Day-to-day event editing — but not configuration:
|
| Read Only |
View-only access:
|
Changing a user's role
The access level is shown as a clickable colored lozenge in the Permissions tab (purple = Admin, green = Use, grey = Read Only). To change a role:
- Open the calendar dropdown menu (pencil icon on the sidebar entry) and choose Edit.
- Switch to the Permissions tab.
- Find the user, group, or role in the list and click the access lozenge. Each click cycles to the next level: Admin → Use → Read Only → Admin.
- Click Save to apply the change. Until you save, changes can be discarded by closing the dialog.
Removing access
Click the × icon at the end of a row to remove that user, group, or project role from the calendar. The change takes effect when you click Save. The creator row has no remove button.
Defaults
- Creator — automatically added as Admin when the calendar is created.
- Newly added user / group / role — defaults to Use. Lower it to Read Only or raise it to Admin by clicking the lozenge before saving.
- Users not on the list — have no access. They will not see the calendar in their Add Existing dialog and cannot open it directly.
Need Help?
If you have questions about creating or managing calendars, contact our support team.
Contact Support