Once installed, WorkHub is available from the Apps menu in your Jira site.
Accessing the App Back to top
Open WorkHub from the Apps menu in Jira. The sidebar takes you to each area:
- Scheduler — plan your team's work on a timeline.
- My Work — your own row of the Scheduler plus a chart of the hours you logged.
- Time Tracking — log time against Jira issues.
- Timesheets — submit, approve, and review timesheets.
- Leave — request and approve time off.
- Reports — utilization, worklog, leave, and planned-vs-actual reports.
- Settings — app configuration (admins and managers).
- My Account — your approvers, capacity scheme, and holiday calendar.
WorkHub reopens the page you used last.
First-Run Setup Back to top
The first time anyone opens WorkHub, the Configure Date Fields dialog asks where to store each issue's start and end date. This is the only required setup. Whoever completes it becomes the first App Admin.
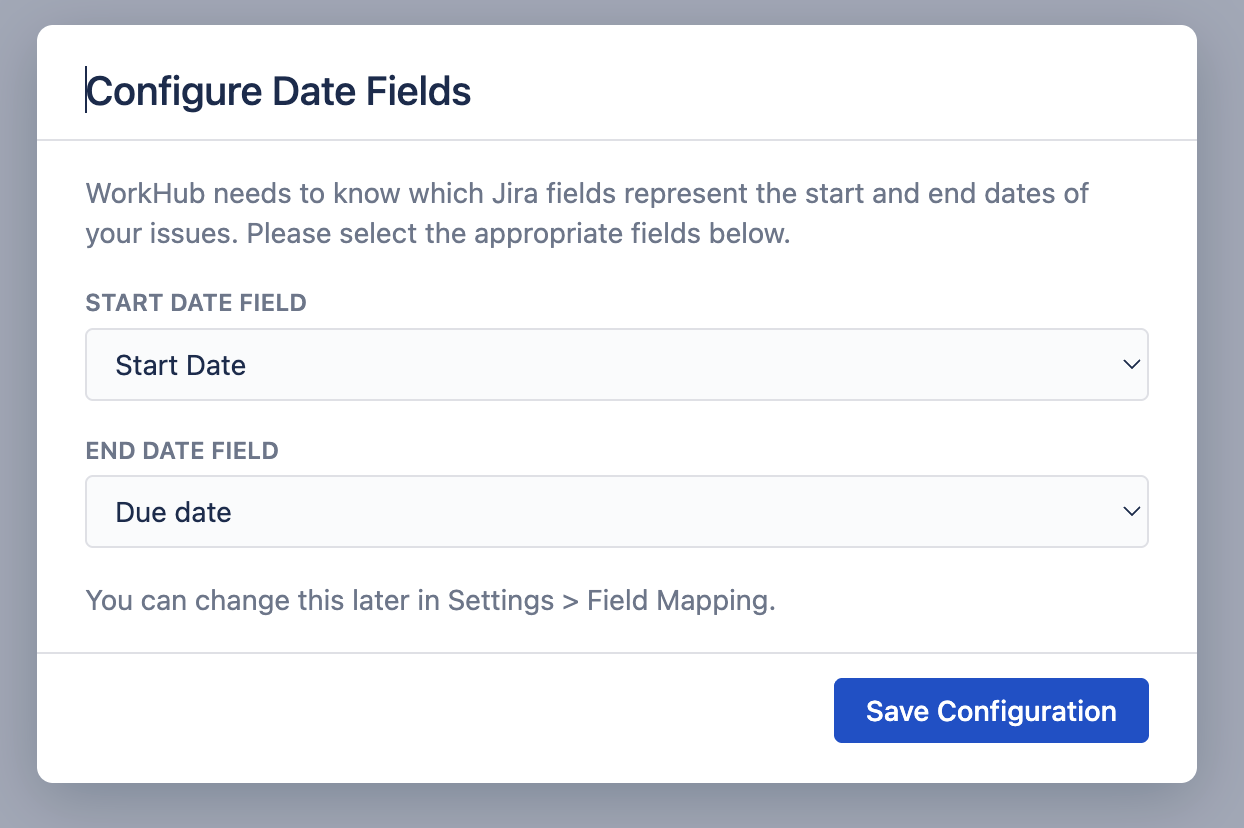
- WorkHub storage (no Jira field) — preselected for both dates. Works in every project with no Jira setup, so you can click Save Configuration and start right away.
- A Jira date field — choose this if dates must be visible on Jira boards and issue views.
You can change this later. See Settings › Field Mapping.
WorkHub reads Assignee, Status, and the Original and Remaining Estimate fields from Jira automatically. All issue types work, including subtasks and epics.
Scheduler Overview Back to top
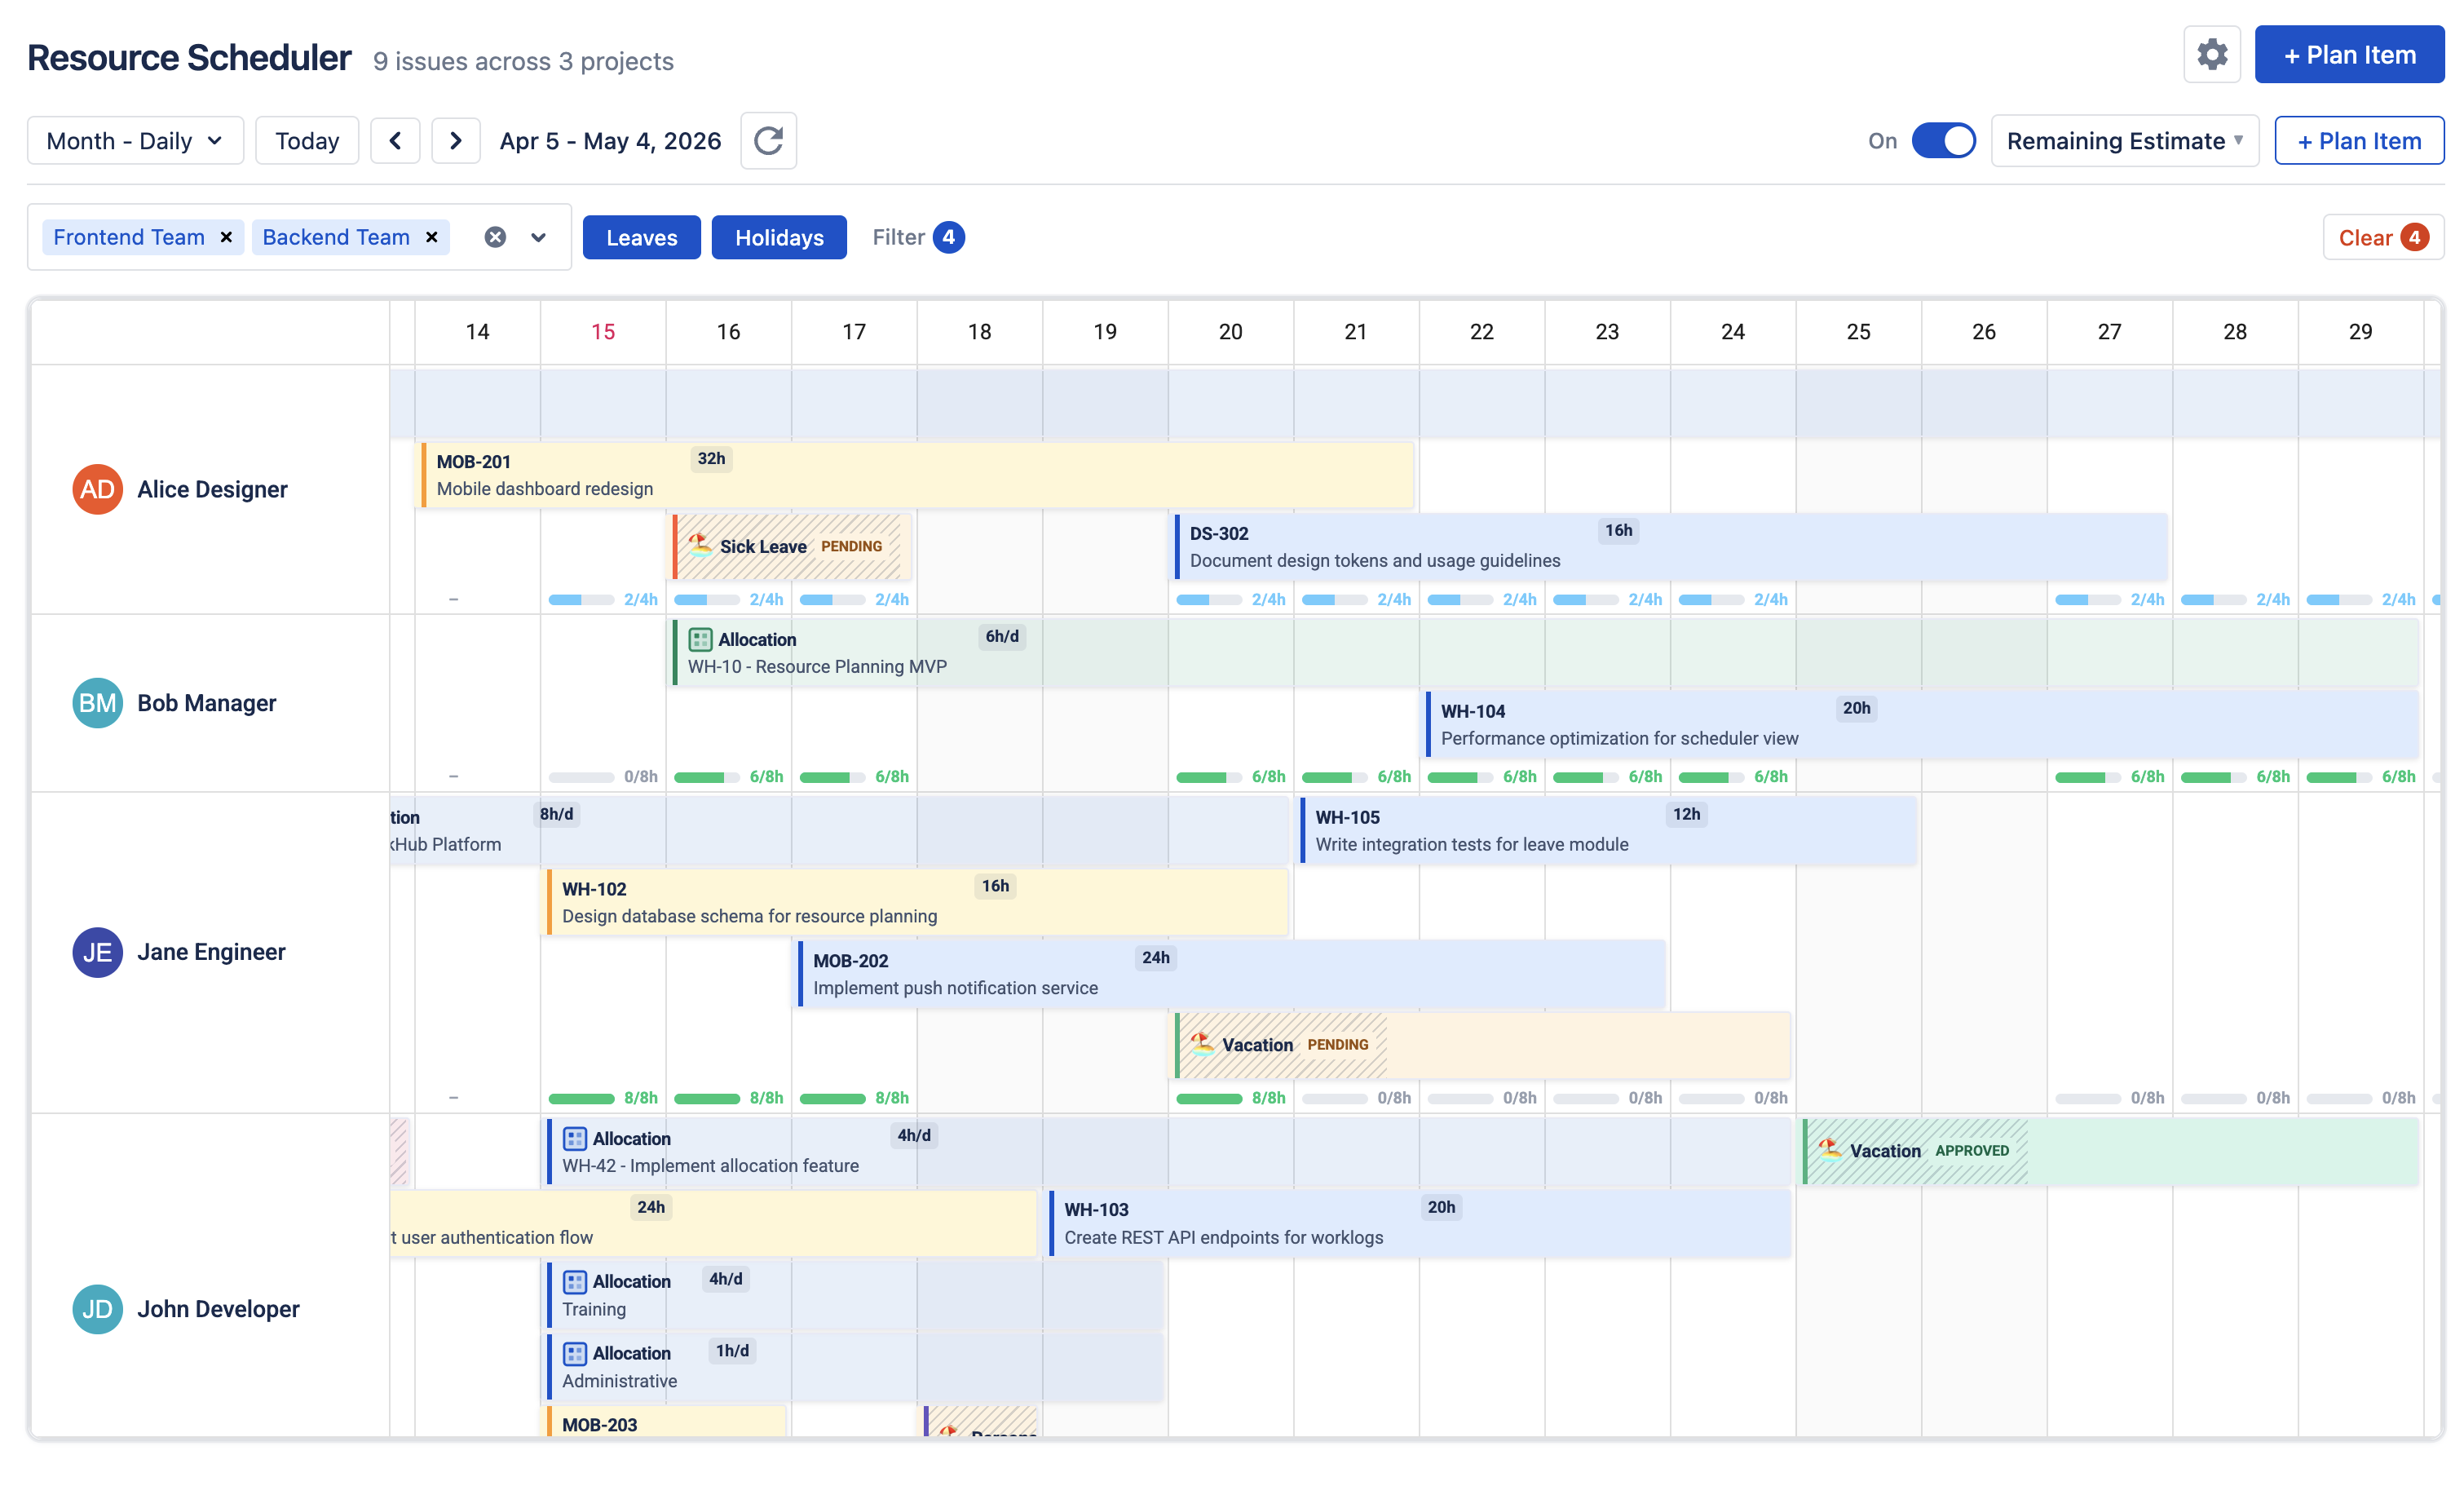
The Scheduler shows one row per person and places issues on a timeline by their dates. Drag a bar to move it, drag it to another row to reassign it, or resize it to change its dates. You can also add allocations for non-issue work, see leave and holidays, and turn on workload indicators.
A short guided tour starts after setup. Reopen it anytime with the button in the Scheduler header.
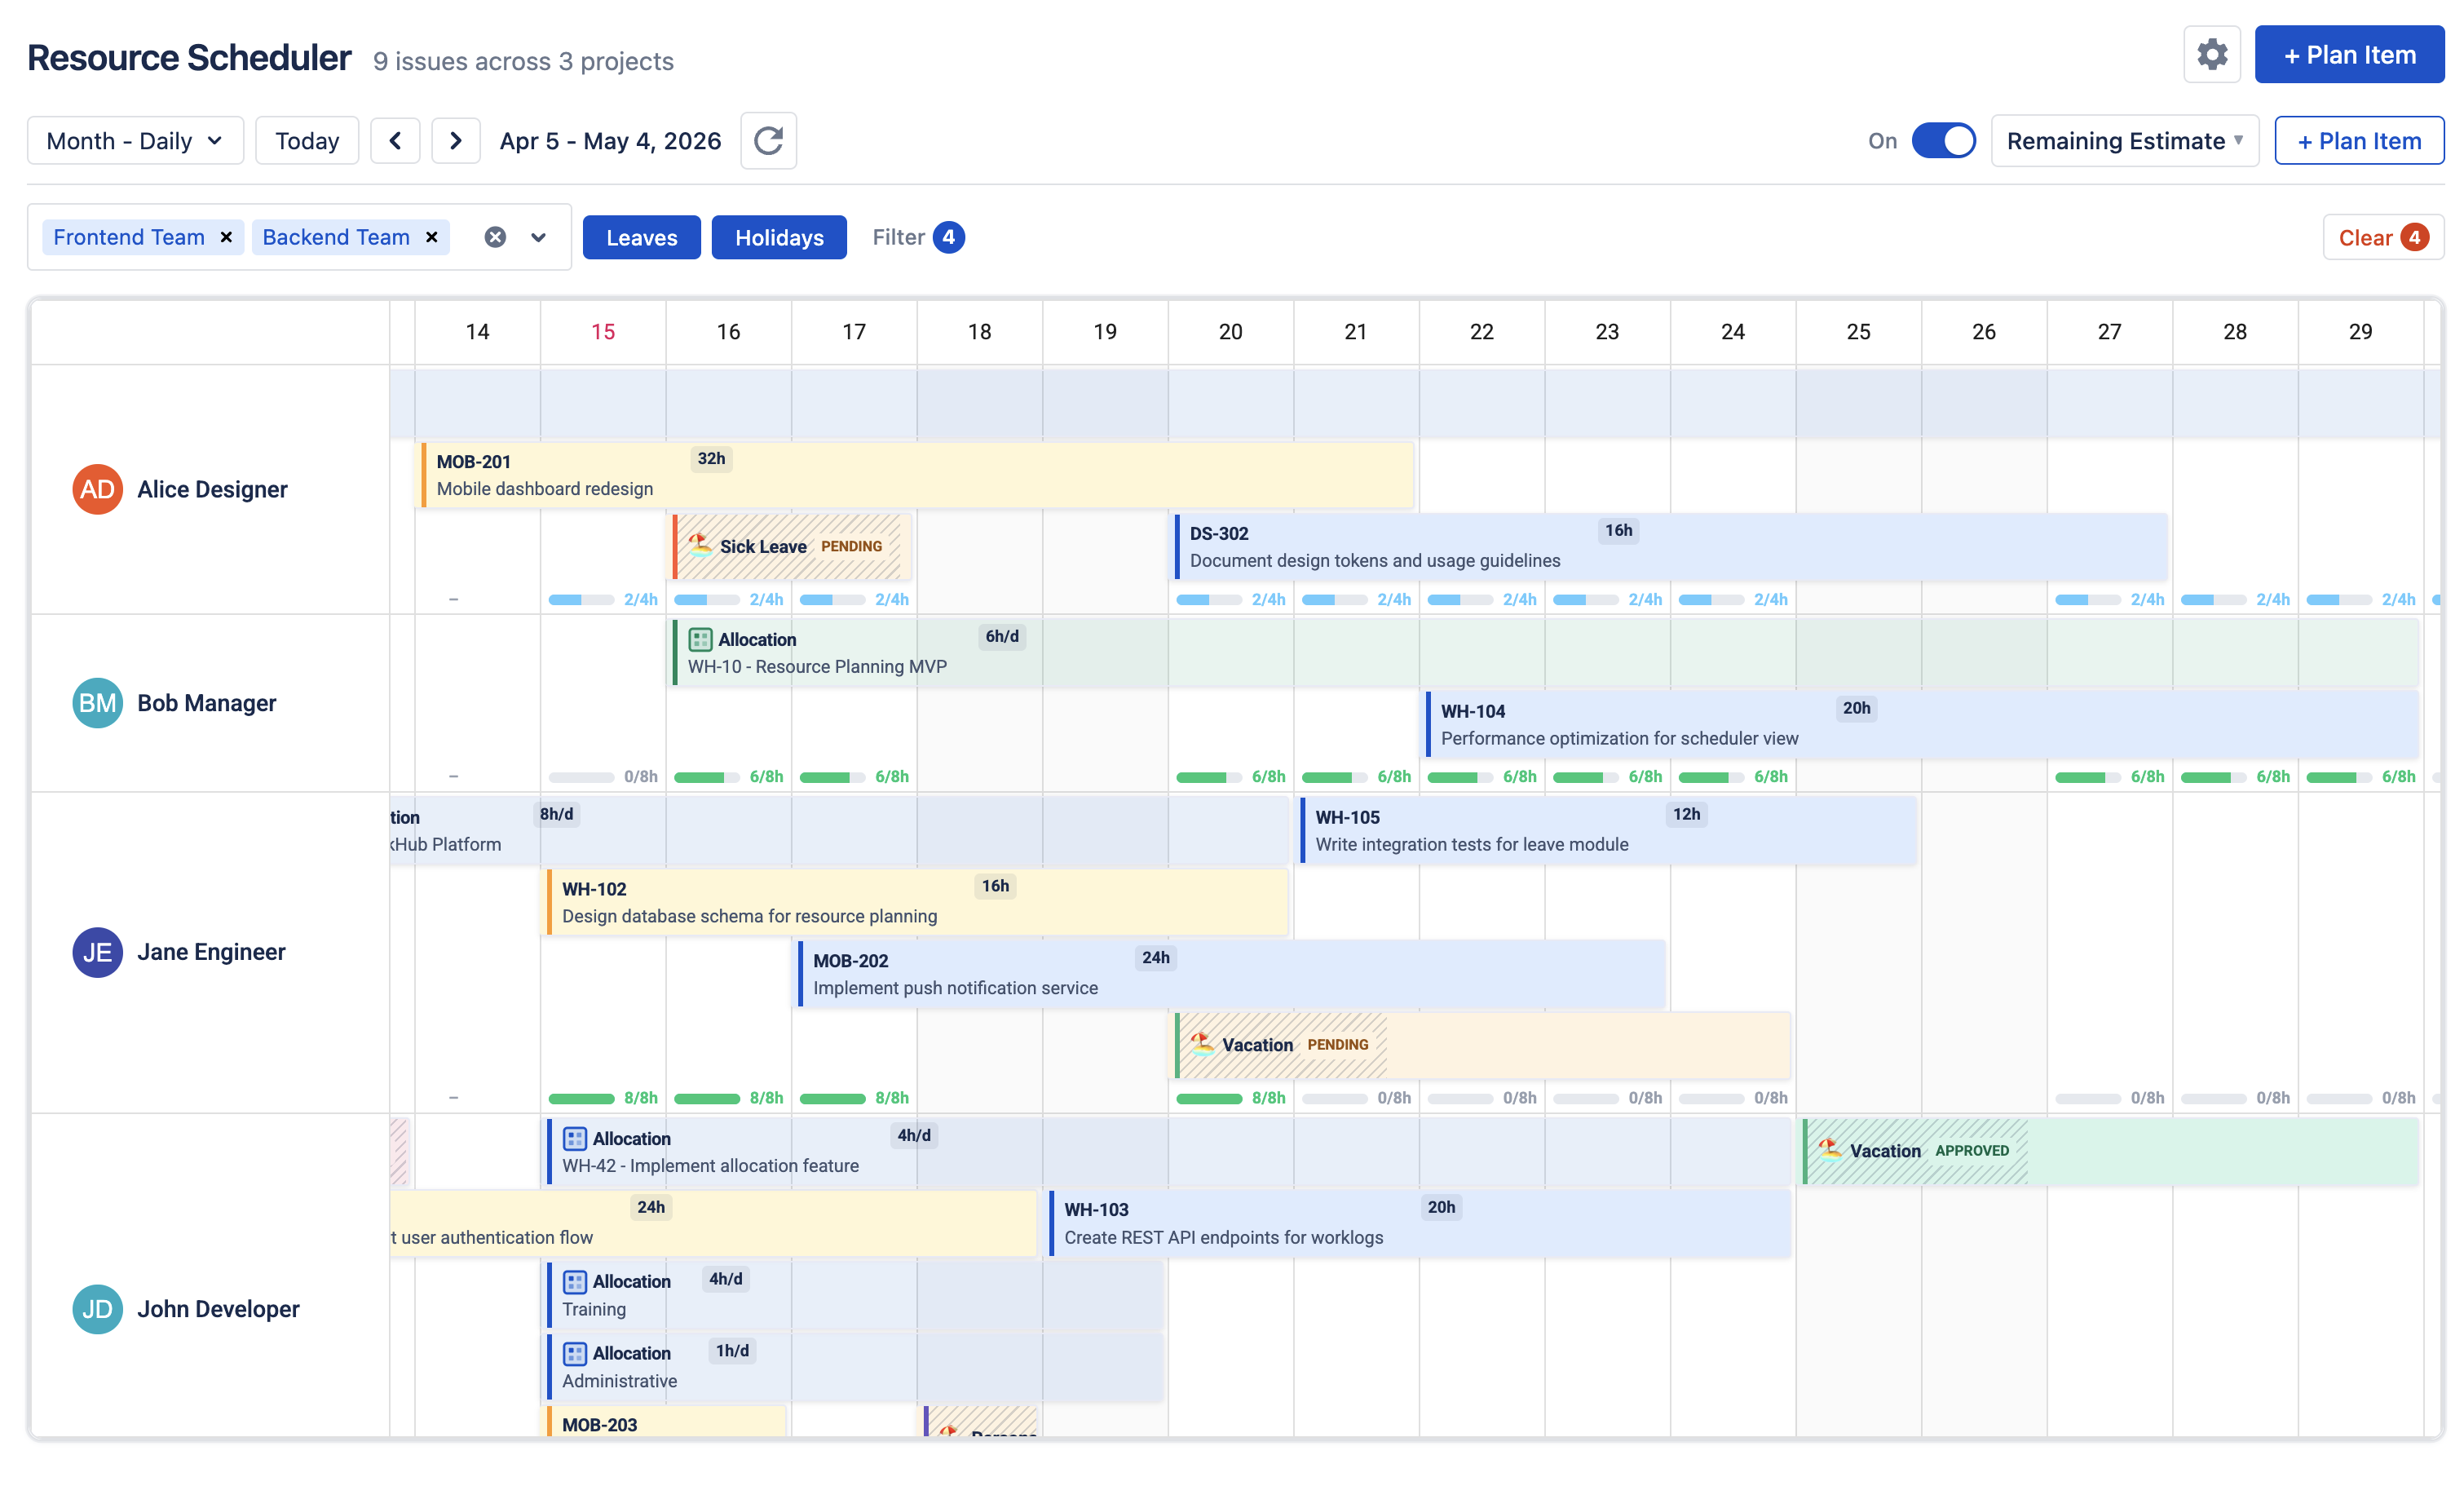
See Resource Scheduler for details.
My Work Overview Back to top
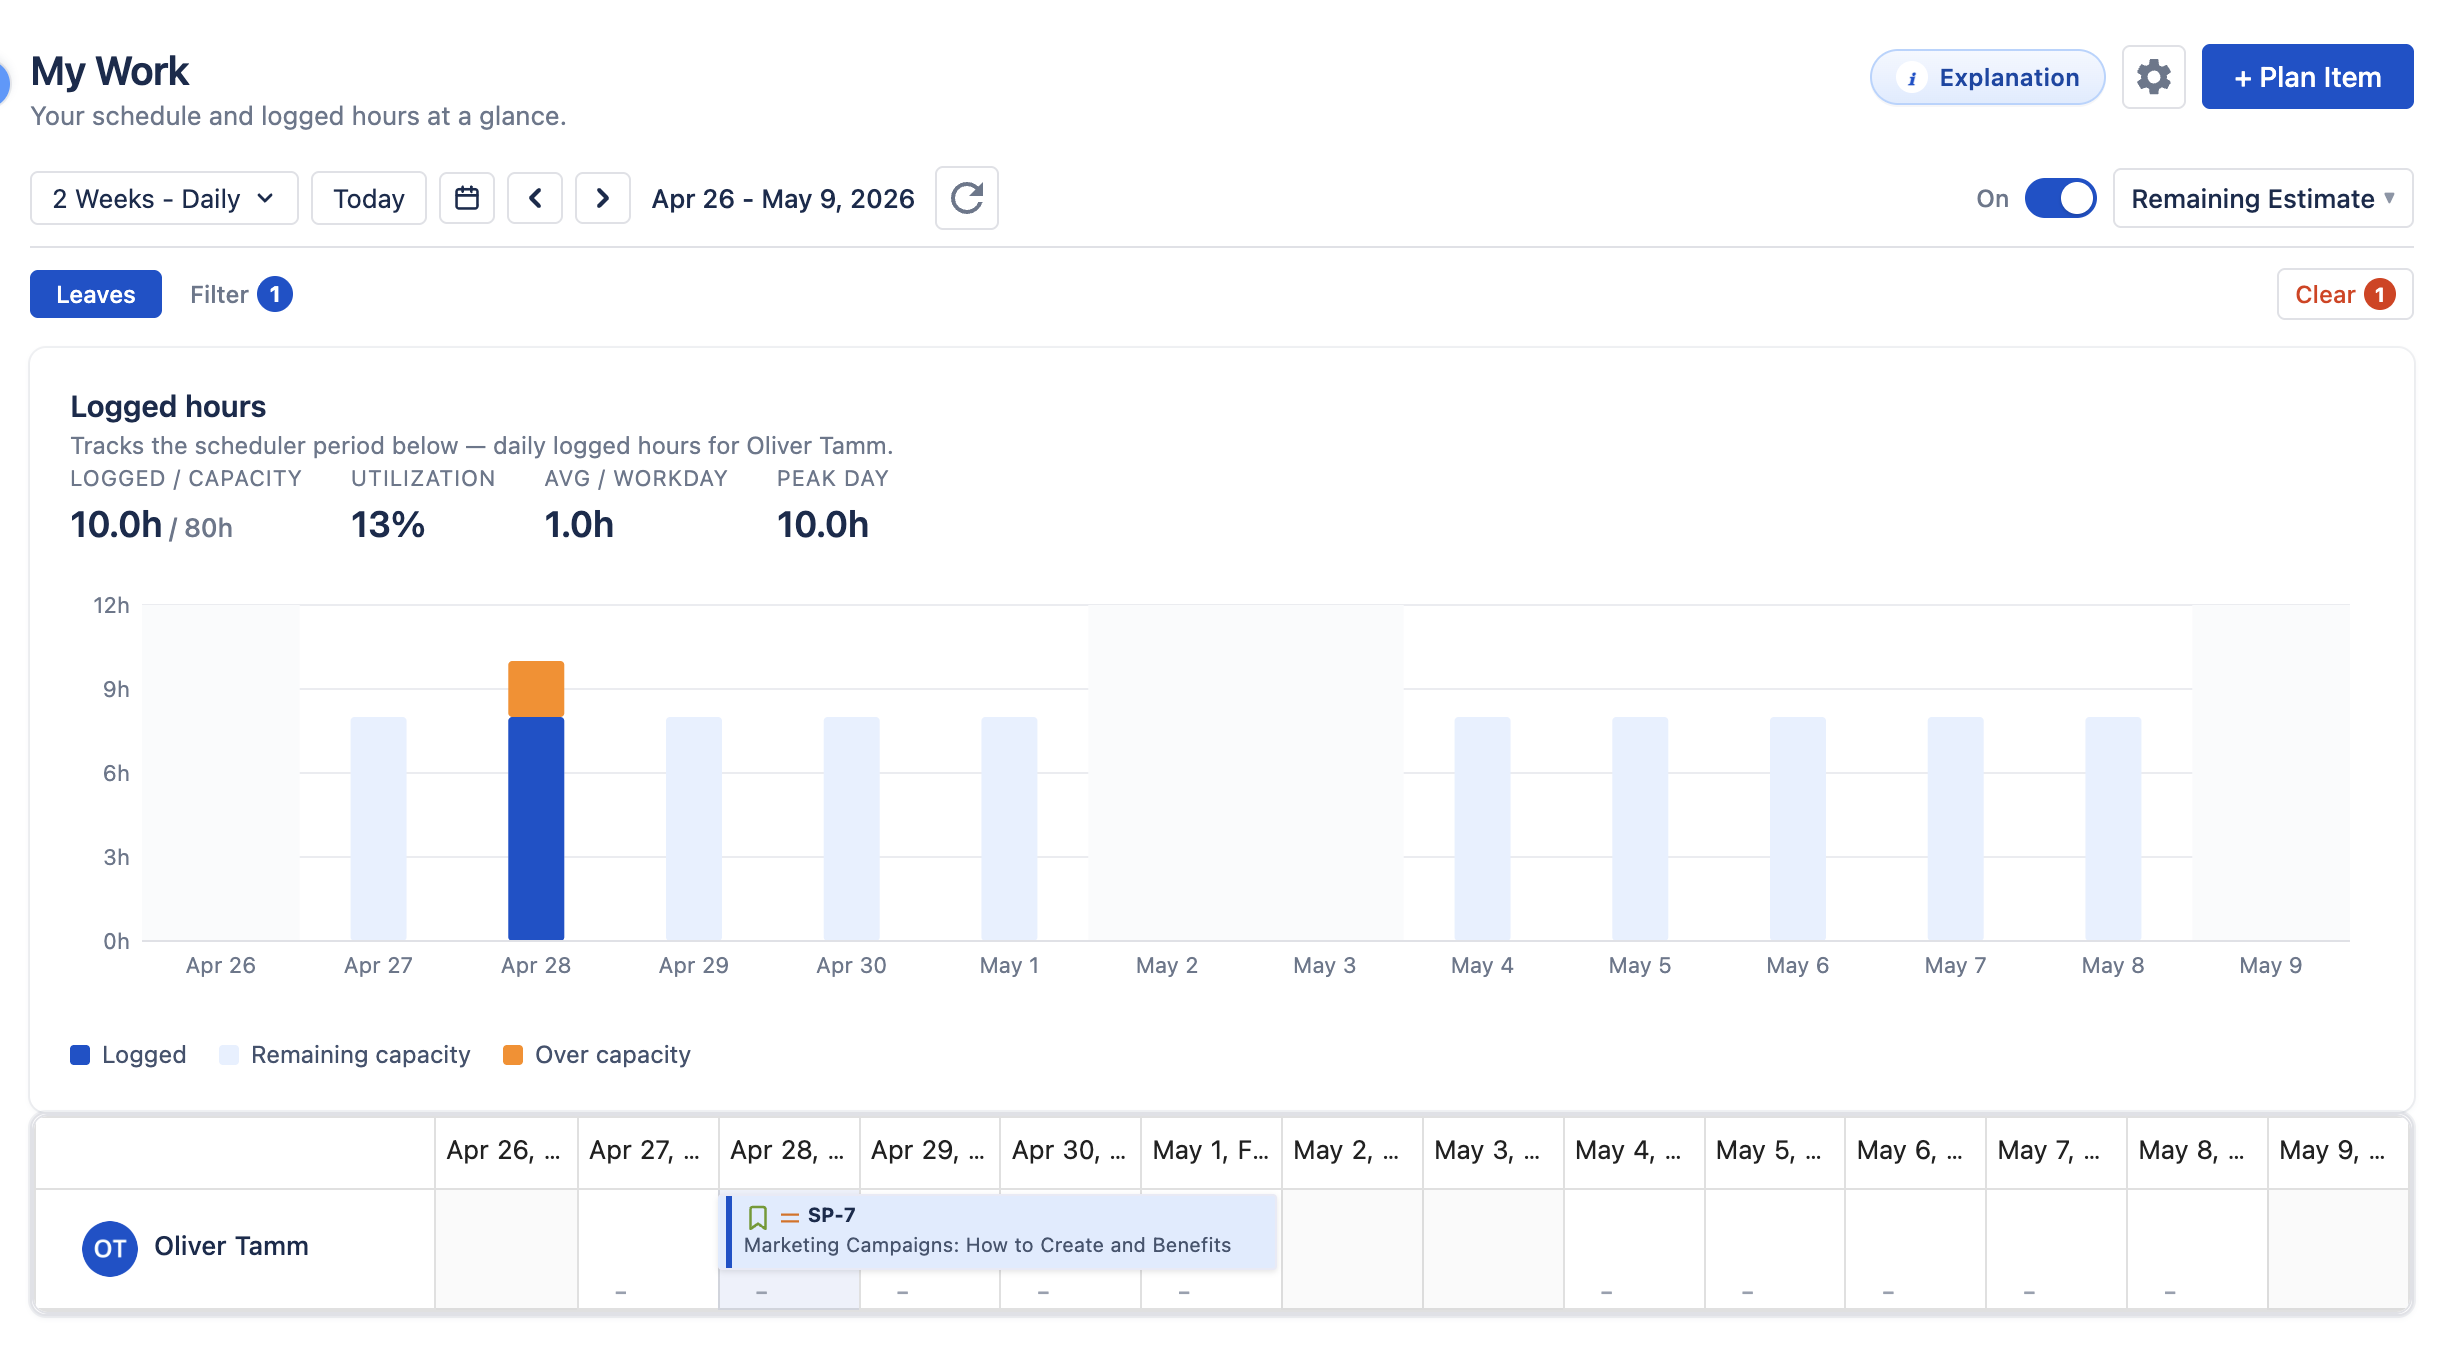
My Work shows your own Scheduler row with a daily chart of the hours you logged against your available hours. See My Work.
Capacity & Workload Basics Back to top
Workload indicators compare each person's planned hours with their available hours and color each day, so you can spot who is overloaded or free. Available hours come from:
- Capacity Schemes — working hours per day (8 h, Monday to Friday by default).
- Holiday Calendars — public holidays.
- Leave — approved time off.
See Workload Management for the color legend and modes.
Need Help?
If you have questions or need assistance, our support team is here to help.
Contact Support