Overview Back to top
The Scheduler is a timeline of your team: people are listed on the left, dates run across the top, and each Jira issue is a bar on its assignee's row. Drag bars to change dates or assignees — changes are saved to Jira right away.
Alongside issues you can see allocations (time booked for non-issue work), leave and public holidays, and a daily workload indicator for each person. Issues appear based on the start and end date fields chosen in Settings → General → Field Mapping.
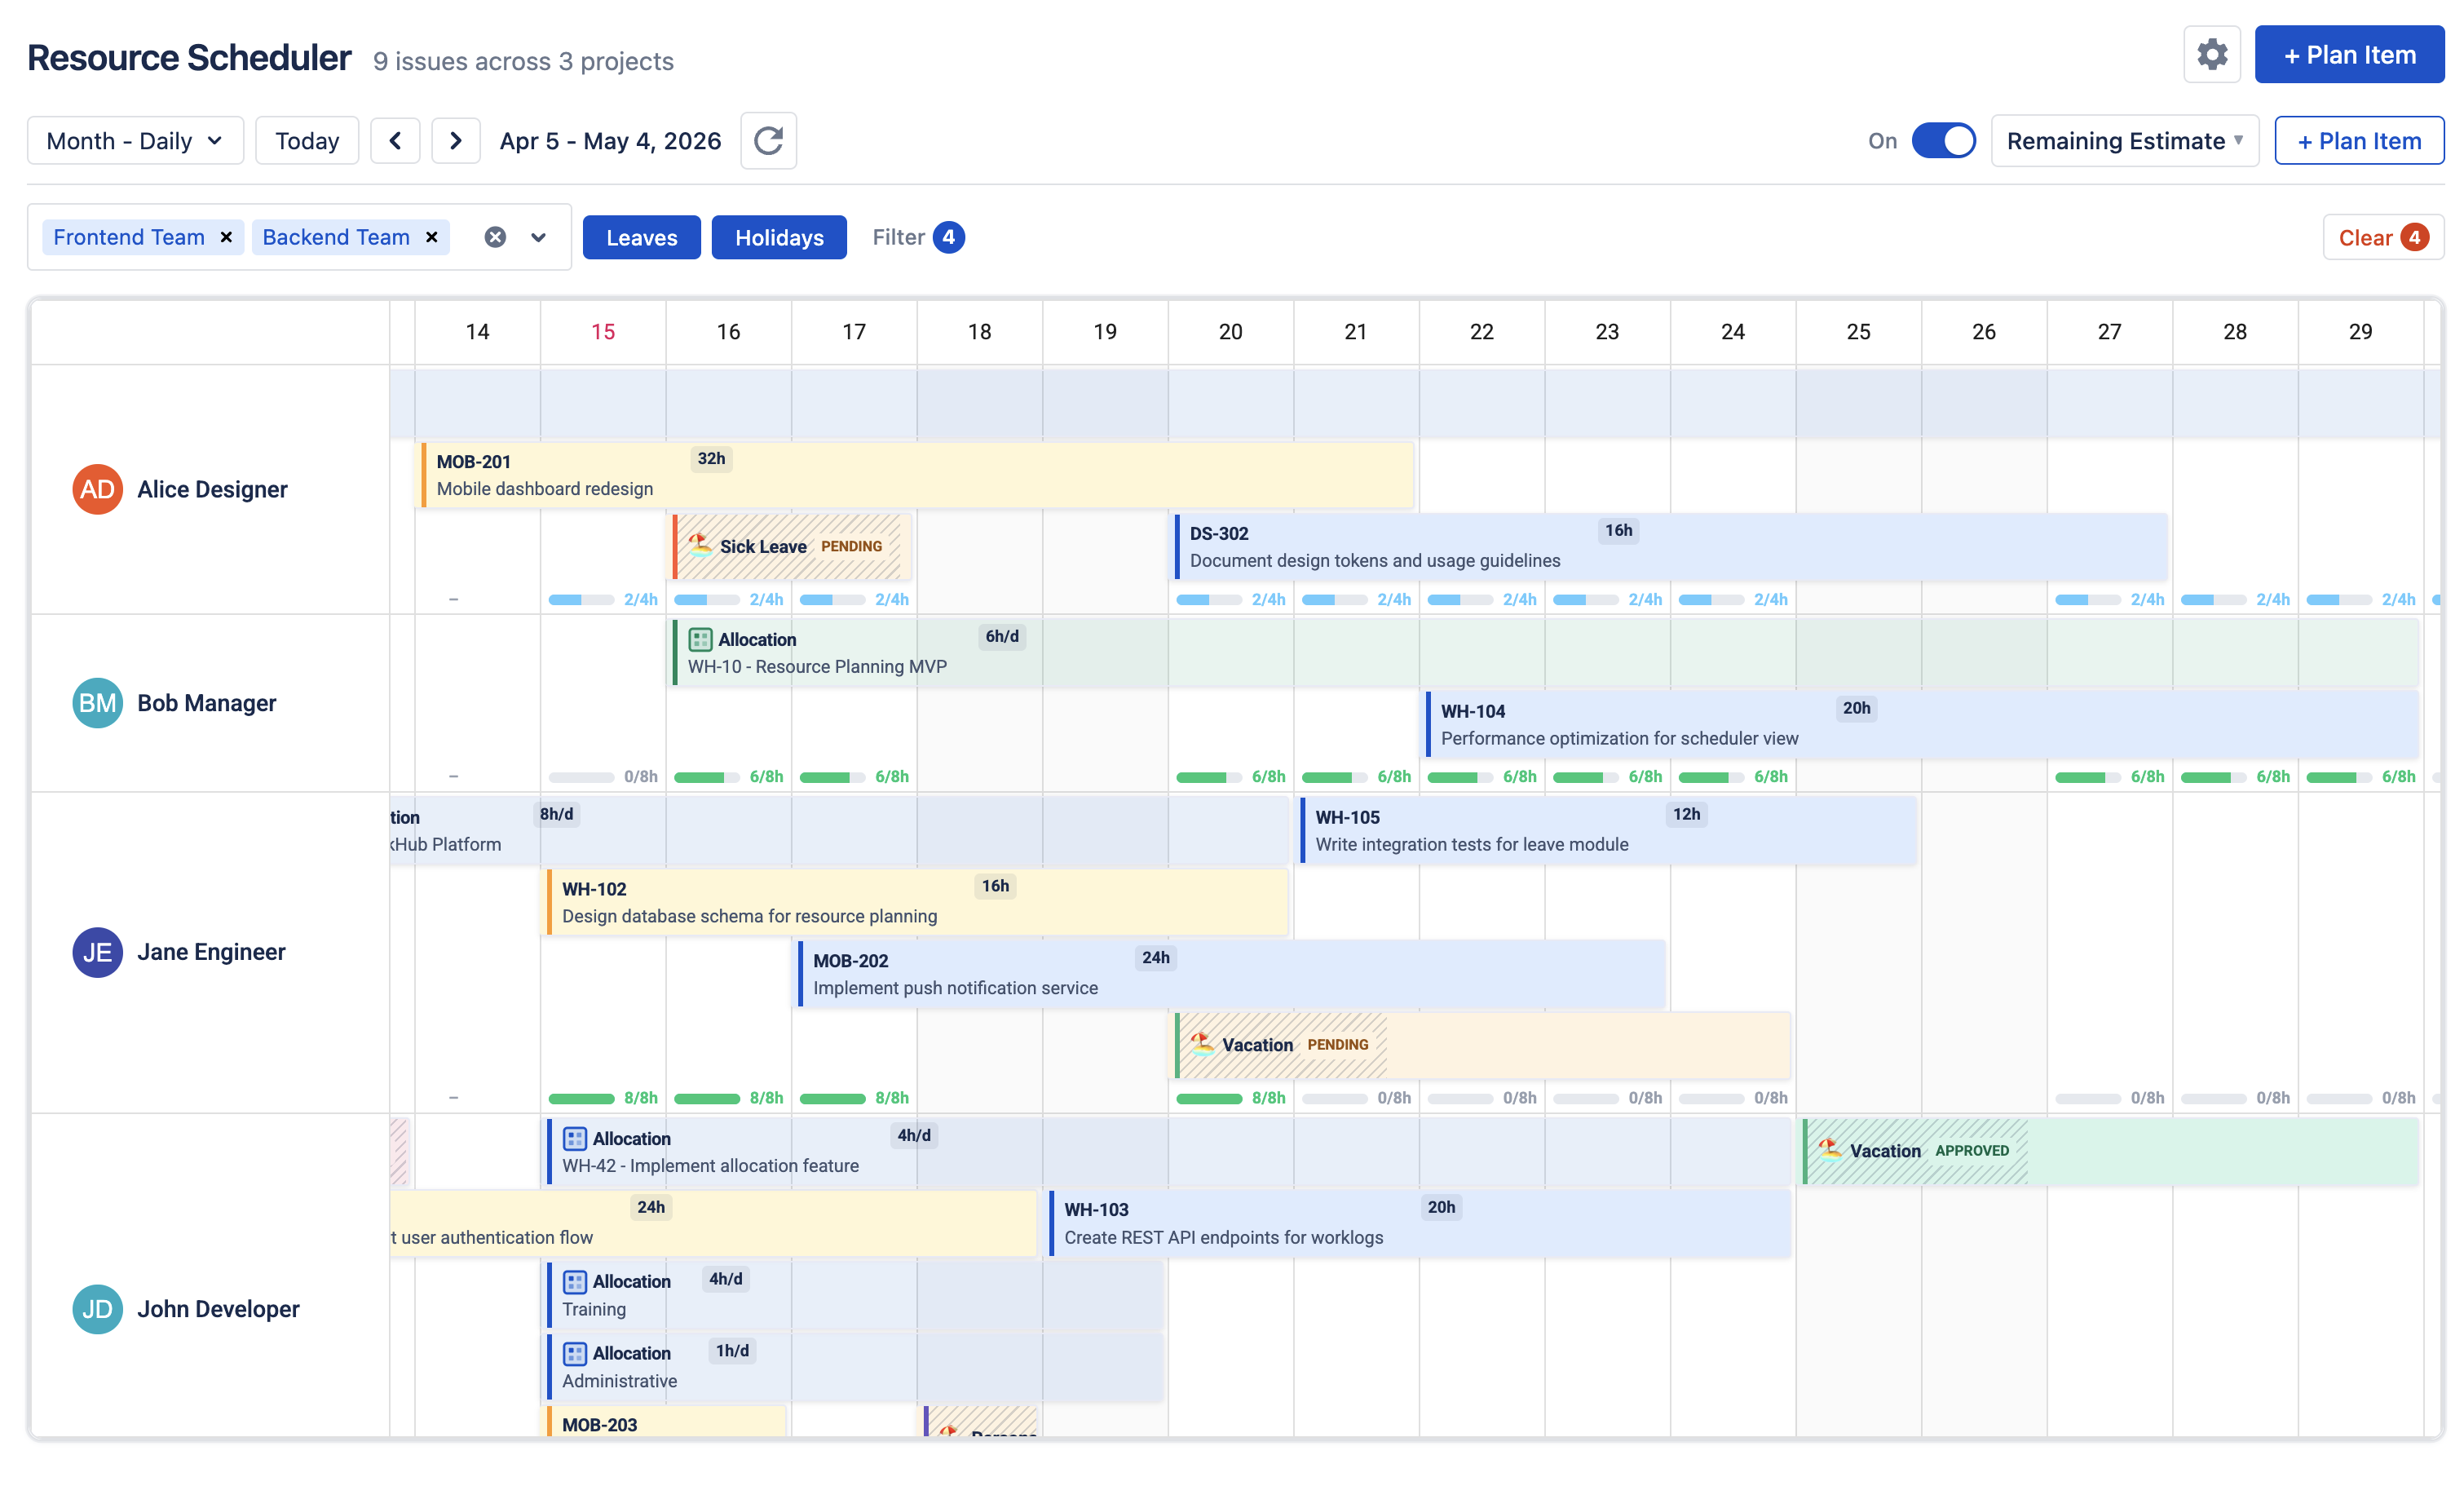
Click Getting started in the header for a short guided tour. To see only your own schedule, use My Work.
View Modes Back to top
Pick how much time the timeline shows from the scope dropdown in the header. Use Zoom in / Zoom out in the same dropdown to make day columns wider or narrower.
| View | Best for |
|---|---|
| Week - Daily | Day-to-day planning (default) |
| 2 Weeks - Daily | Sprints and short-term planning |
| Month - Daily | Monthly capacity review |
| Year - Monthly | Annual roadmap, one column per month |
| Year - Daily | Long-range planning with day-level detail |
| Custom range… | Any start and end date you choose |
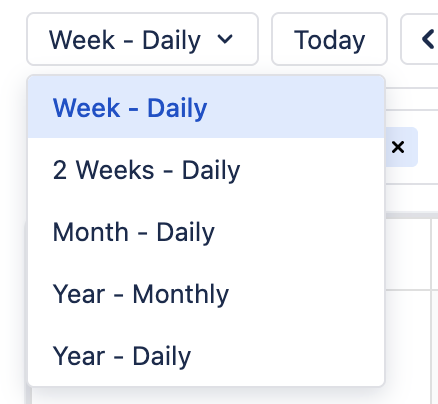
The timeline header shows week numbers. Weeks start on the day set in Settings → General, or on your Jira locale's first day of the week.
Toolbar & Filters Back to top

- + Plan Item — search Jira issues and drag them onto the timeline (see Scheduling Issues).
- Bulk Allocate — book the same allocation for several people at once.
- Explain colors (palette icon) — shows why each bar has its color (see Issue Colors).
- Today, the arrows and the calendar icon — move the timeline. Refresh reloads the data.
- Workload switch (On / Off) — turn the daily workload indicator on or off and choose how load is measured (see Workload Management).
- Fullscreen — enlarges the scheduler and compacts the header to a single row. Click Exit fullscreen or press Esc to leave.
Choose who to show
The timeline is empty until you pick people. Select one or more teams, or type a name to add individual users — you can mix both. Each row shows the person's team under their name.
Filter issues
Filter narrows which issues are shown for the selected people, by Projects, Epics, Work types, Statuses, Completion status, Fix Versions, Labels, Components, or any custom field via Add field. Click Apply to update the timeline. Use Save filter to keep a set of filters for later and pick it from Saved filter; saved filters are personal.
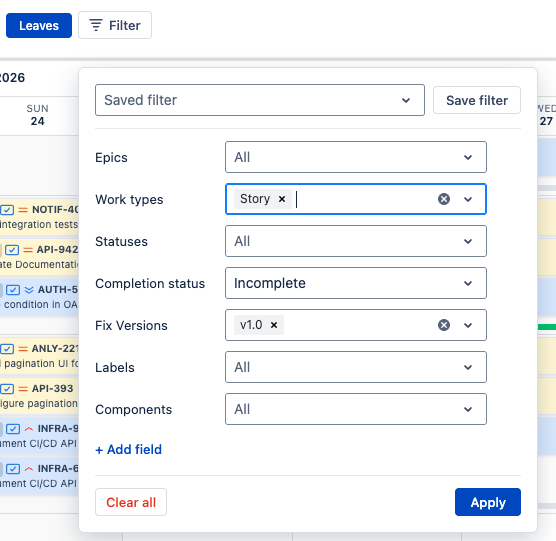
The Leaves and Holidays toggles show or hide those bars; hidden leave and holidays still reduce capacity. Clear resets the people selection, the toggles and the filters in one click.
Issue Cards Back to top
Each issue bar runs from its start date to its end date. By default it shows the issue key, summary, type and priority icons, and an hours badge; admins can choose the text in Settings → Issue Display → Issue Card. Bars are colored by Jira status category unless an admin sets up Issue Colors.
An issue with only one date shows as a one-day bar; drag or resize it to set the other date. Admins can hide these with Show issues that have only one date in Field Mapping.
Issue details
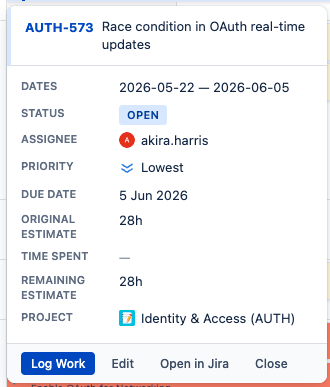
Click a bar to see its details. Admins choose which fields appear in Settings → Issue Display → Issue Tooltip. From the popup you can:
- Log Work — record time spent on the issue.
- Edit — change start and end dates, Original and Remaining Estimate, and assignee. Estimates use Jira's format, e.g.
1w 2d 4h. - Split — plan the issue for several people (see Split Issues).
- Open in Jira — open the issue in a new tab.
- Actions → Unschedule clears the dates, Unassign removes the assignee. The issue leaves the timeline.
Drag and Drop Back to top
- Drag sideways to move an issue to new dates; its length stays the same.
- Drag to another row to reassign the issue to that person.
- Drag an edge to make the issue longer or shorter.
Changes are saved to Jira immediately. You need edit permission on the issue, and you cannot change rows of people you can only view.
Scheduling Issues Back to top
Issues are created in Jira; the Scheduler puts them on the timeline. There are two ways:
- From + Plan Item: find an issue and drag it onto a person's row. The bar is sized to fit the issue's estimate across that person's working days, skipping leave and holidays. Issues without an estimate get one day.
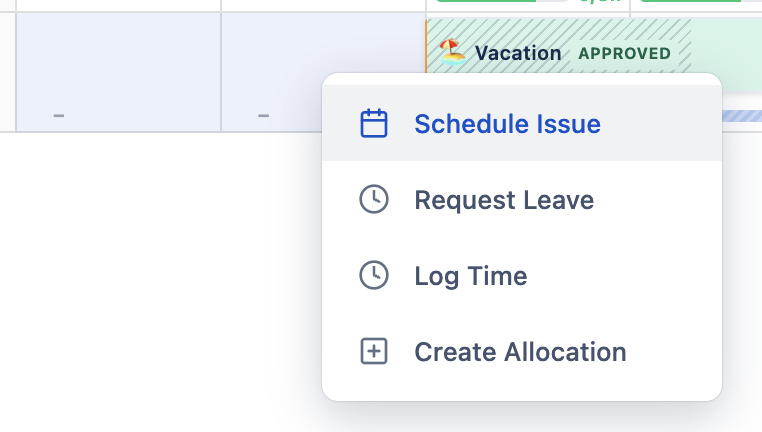
- From a day cell: click an empty cell (or drag across several days), or right-click anywhere on a row, and choose Schedule Issue. Pick the issue; assignee and dates are pre-filled from where you clicked.
Day cell menu
The same menu also offers Create Allocation, Request Leave and Log Time. Right-click works even when a cell is covered by bars.
- Log Time appears only on your own row — to log time for someone you manage, use Time Tracking.
- Request Leave appears on your own row, and on other people's rows if you are an app admin or their leave approver.
- Schedule Issue and Create Allocation are hidden on rows you can only view.
Split Issues (Multiple Assignees) Back to top
Jira allows one assignee per issue. Split divides an issue into parts — one per person, each with its own dates and hours (entered as Total hours or Hours per day) — so several people can work on it.

Each part shows as its own bar with a badge such as 1/2, and counts toward its owner's workload. You can drag, resize and log work on a part like a normal issue; changes affect only that part, not the Jira issue. Dragging a split issue from + Plan Item adds a new part. Removing the last part returns the issue to normal.

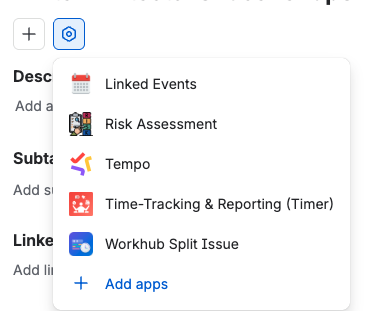
You can also manage parts from the WorkHub Split Issue panel in the Jira issue's apps menu.
Custom Allocations Back to top
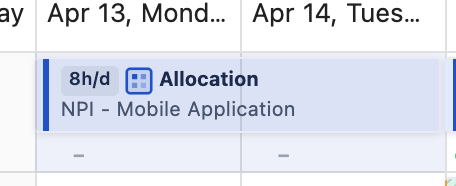
An allocation books a set number of hours per day for a person — against a project, epic, issue, or a custom category such as training or meetings. Allocations appear as bars on the timeline and count toward workload, so you see everything a person is committed to.
Create an allocation
- Right-click a day cell on the person's row and choose Create Allocation.
- Choose what it is for (Project, Epic, Issue or Custom Category), then set Hours per day, Start date and End date. A Custom title and color are optional.
- Click Create.

Click an allocation bar to see its details, log work on it, edit or delete it. Drag it to change dates or person, or drag its edge to resize. Time logged on allocations shows up in Time Tracking, Timesheets and Reports like any other worklog.
Bulk Allocate
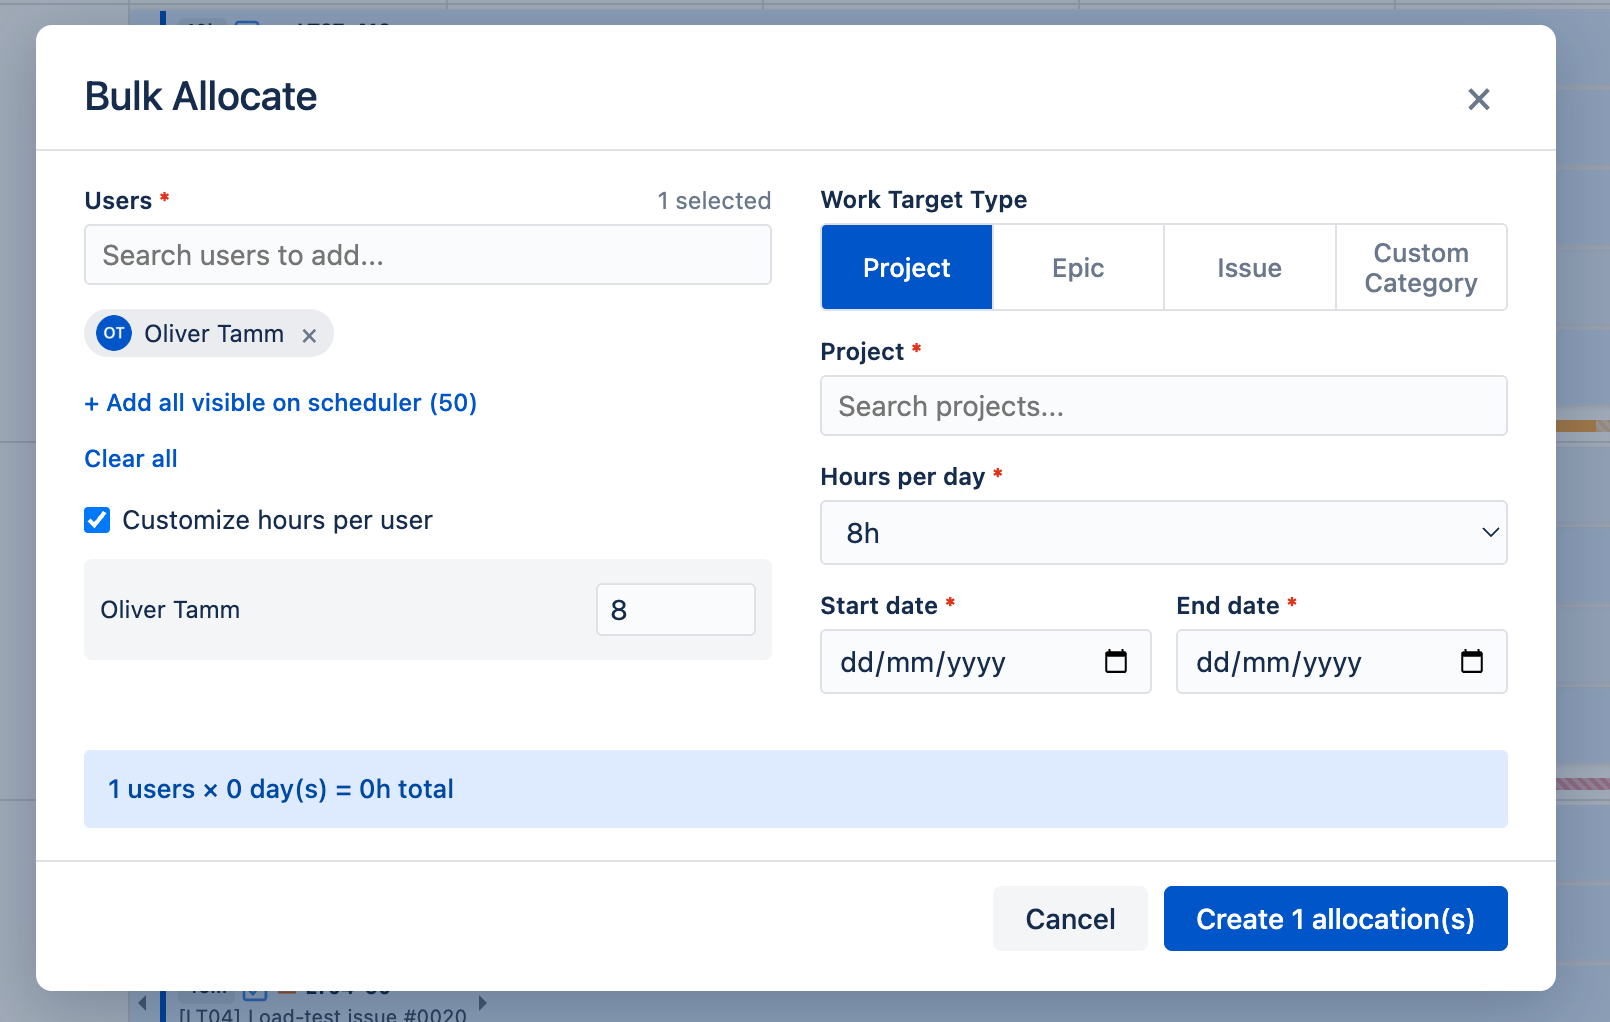
To book the same work for many people — for example, a team training week — click Bulk Allocate. Add people one by one or with + Add all visible on scheduler, then set the target, hours and dates once. Tick Customize hours per user to give people different hours. A total of the booked hours is shown before you save.
Recurring allocations
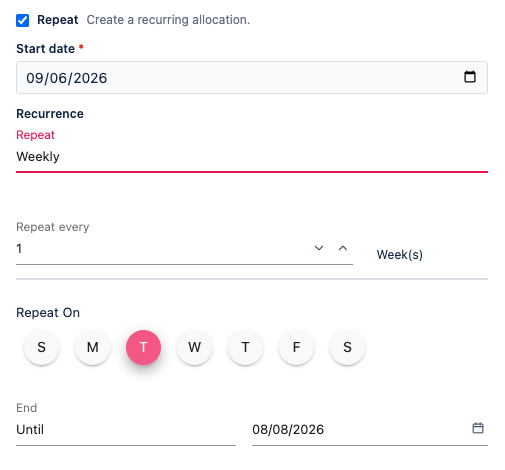
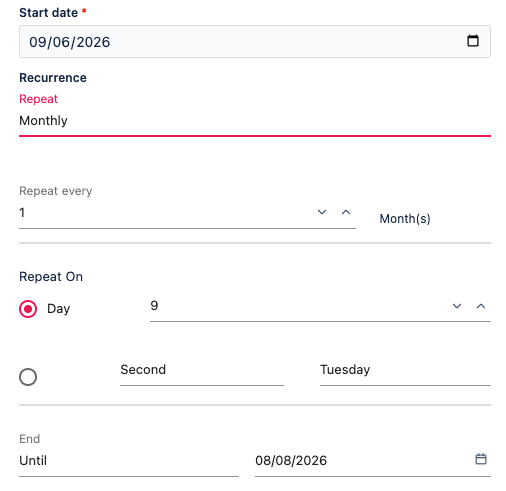
Tick Repeat in either dialog for bookings like a weekly meeting. Choose a daily, weekly, monthly or yearly pattern and when it ends. Each occurrence is a one-day bar with a marker.
When you change or delete one occurrence, choose whether it applies to This occurrence, This and following occurrences, or All occurrences. To change the pattern itself, delete the series and create a new one. Logged time is kept when occurrences are deleted.
Leave & Holiday Display Back to top
Leave and public holidays from each person's holiday calendar appear on their row, so you see availability next to the work. They always reduce capacity in the workload indicator, even when hidden with the toggles. Holiday bars are read-only.

Click a leave bar to see its details. The owner can Edit or Recall it; the approver can Approve, Reject, Revoke, Approve Recall or Deny Recall, depending on its status. You can drag or resize a pending leave if you can edit it (your own, or as its approver or an admin). See Leave Management for the full workflow.
Need Help?
If you have questions or need assistance with the Resource Scheduler, our support team is here to help.
Contact Support